Add Services
Learn how to create new Services in Schedule Xpress as your business grows.
As service offerings expand, organizations may need to add new services to their account. Schedule Xpress provides multiple ways to create services, allowing administrators to quickly add records while maintaining consistent service information.
Add Services in Manage Services
You can add new services using one of two methods in Manage Services:
- Add Service – Create a service with full details, including color, qualifications, and references.
- Quick Add Multiple – Quickly create multiple services using service names only, then add additional details later if needed.
Let's look at how each method works.
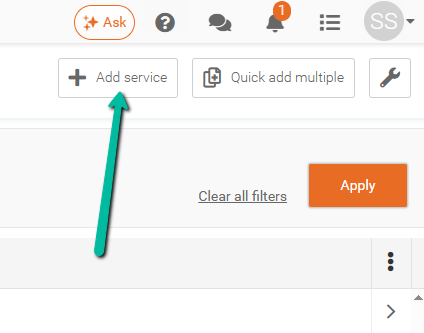
Add Service
To add a single service with full details:
- Click Add Service in the top-right corner of Manage Services.
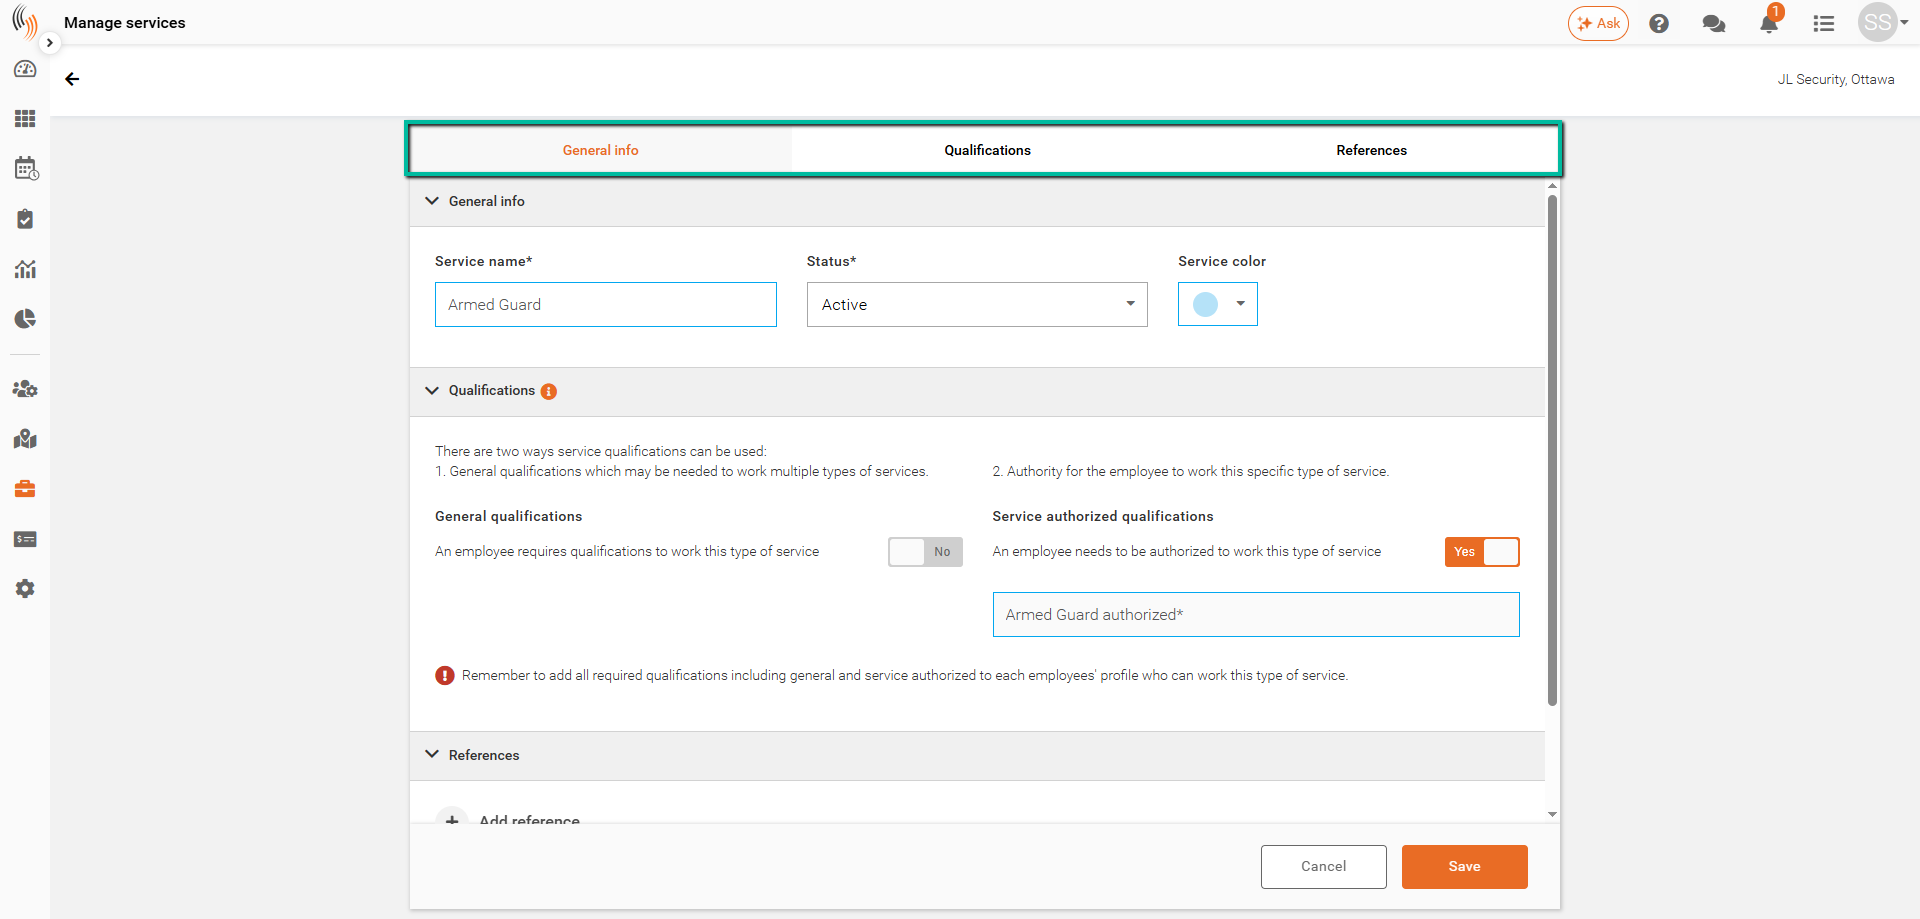
Within the form, you can configure the following:
- General Info – Enter the Service Name and Status (required). You can also assign an optional service color.
- Qualifications – Add general and service-authorized qualifications as needed.
- References – Include any additional reference information.
Click Save to add the service to your Manage Services list.
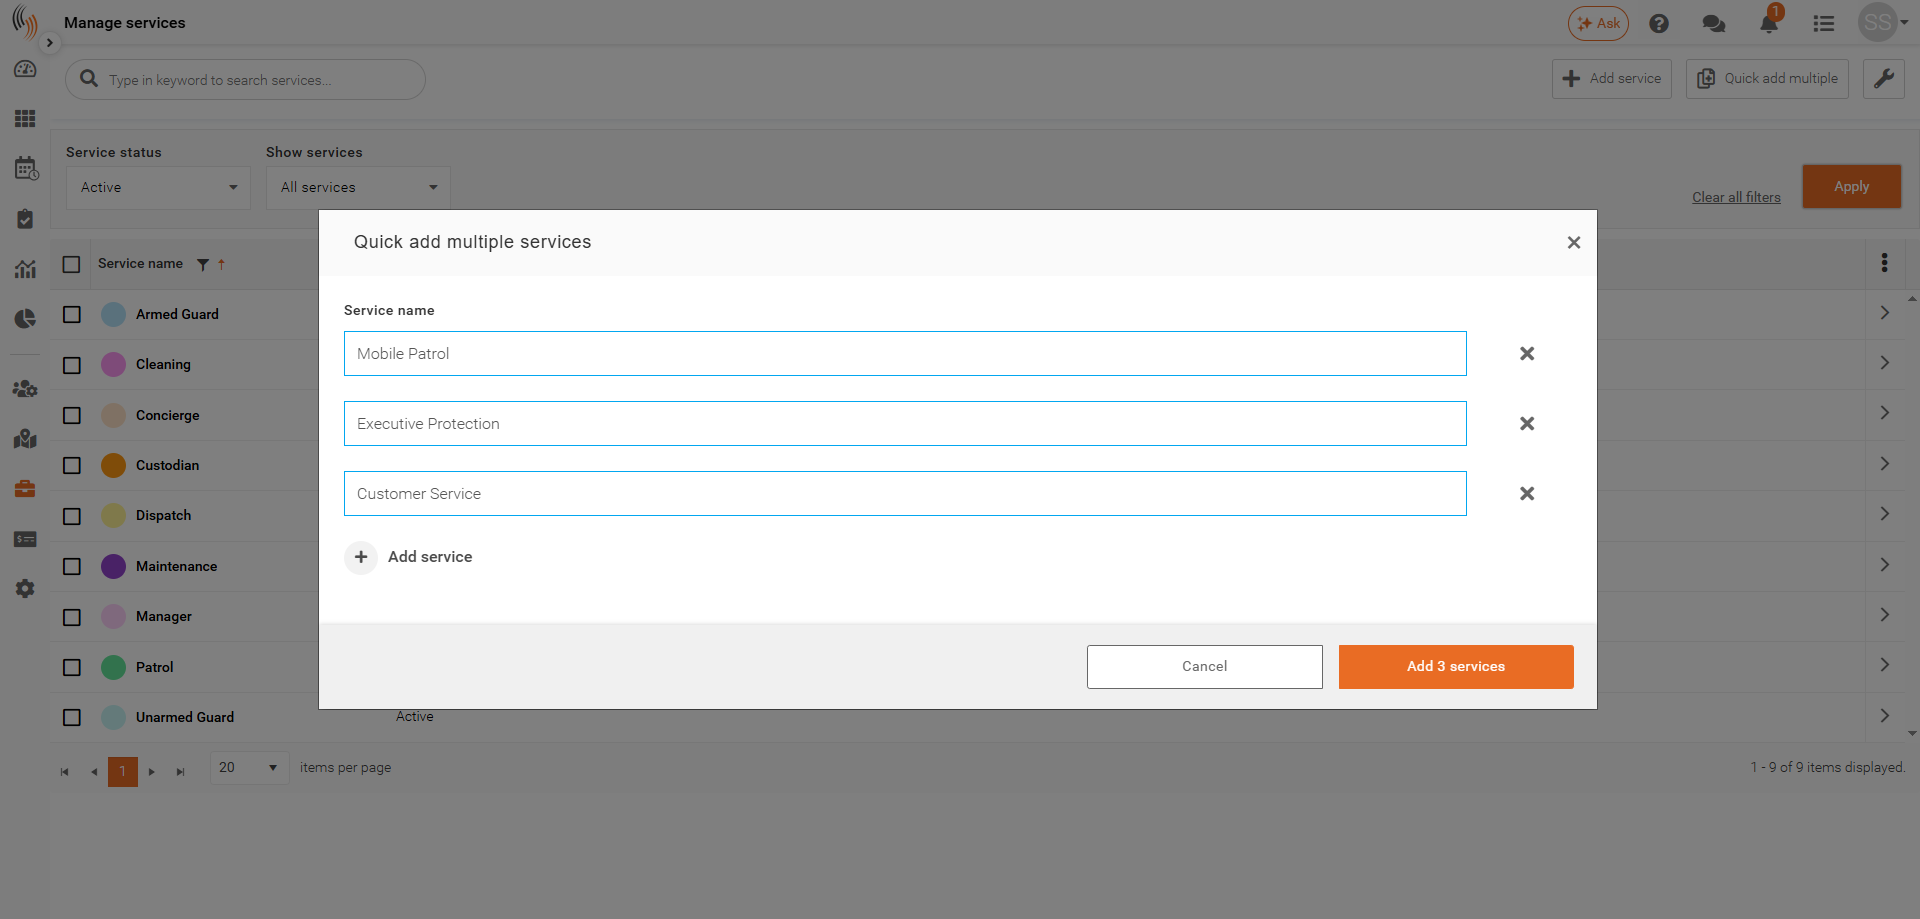
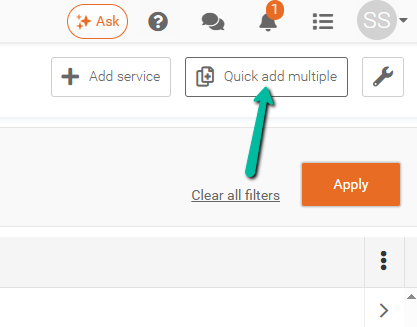
Quick Add Multiple
To quickly add multiple services:
- Click Quick Add Multiple in the top-right corner of Manage Services.
Once the window opens:
- Enter a service name for each service.
- Click + Add Service to create additional lines.
- Repeat until all required services have been entered.
Note: You can add up to 10 services at a time.
Once all services have been entered:
- Click Add # Services to create the services.
Services will not be created until you complete this final step.