Attach Documents to Shifts
Shift Documents allow managers to include key details at the shift level, ensuring employees have access to the right information when they need it.
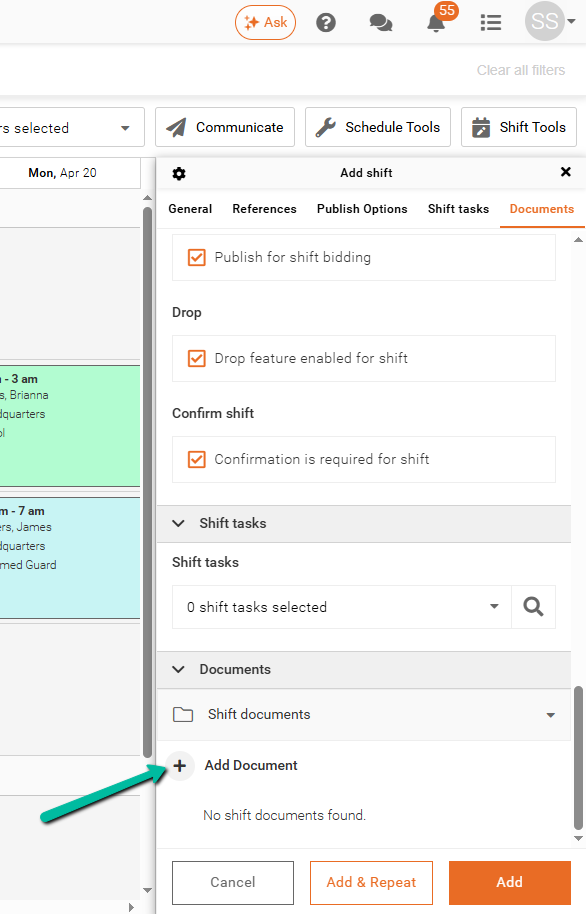
Add a Document to a Shift
To attach a document:
- Open the shift panel
- Navigate to Documents → Shift Documents
- Click Add Document
You can create and attach a new document directly from this screen.
Important:
After adding documents, you must update the shift and click the save icon to apply your changes.
You can enter the Title, provide the Details, and attach a file.

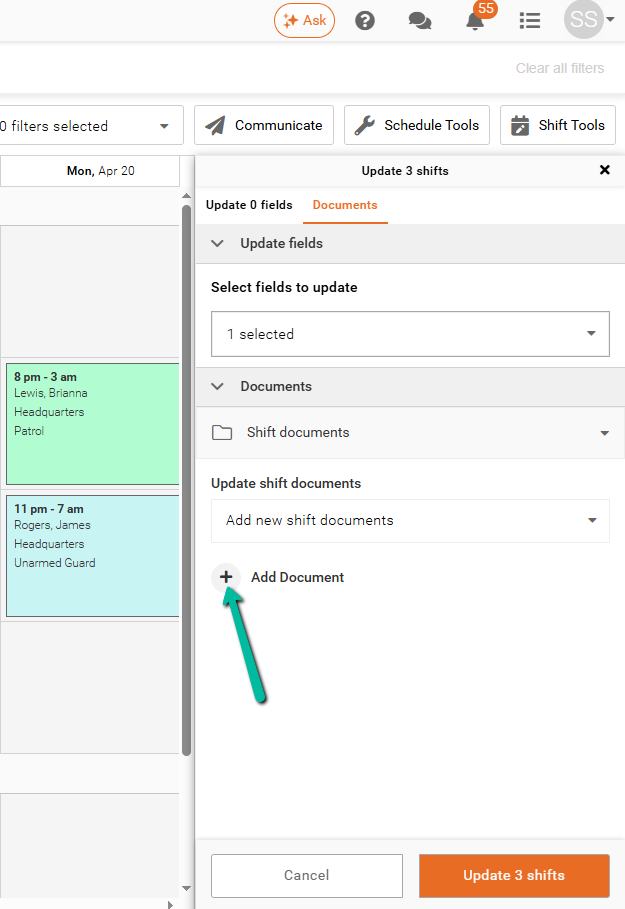
Add Documents in Bulk
To add documents to multiple shifts that already exist:
- Select the desired shifts
- Go to Shift Tools → Update # Shifts
- Select the Shift Documents field
- Add your document(s)
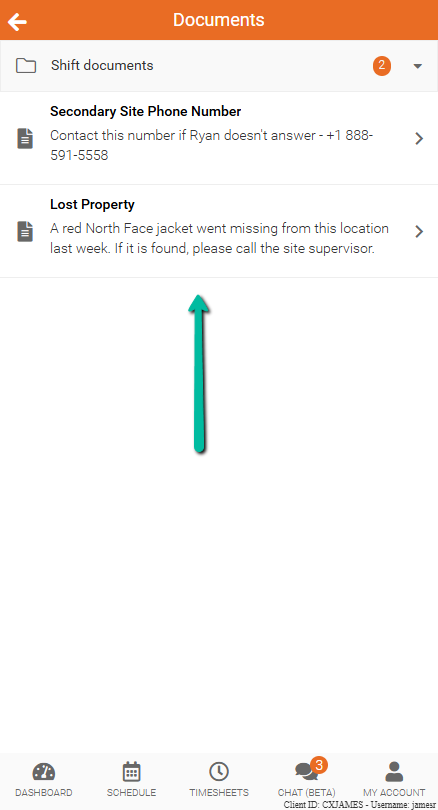
View Documents in Team Xpress
In Team Xpress, Documents appear under the Documents section within shift details.
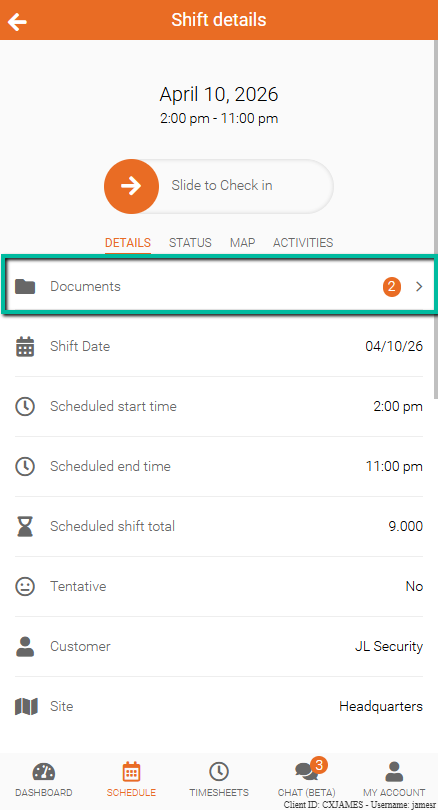
Employees can click the Documents tab to view all Document information.
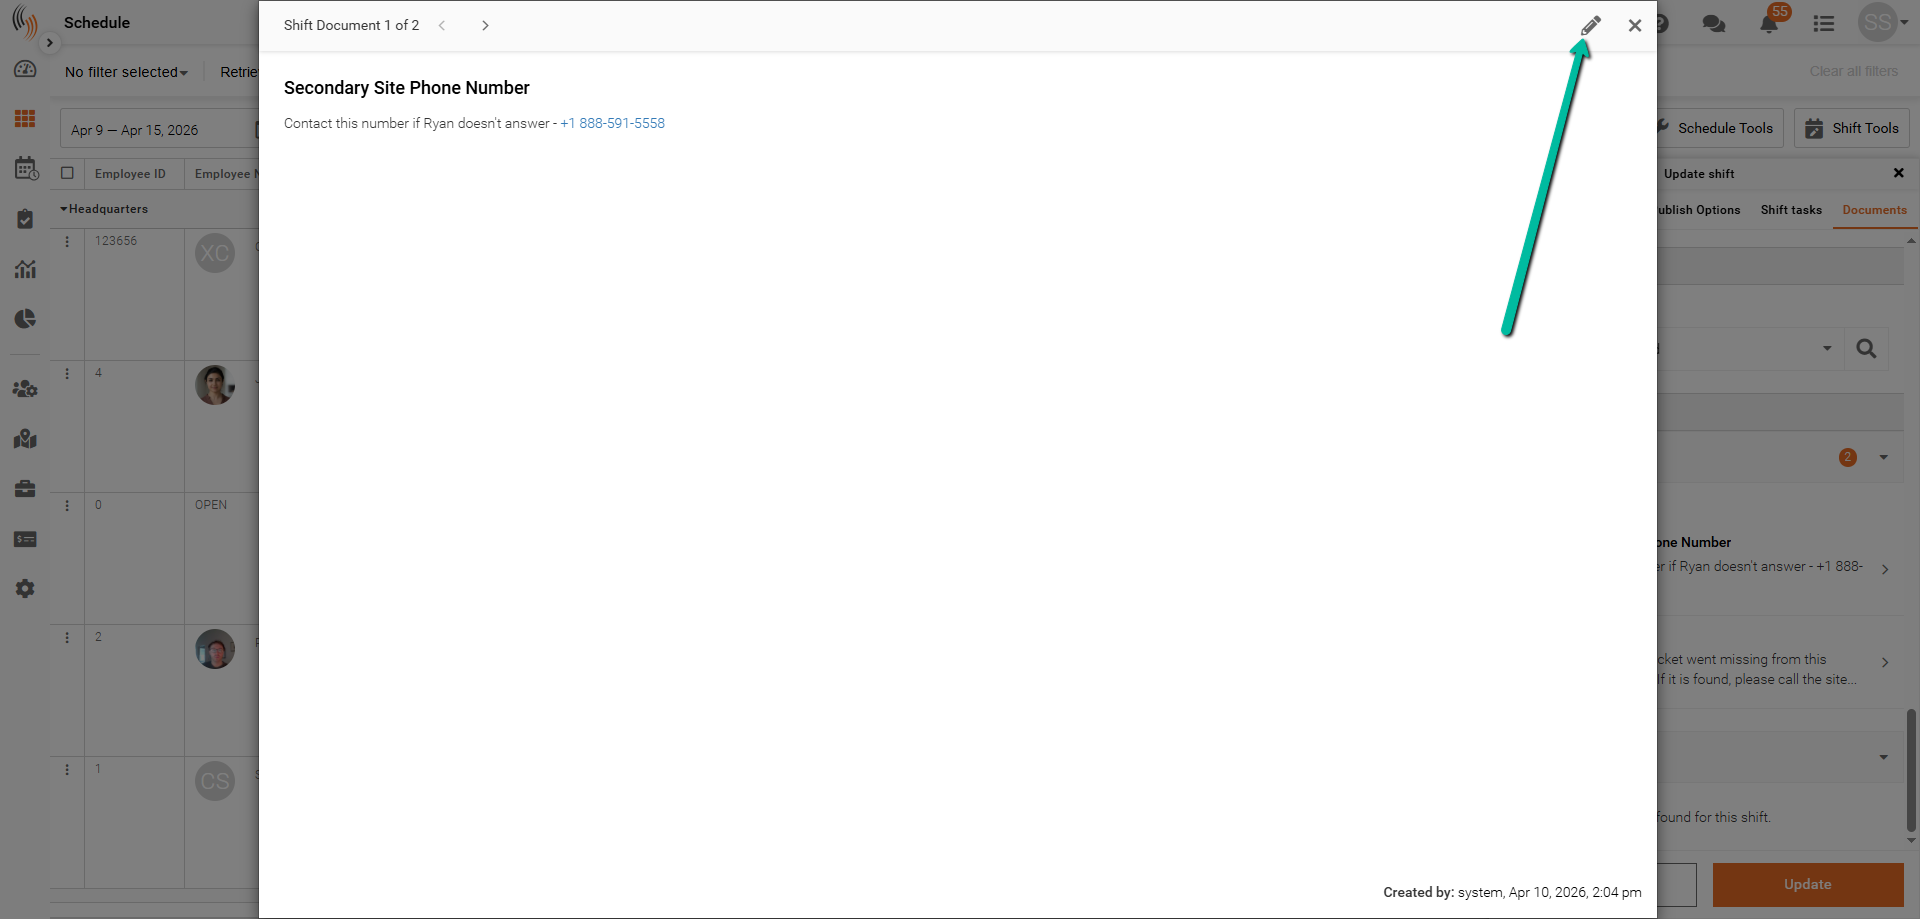
Delete a Document from a Shift
To remove a document from a single shift:
- Open the Shift Form
- Locate the document
- Click the pencil icon
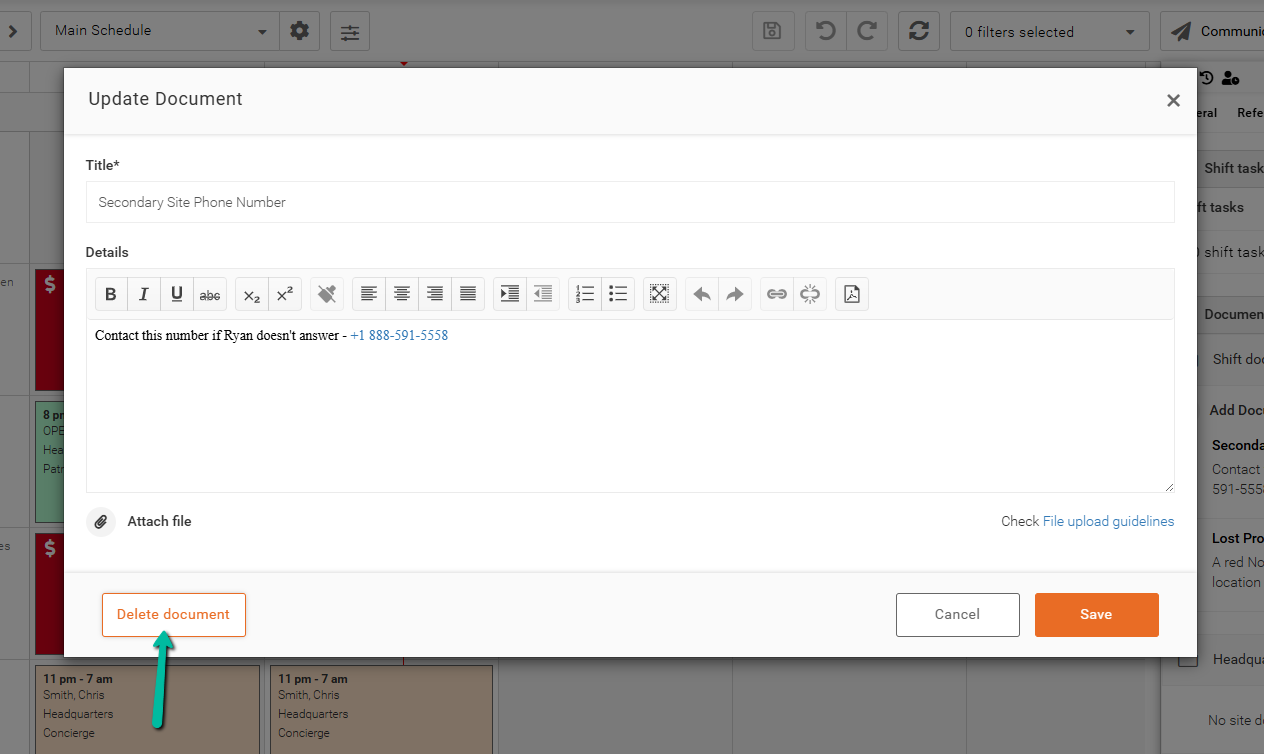
To complete:
- Select Delete Document
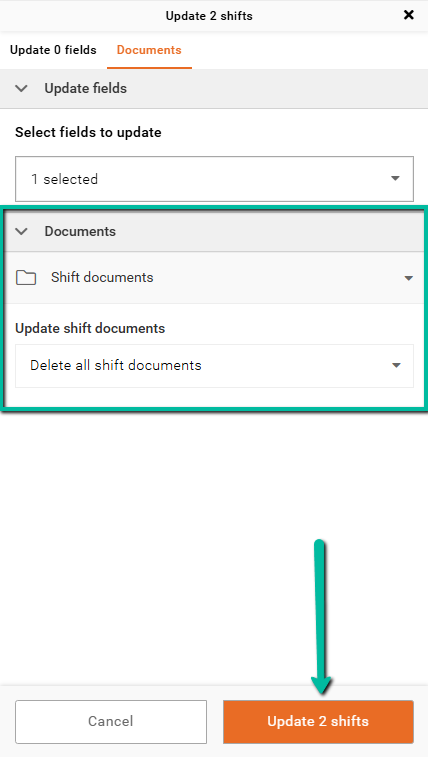
Delete Documents in Bulk
To remove documents from multiple shifts:
- Select the desired shifts
- Go to Shift Tools → Update # Shifts
- Select the Shift Documents field
- Choose Delete All Shift Documents
- Click Update # Shifts
- Click the Save icon to apply your changes
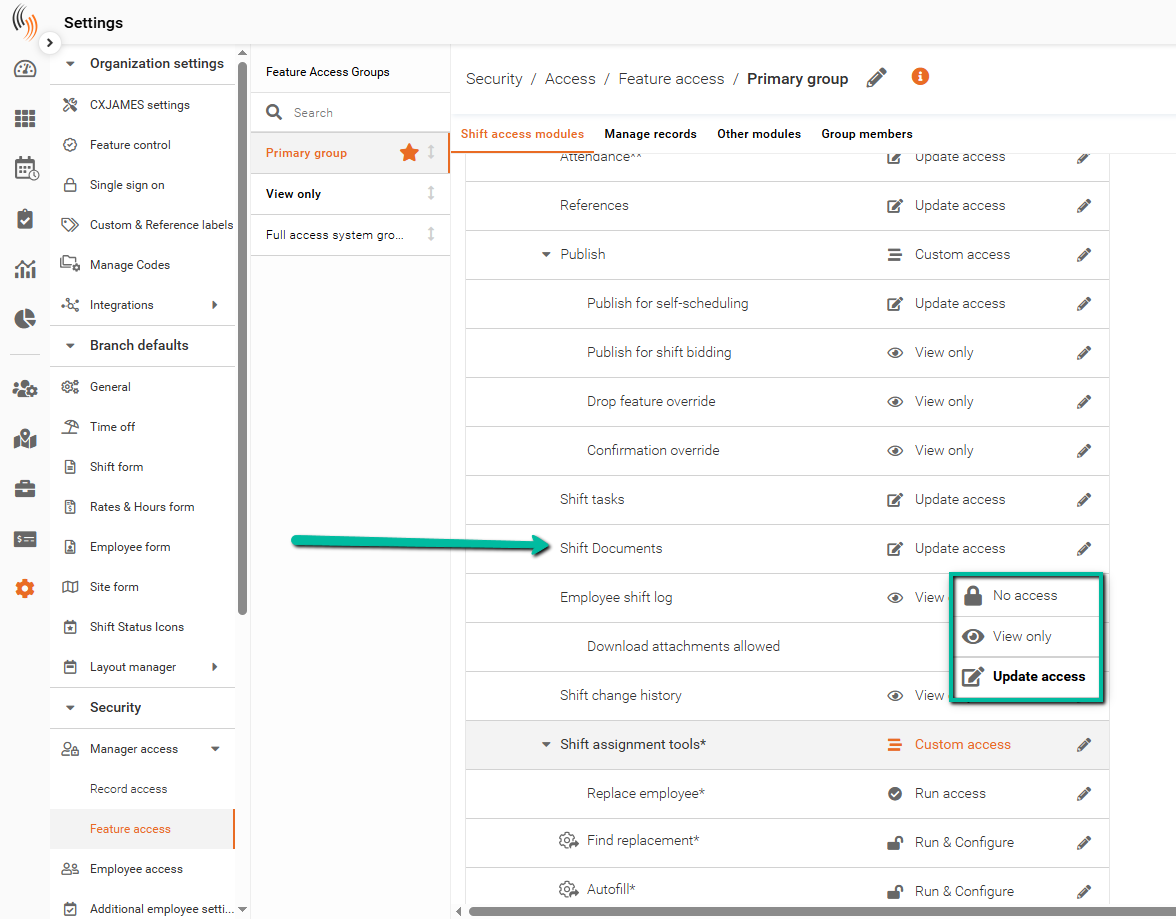
Permissions
Admins can control access to Shift Documents through feature access settings.
- Go to Settings → Security → Manage Access → Feature Access
- Select the appropriate Feature Access Group
- Locate Shift Documents under Shift Access Modules
- Click the pencil icon on the right to update permissions
Access Options
- No Access – Users cannot view or interact with shift documents
- View Only – Users can view documents but cannot add, edit, or delete them
- Update Access – Users can add, edit, and delete shift documents