Create & Apply Shift Templates
Shift Templates let you save recurring shifts and quickly apply them to future schedules, saving time, reducing errors, and eliminating the need to start from scratch each period.
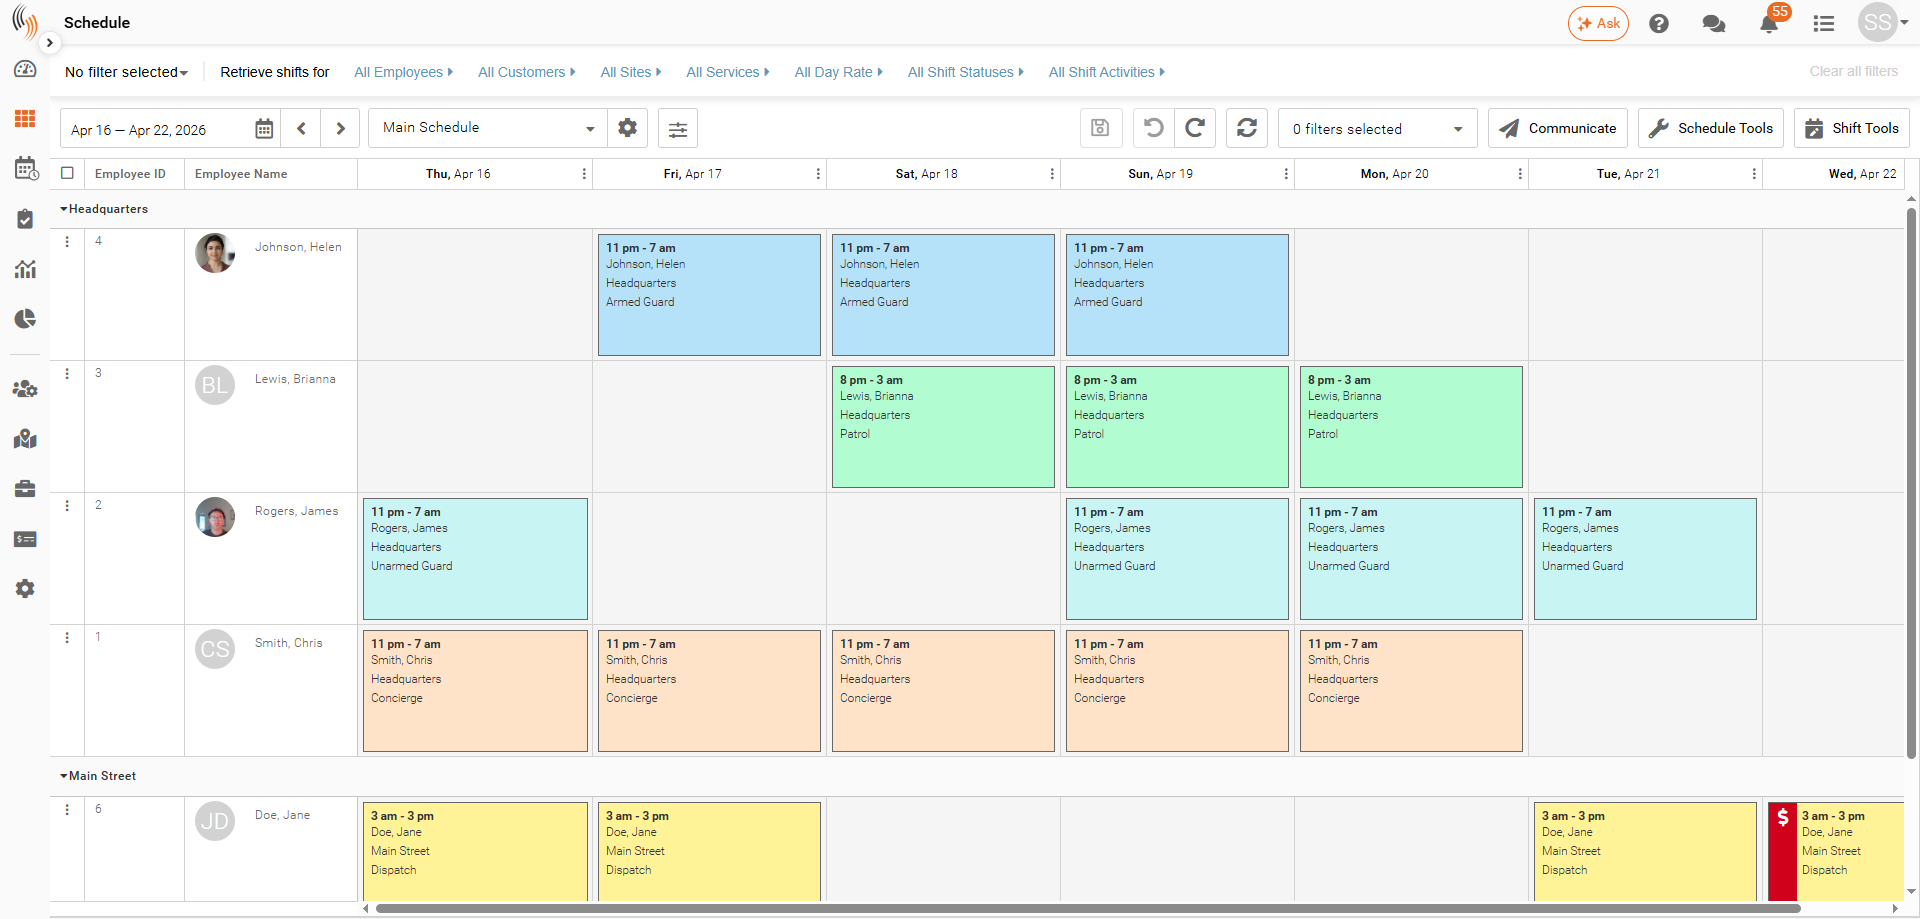
Create Your Schedule Before Templating
Begin by creating a schedule that suits your company’s needs and your employees’ availability. We suggest using weekly templates for better focus and flexibility, but you can also make templates covering up to a month if necessary.
Create a Shift Template in Your Schedule
With your schedule in place, you’re ready to create your shift template. Just follow the steps below to get started.
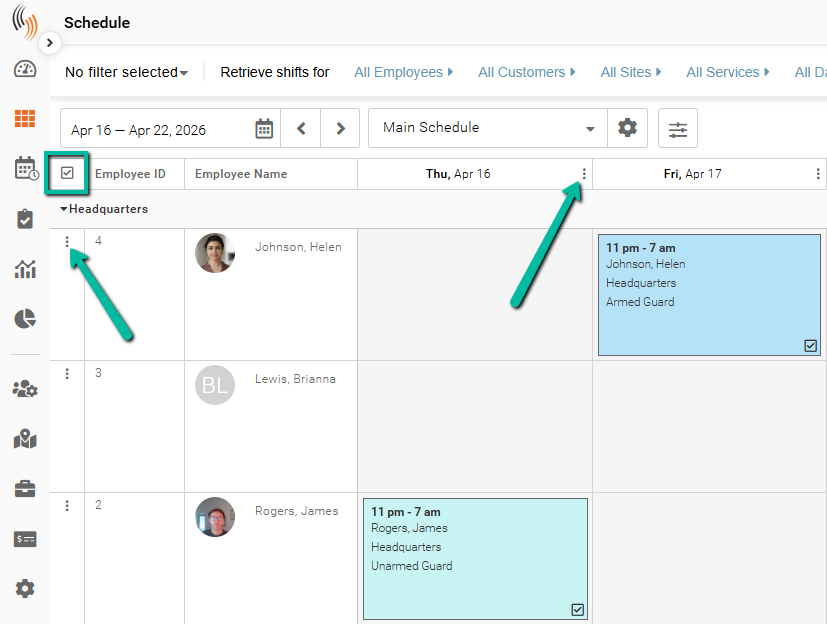
Step 1 – Highlight Your Shifts
First, highlight the shifts you want to include in the shift template.
To select shifts, you can:
- Click the square in the top left corner of the schedule grid to select all shifts and highlight every visible shift in your schedule.
- Use the three-dot menus to select whole columns or rows.
- Select individual shifts by checking the box in the bottom right corner.
- Click on an empty schedule box or space, then drag to select multiple shifts (lasso).
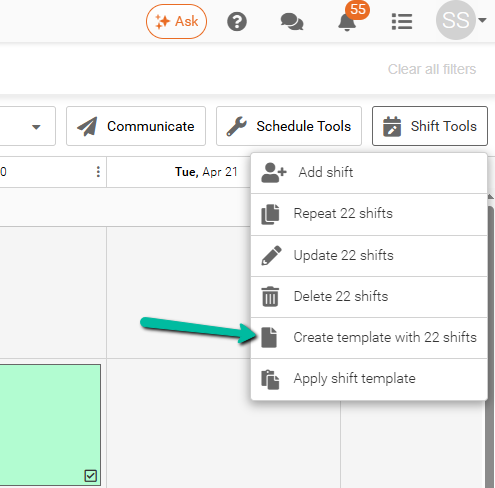
Step 2 – Create the shift template
There are two ways to create a template.
Option 1: Create the Shift Template Directly in the Schedule
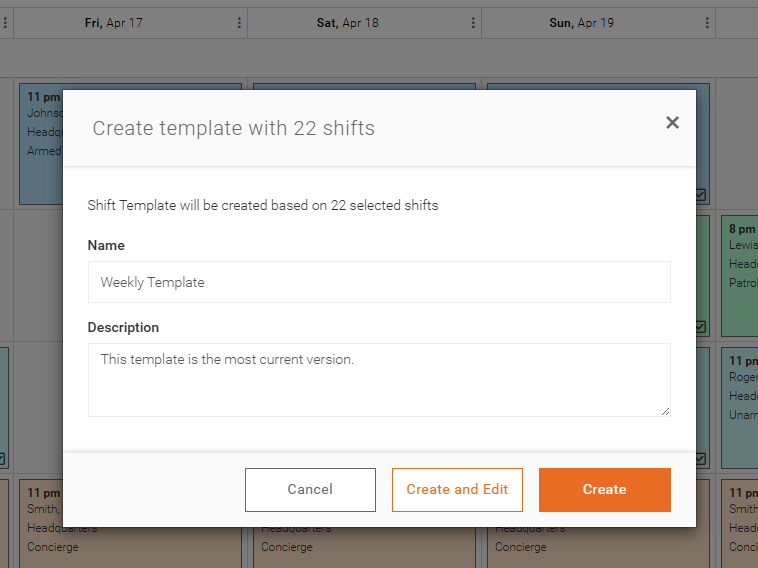
After selecting your shifts, click Shift Tools → Create Shift Template (the button will display the number of selected shifts). Enter a Name and Description for your template. This is the simplest way to create a shift template.
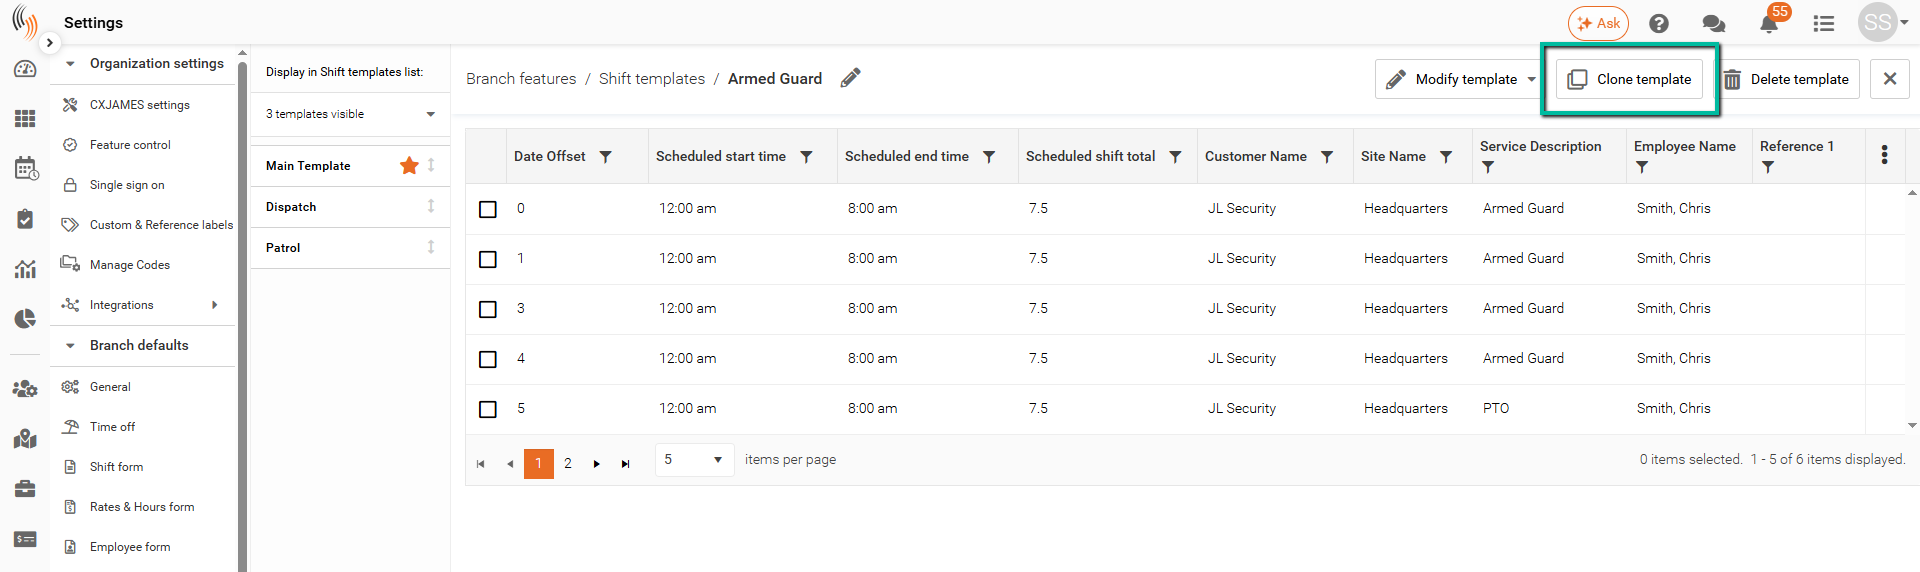
Option 2: Create the Shift Template in Your Shift Template Settings
Go to Settings → Branch Features → Shift Templates. Click Clone Template to create a copy of an existing template, then use Modify Template to add or remove shifts.
Step 3 - Adding a Shift Template Name and Description
Once you’ve chosen how to create your shift template, the next step is to decide on a Name and Description.
The description can be used for any purpose you need, but many use it to specify the template’s start date, like a Monday start. This helps them know which day of the week to begin using it.
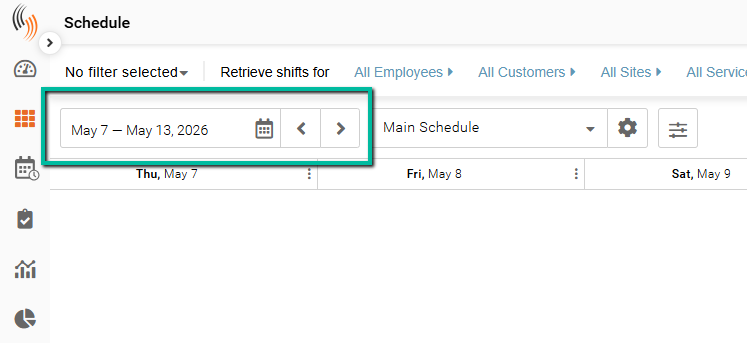
Step 4 - Select the Date Range to Apply the Shift Template
First, select the date range where you want to apply the template.
Step 5: Apply Your Shift Template
After selecting your date range, you can apply a shift template using either of the following methods:
Method 1: Shift Tools Menu
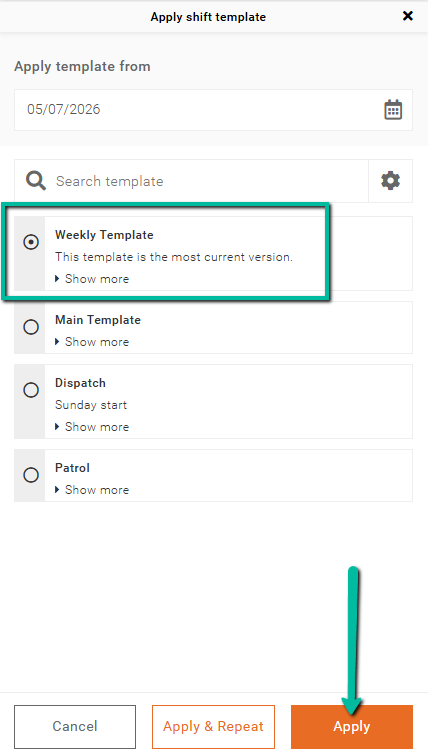
Go to Shift Tools → Apply Shift Template.

Select the template by clicking the circle to the left of its name. If your template does not start on the first day of your schedule, make sure to choose the correct date in the Apply Template From section at the top of the panel. Click Apply to add the template to your schedule.

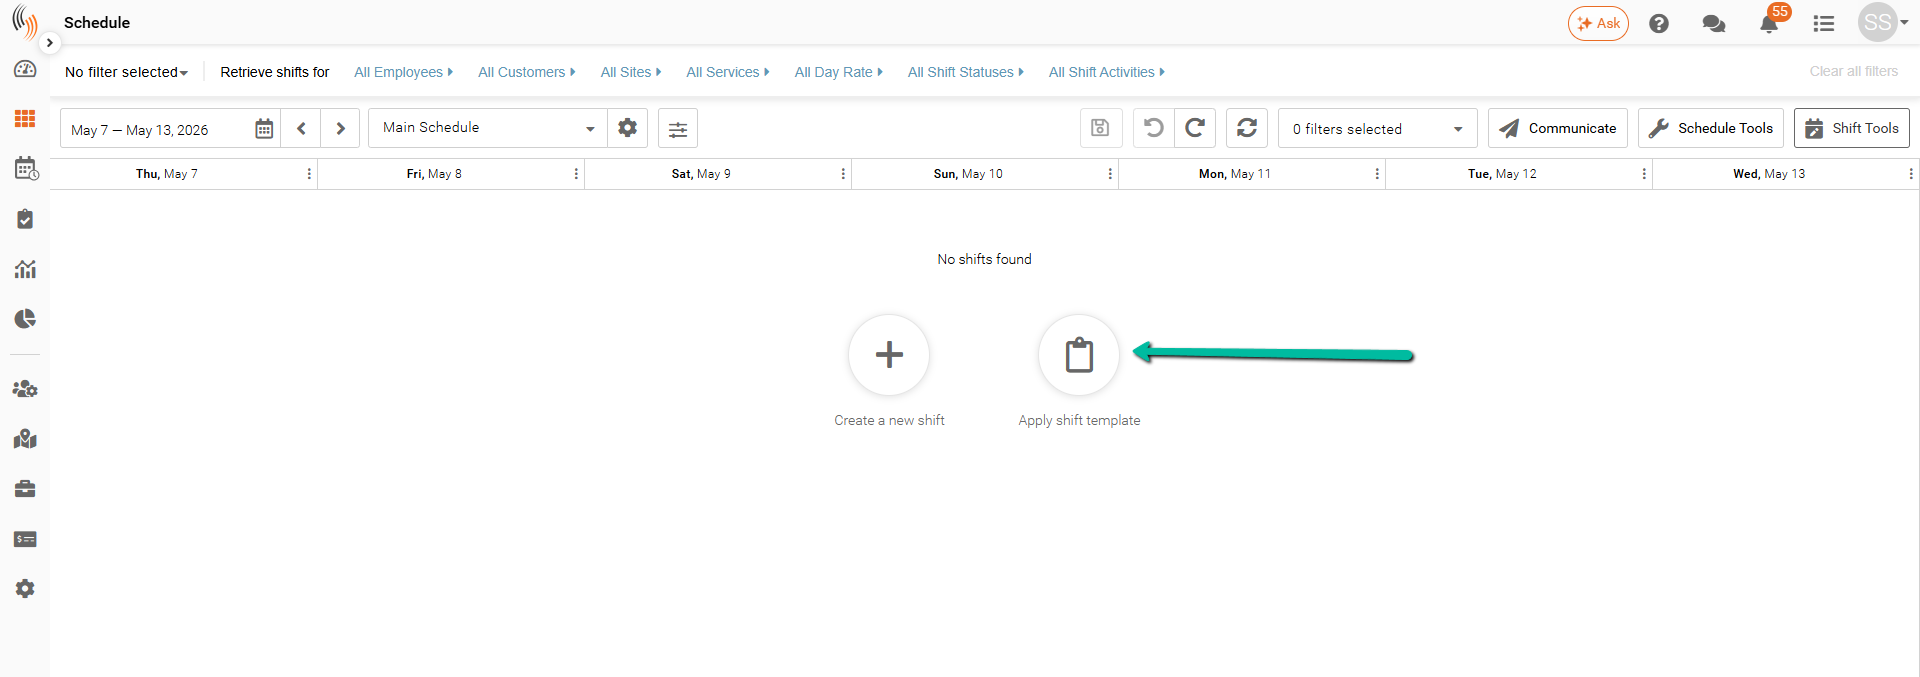
Method 2: Empty Schedule Shortcut
If there are no shifts in the selected date range, click the Apply Shift Template button in the center of the schedule.
Note: This method is only available when there are no existing shifts in the selected date range.
Select your template, confirm the correct Apply Template From date, then click Apply.
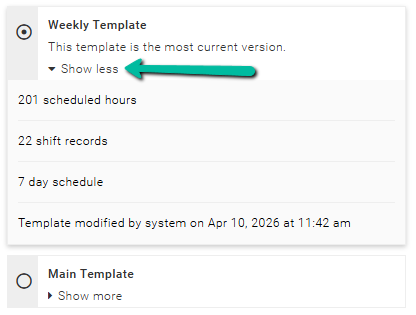
Show More to See Additional Template Information
Use Show More to see extra template details, including scheduled hours, number of shift records, schedule duration (days), and the last modified date and user.
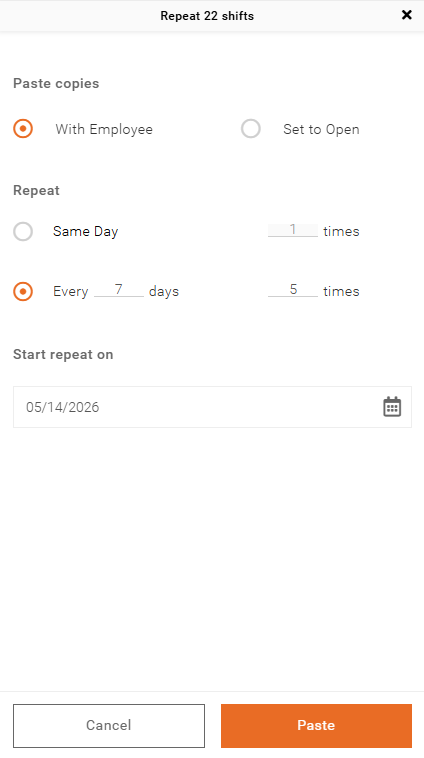
Apply & Repeat Shift Template
If you want to repeat your shift template for multiple weeks instead of just one, simply click the Apply & Repeat button at the bottom of your shift template panel.

The Paste Copies section lets you choose how shifts are copied
- With Employee keeps the assigned employee on each shift
- Set to Open removes employees and leaves shifts unassigned
The Repeat section lets you control how shifts are repeated
- Same Day repeats each shift the selected number of times on consecutive days
- Every # Days repeats the schedule at a set interval
For example, to repeat a schedule weekly, select Every 7 Days, enter how many times it should repeat, and choose a Start Repeat On date. This is typically the start date of the next week after the schedule you’ve pasted.
Step 6 - Saving your Shift Template
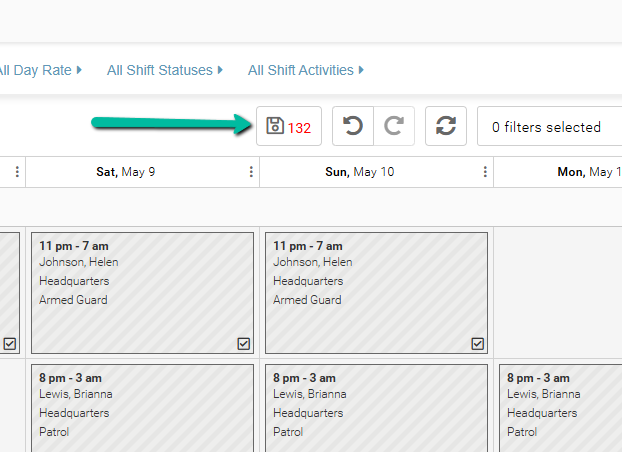
After clicking Apply, your Schedule will appear in draft mode. You can make any minor changes before saving.
When you're ready, click the Save icon to publish the shift template.
Make Permanent Changes to a Shift Template
You have two options to make permanent changes to a shift template.
Option 1: Update from your Schedule
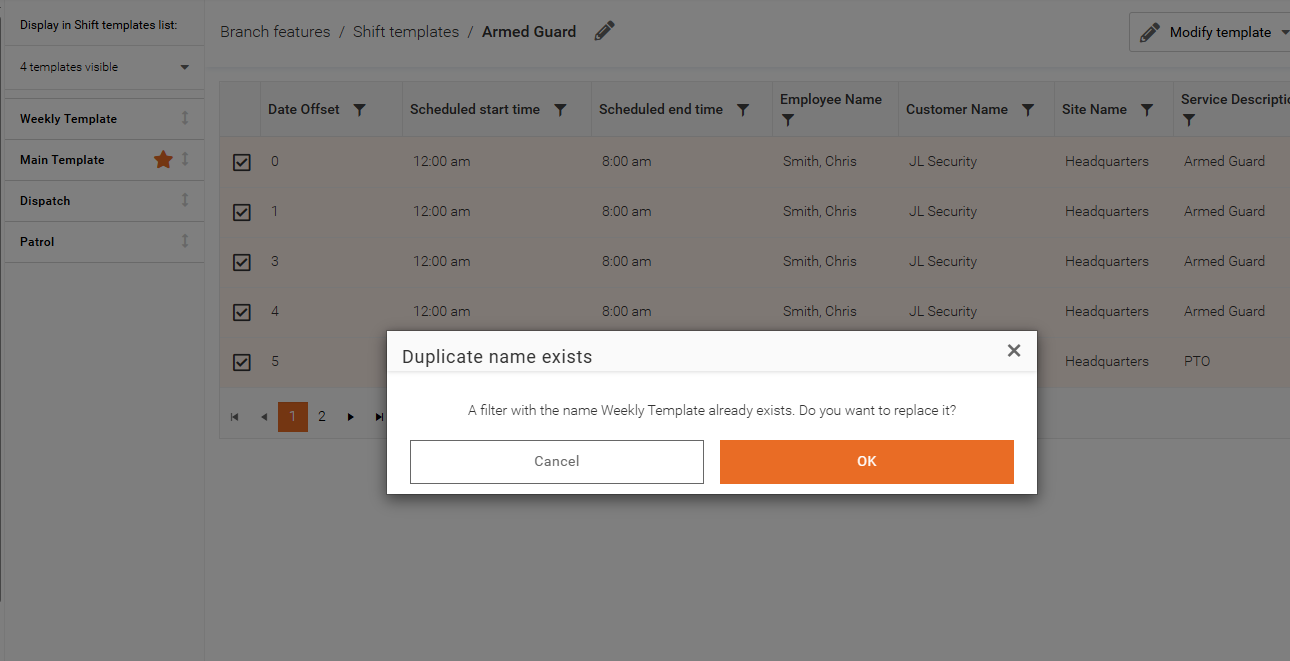
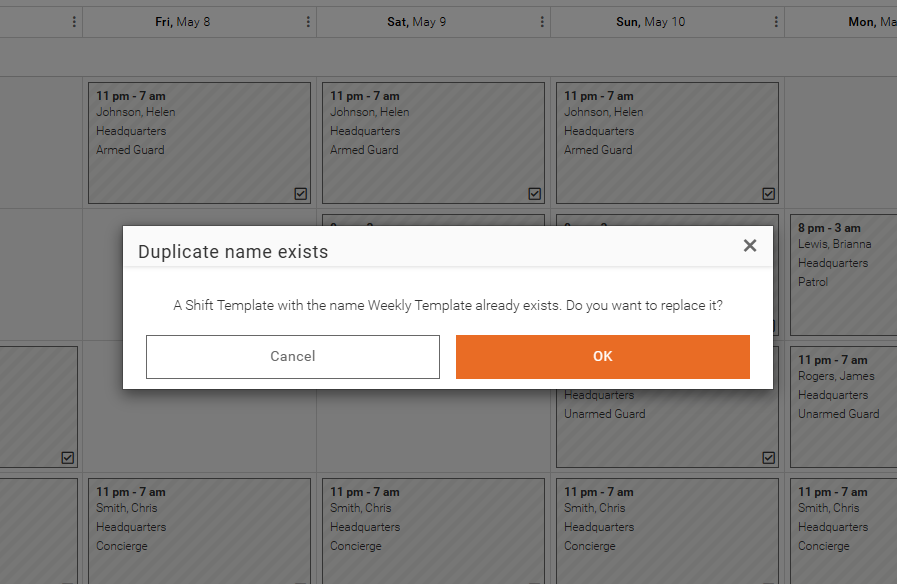
You can paste the template into a blank week and make permanent changes while it’s still in draft mode. When you’re satisfied with your edits, select all the shifts → go to Shift Tools → click Create Template with # Shifts → rename it exactly as the original. This will overwrite and update the existing template.
Option 2: Edit directly in Settings
You can edit the template directly in your Settings → Branch Features → Shift Templates. Once there, select the template from the Shift Template list on the left → click Modify Template to add, update, or delete a shift.