Custom & References Labels
Custom & Reference labels allow administrators to rename the default labels used throughout Schedule Xpress and eTime Xpress. This helps organizations align system terminology with their internal processes and naming conventions.
Access Custom & Reference Labels
To access Custom & Reference labels:
Settings → Custom & Reference labels

Custom & Reference Labels Overview
The Custom & Reference Labels section allows administrators to:
- Modify default system labels
- Create and manage Reference labels
- Configure lookup-only dropdown behavior
- Reset labels back to system defaults
Important: Changes made to labels affect both Schedule Xpress and eTime Xpress.
Note: Many organizations already have labels configured appropriately. This section should only be adjusted when terminology updates are required.
Custom Labels
Custom labels allow administrators to rename default system terminology throughout the platform.
Examples include changing:
- Customer → Client
- Customers → Clients
Finding Custom Labels
Within the Custom & Reference Labels section, select a label from the list to edit its naming configuration.
The system default label name remains visible for reference purposes, even if it has already been renamed.
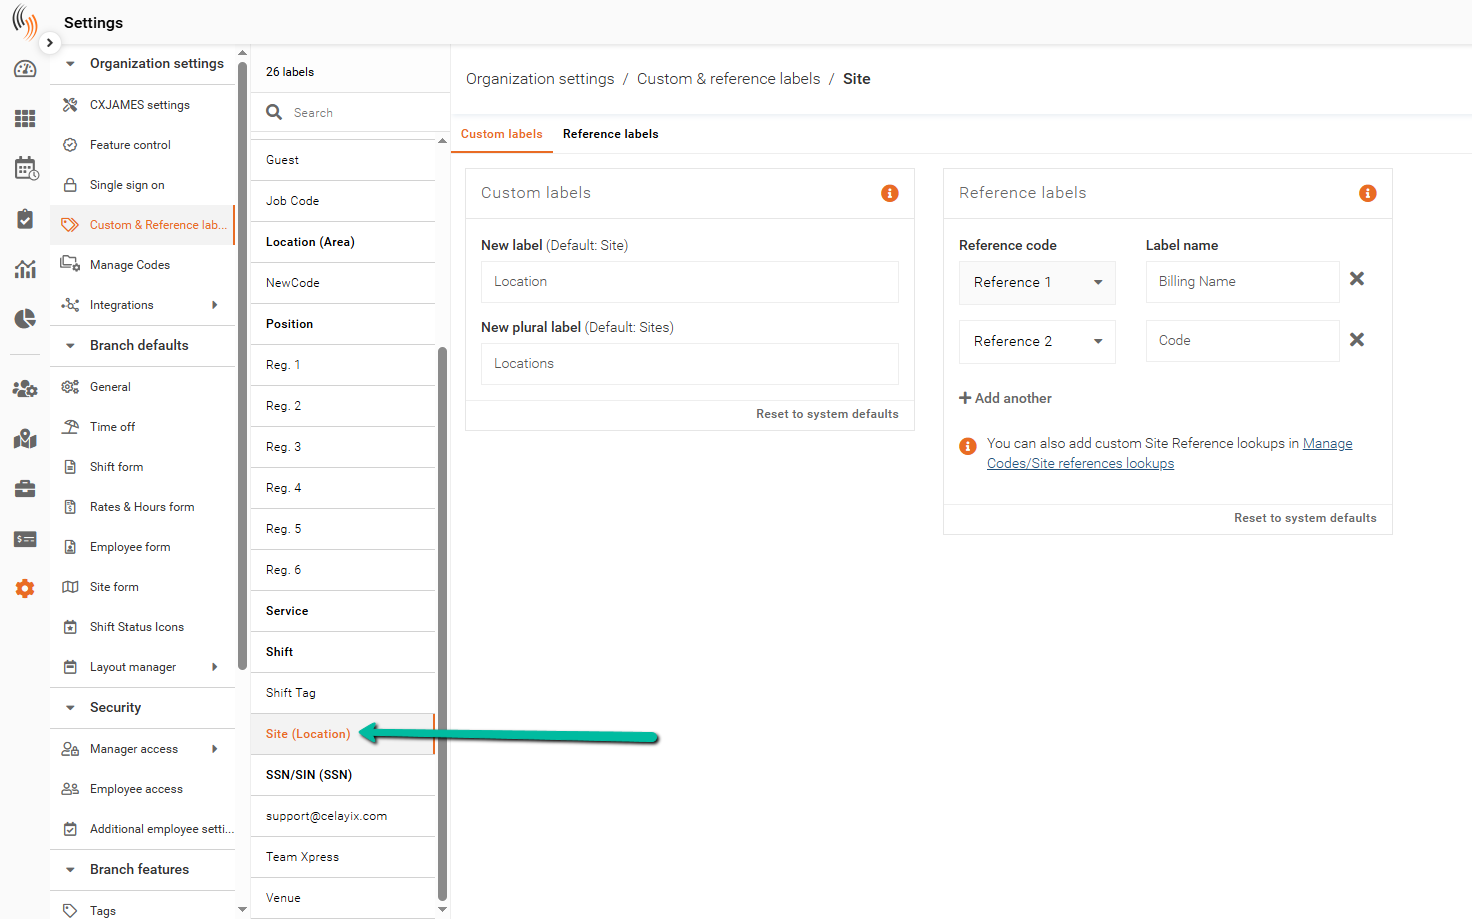
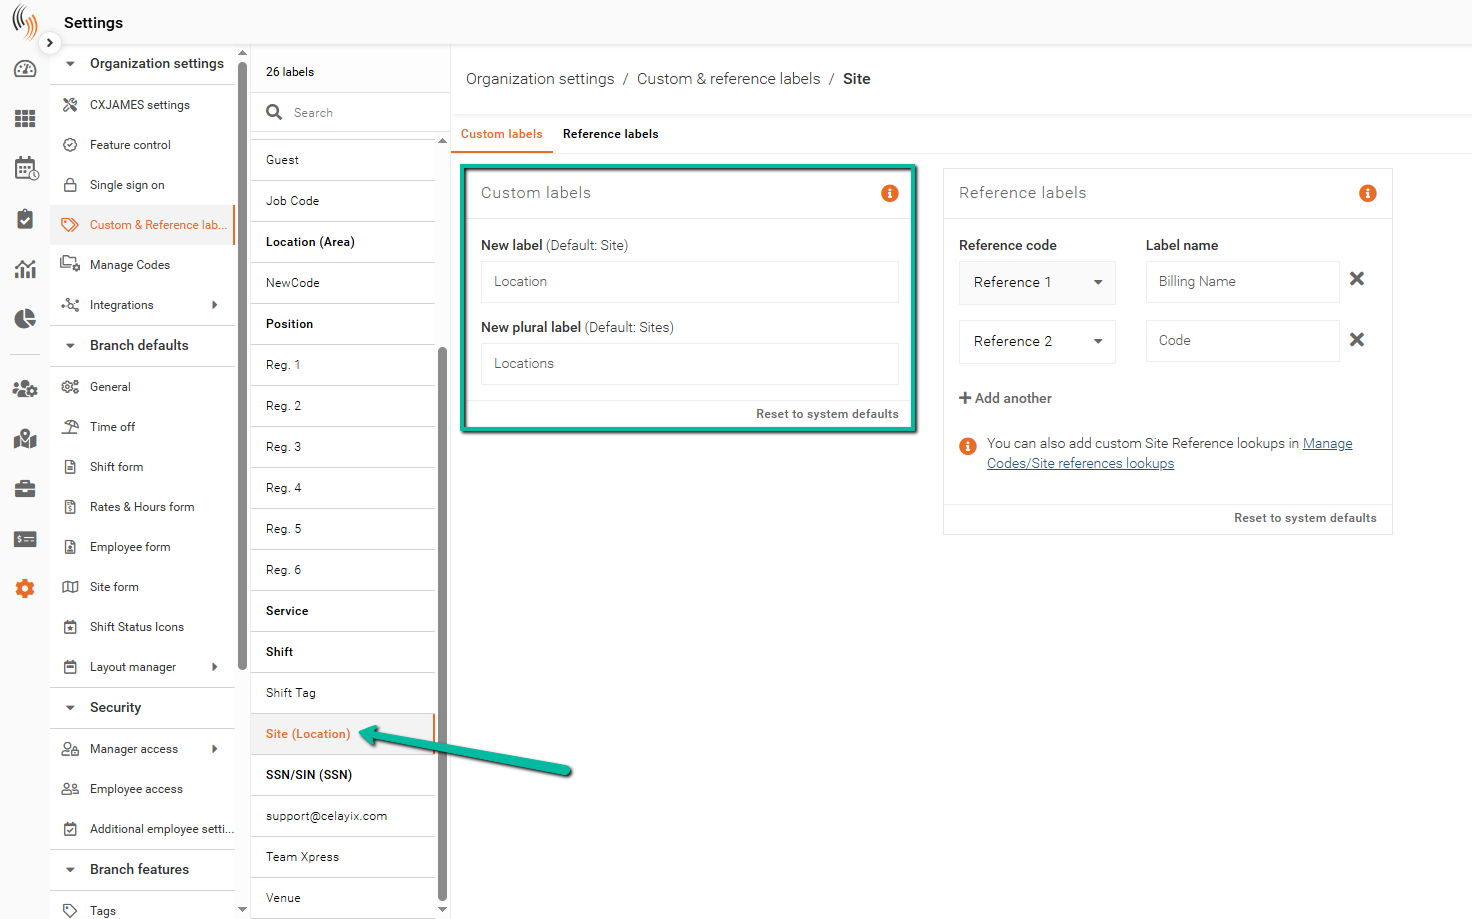
Adding or Adjusting Custom Labels
After selecting a label, the configuration panel allows you to define:
- New label
- New plural label
Example:
- Site → Location
- Sites → Locations
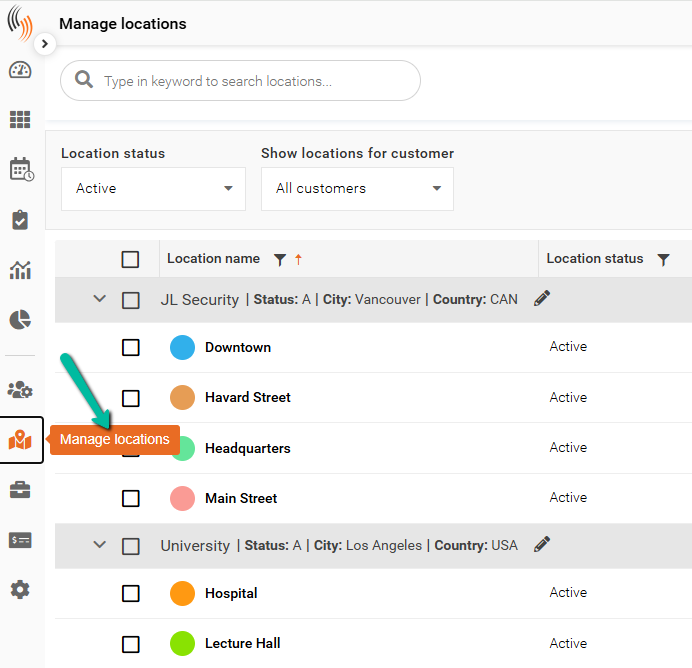
Where Custom Label Changes Appear
Changes made to Custom labels are reflected throughout Schedule Xpress and eTime Xpress.
Examples include:
- Manage sites
- Column headers
- Employee profiles
- Additional configuration areas
Note: After making label changes, it is recommended to log out and log back into Schedule Xpress and eTime Xpress to ensure the updates are fully applied.
The example below illustrates that the term "sites" in "Manage sites" has been updated to "location."
Reference Labels
Reference labels allow administrators to define additional identifiers and references for system entities such as Employees, Sites, Shifts, and Services.
Reference labels can be customized by selecting the desired Reference number and assigning a new label name.
Supported Reference Label Types
Reference labels can be configured for:
- Branch
- Company
- Customer
- Employees
- Services
- Sites
- Shifts
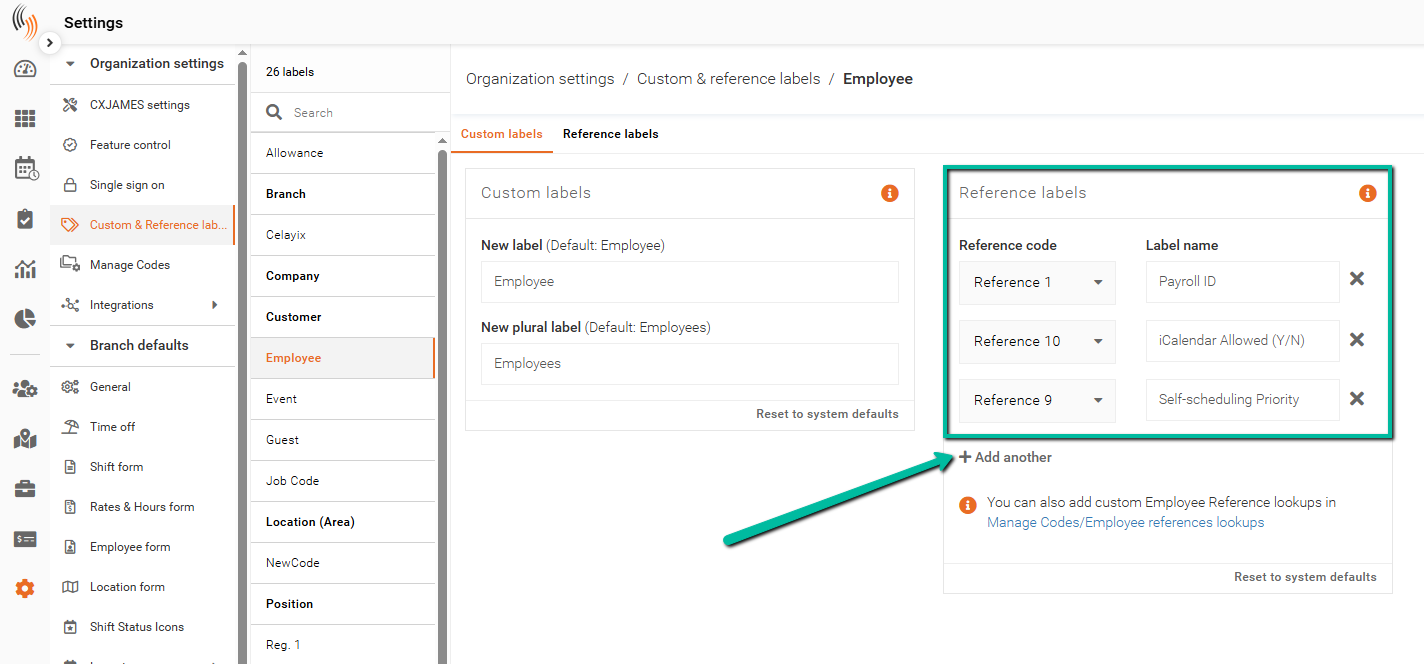
Adding or Adjusting Reference Labels
To create or edit a Reference label:
- Head to Settings → Organization Settings → Custom & References Labels
- Select the desired Custom label.
- Navigate to the References section.
- Click Add Reference label.
- Select the Reference code from the dropdown.
- Enter the Label name.
Example:
- Reference label 2 → Payroll ID
Since this involves a system change, you'll need to do a full refresh for it to update in your database.
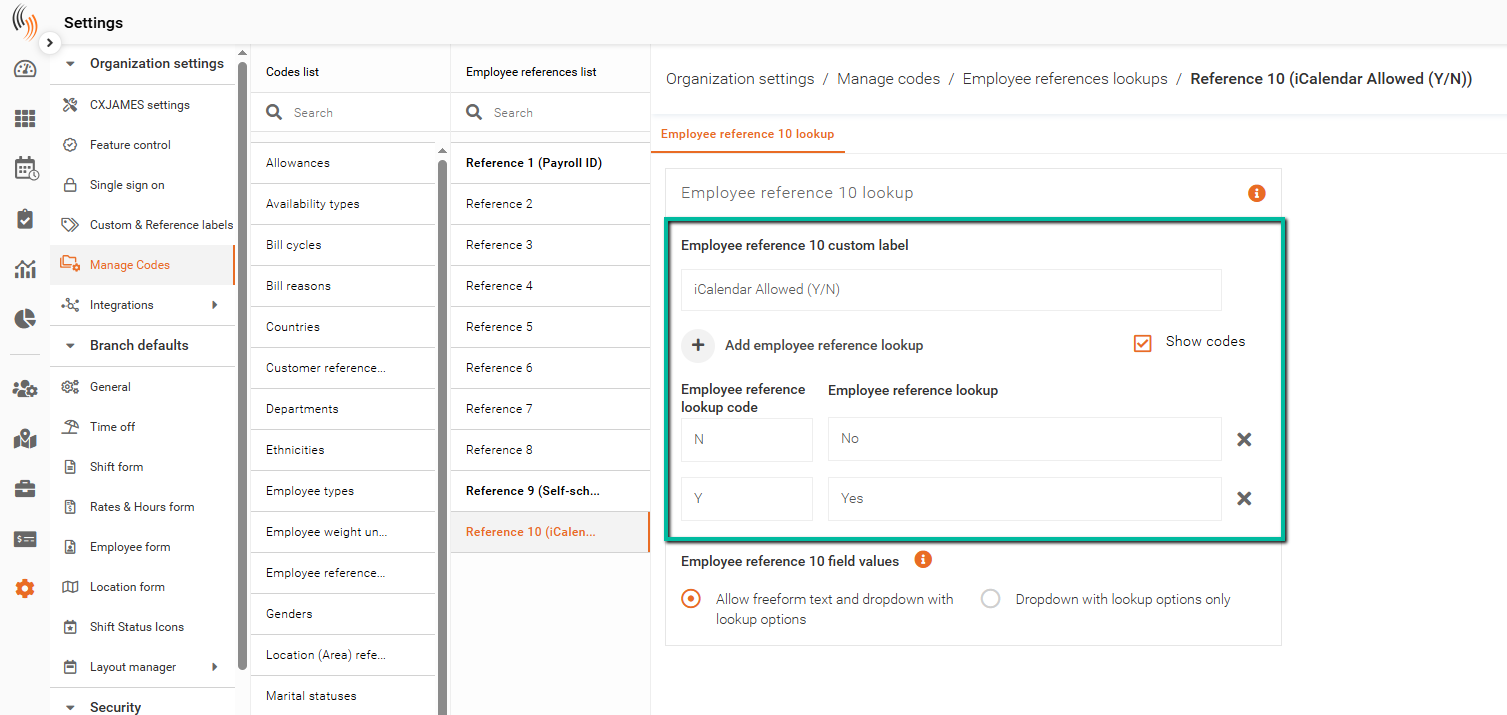
Dropdown with Lookup Options Only
To add dropdown lookup options, go to Settings → Organization Settings → Manage Codes, select the desired reference field, then click Edit Settings in the top-right corner.
From there:
- Click Add Employee Reference Lookup.
- Enter the lookup code and lookup value.
- Select the desired field value option.
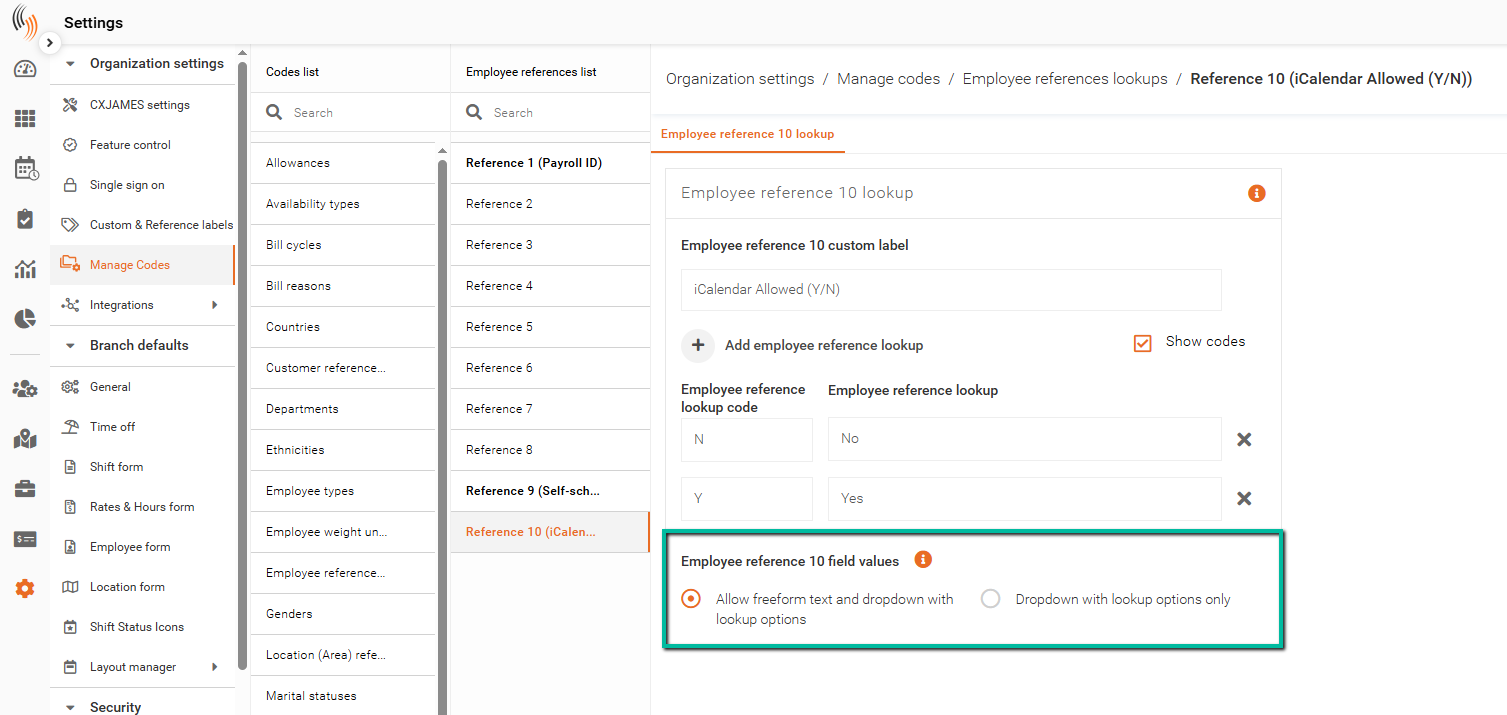
By default, the reference field uses Allow freeform text and dropdown with lookup options, which allows users to:
- Type custom values manually
- Select from predefined lookup options
To restrict users to predefined values only, select Dropdown with lookup options only. When enabled:
- Users must select from the dropdown list
- Manual typing is disabled
Supported lookup types:
- Employee references
- Shift references
- Site references
- Service references
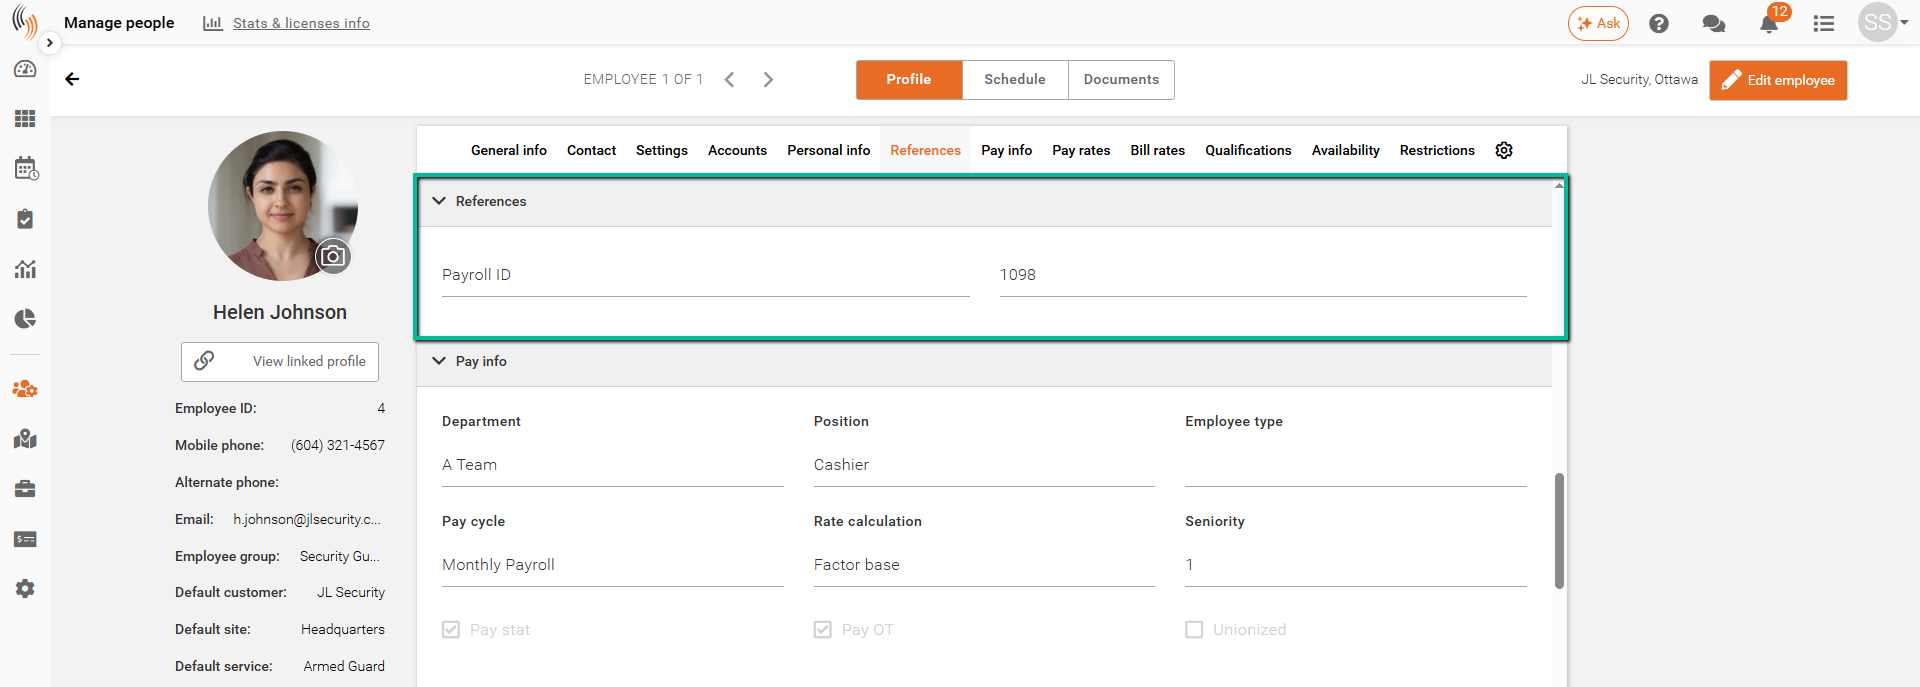
Applying a Reference Label to a Profile
Reference labels can be assigned directly to profiles such as Employees, Sites, Services, and Shifts.
The example below demonstrates assigning the Reference label “Payroll ID” to an Employee profile.
To apply a Reference label to an Employee:
- Open the employee profile.
- Click Edit employee.
- Navigate to the References section.
- Click Add reference.
- Select the appropriate Reference label.
Once assigned, these reference values can be used in:
- Custom reports
- Payroll export files
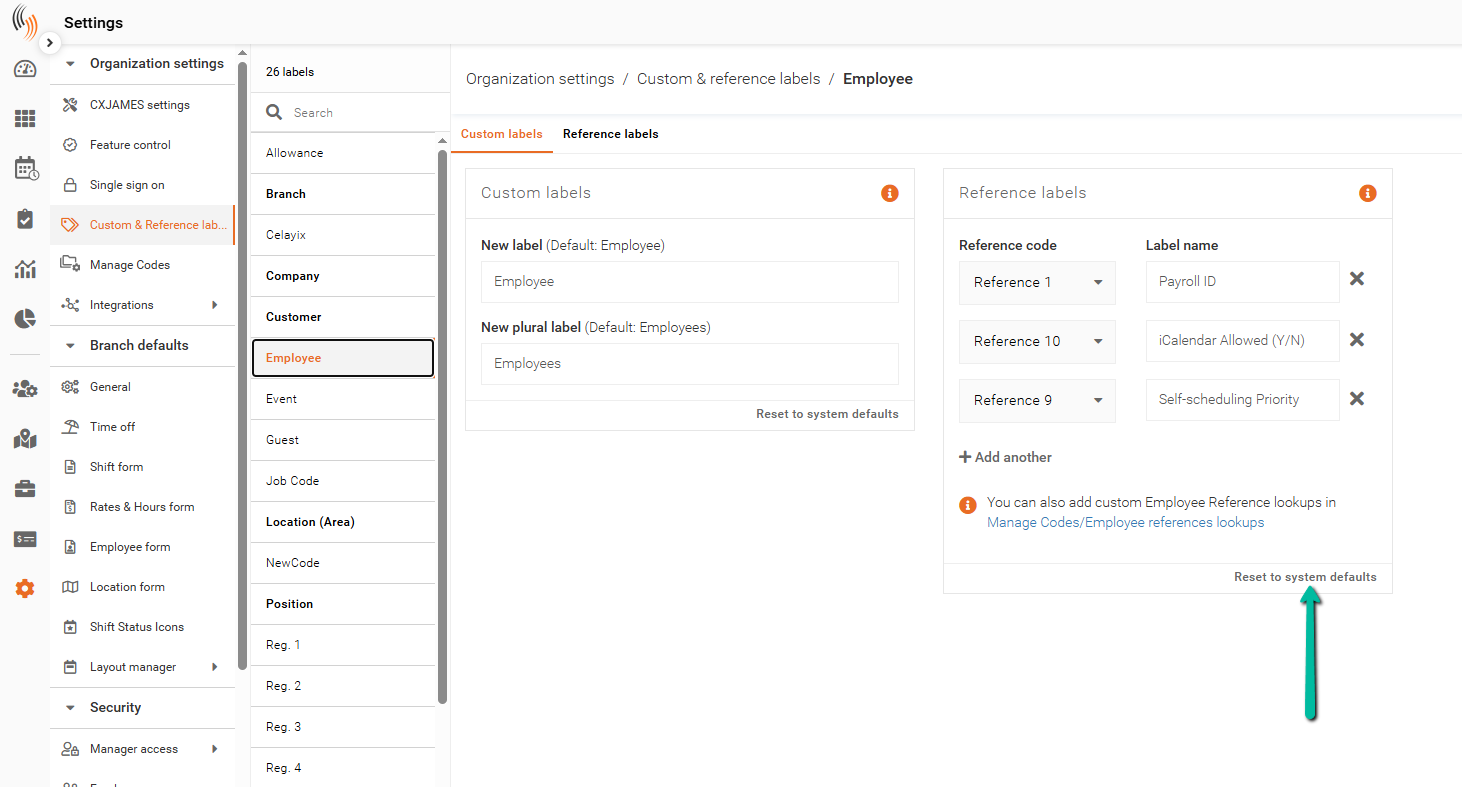
Reset to System Defaults
Custom and Reference labels can be restored to their original system-defined names at any time.
To reset labels:
- Use the Reset to system defaults option within the Custom & Reference Labels section.