
Manage Feature Access Groups
Feature Access Groups can be created in Schedule Xpress to ensure that you only allow Managers access to the features they need. This can be used as a security measure, but also as a way of preventing them from viewing or modifying areas they should not have access to.
Find Your Feature Access Groups
You can find your Feature Access Groups in Schedule Xpress under:
Settings > Security > Manager access > Feature access
Within this section, administrators can create, update, and manage Feature access groups for Managers and administrative Users.

Existing Feature Access Groups
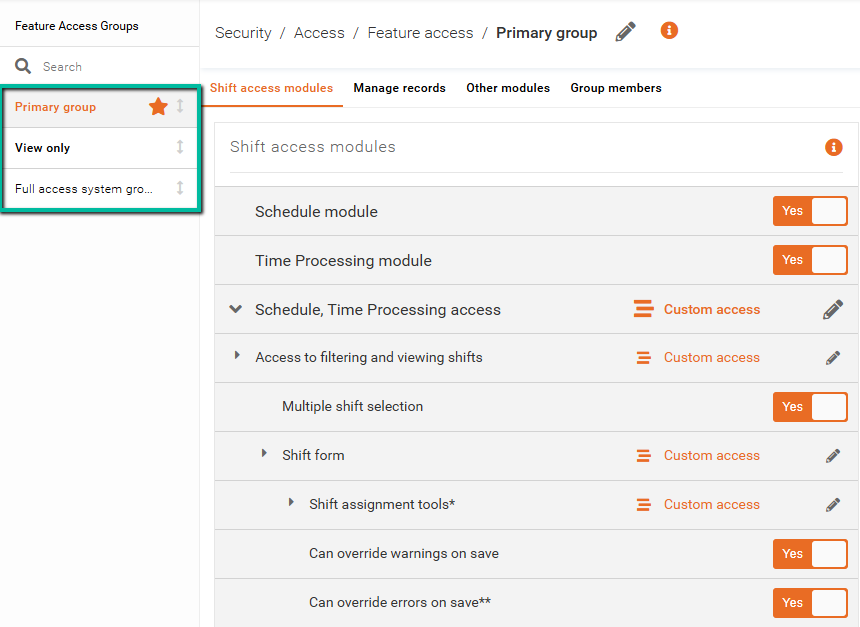
Upon entering Feature Access, you'll see all existing groups under the Feature Access Groups section on the left side.
You can reorder the list of Feature Access Groups by clicking and dragging the double-sided arrow into position.
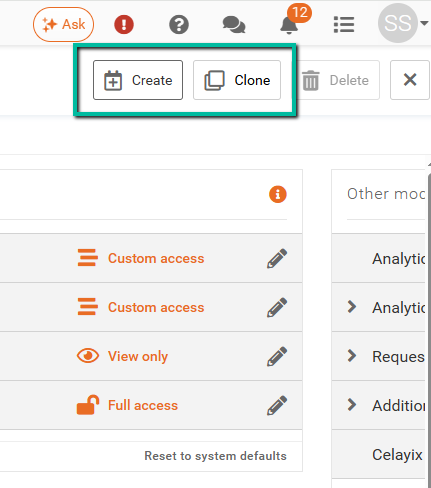
Create or Clone a Feature Access Group
If you want to create a new Feature Access Group, you can either create a new group or clone an existing one.
Typically, cloning is used when you want to make slight adjustments to an existing access group instead of building one from scratch.
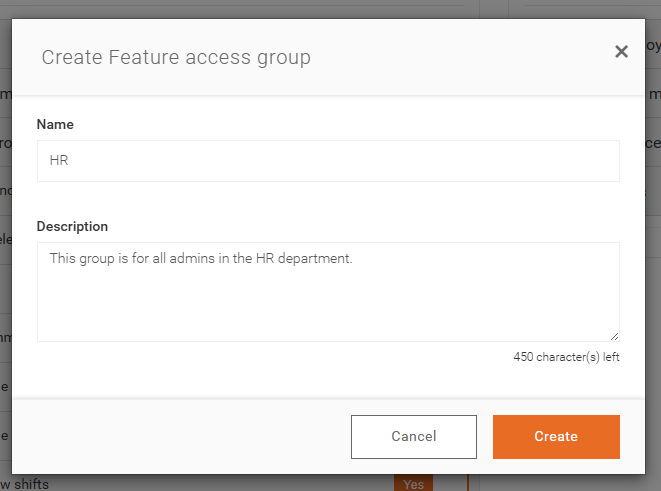
When creating a new group, you'll be prompted to enter:
- A Name
- A Description
If cloning an existing group, you can overwrite the copied name before saving.
Once created, your new group will appear alongside the existing Feature Access Groups, and you can begin configuring access settings.
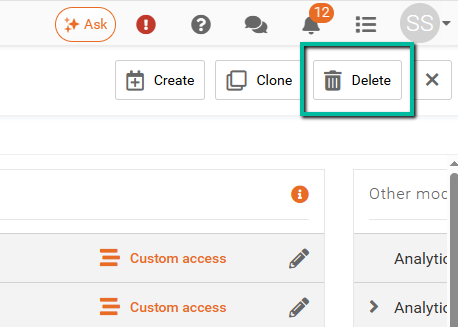
Delete a Feature Access Group
You can delete a Feature Access Group by selecting the group and clicking Delete in the top-right corner.
If you delete a group that has assigned Users, those Users will automatically be moved into the default Feature Access Group.
Note: You cannot delete a default Feature Access Group.
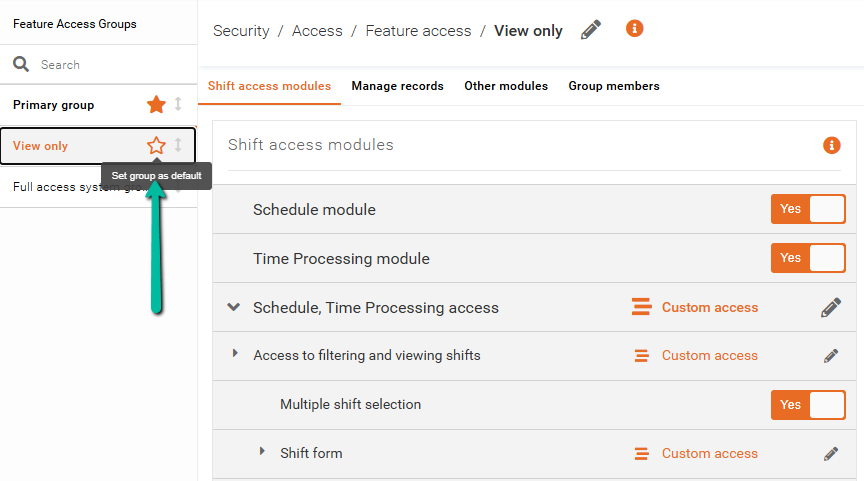
Default a Feature Access Group
You can default a Feature Access Group to ensure that all new Users are automatically assigned to that group unless changed manually.
A default group is identified by an orange star.
Note: Only one group can be defaulted at a time, and default groups cannot be deleted.
To default a group, hover beside the group name and click the star icon.
Feature Access Group Setup
Let's look at how you can define your Feature Access Group.
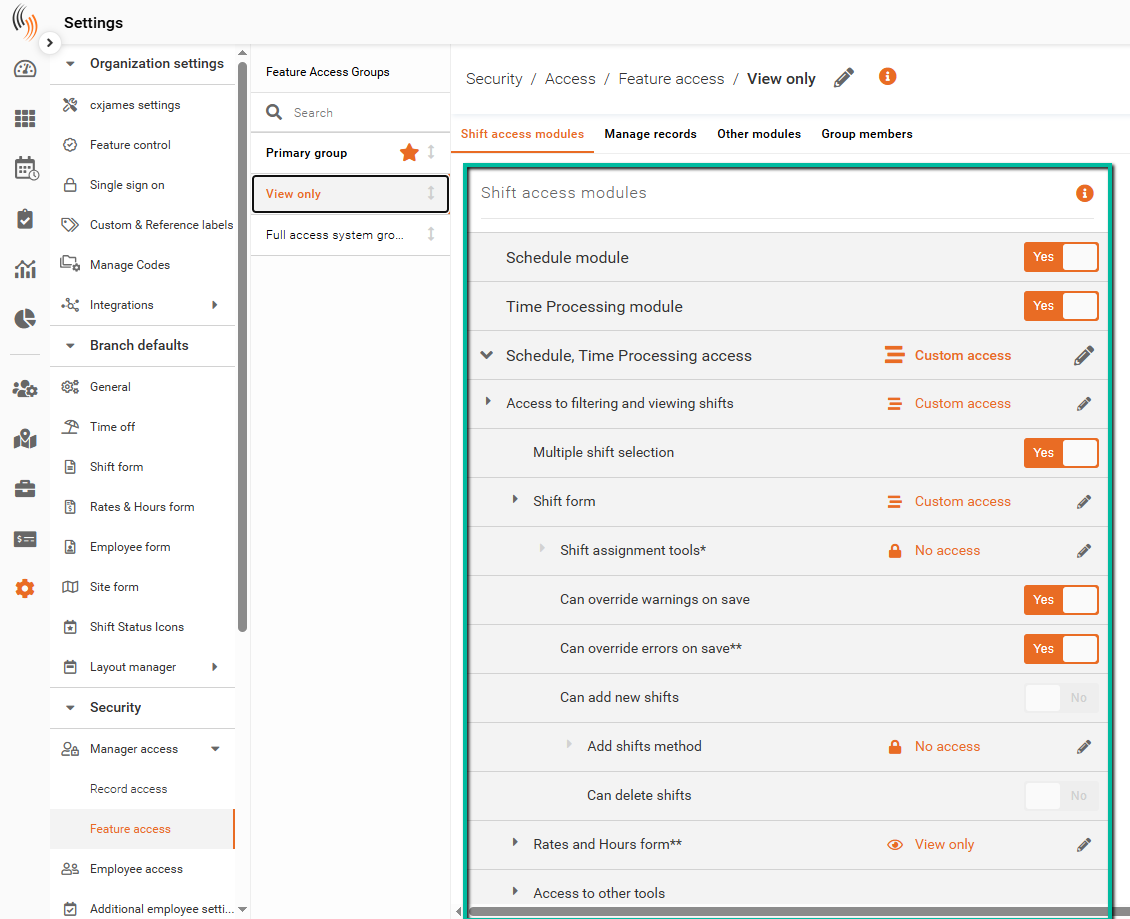
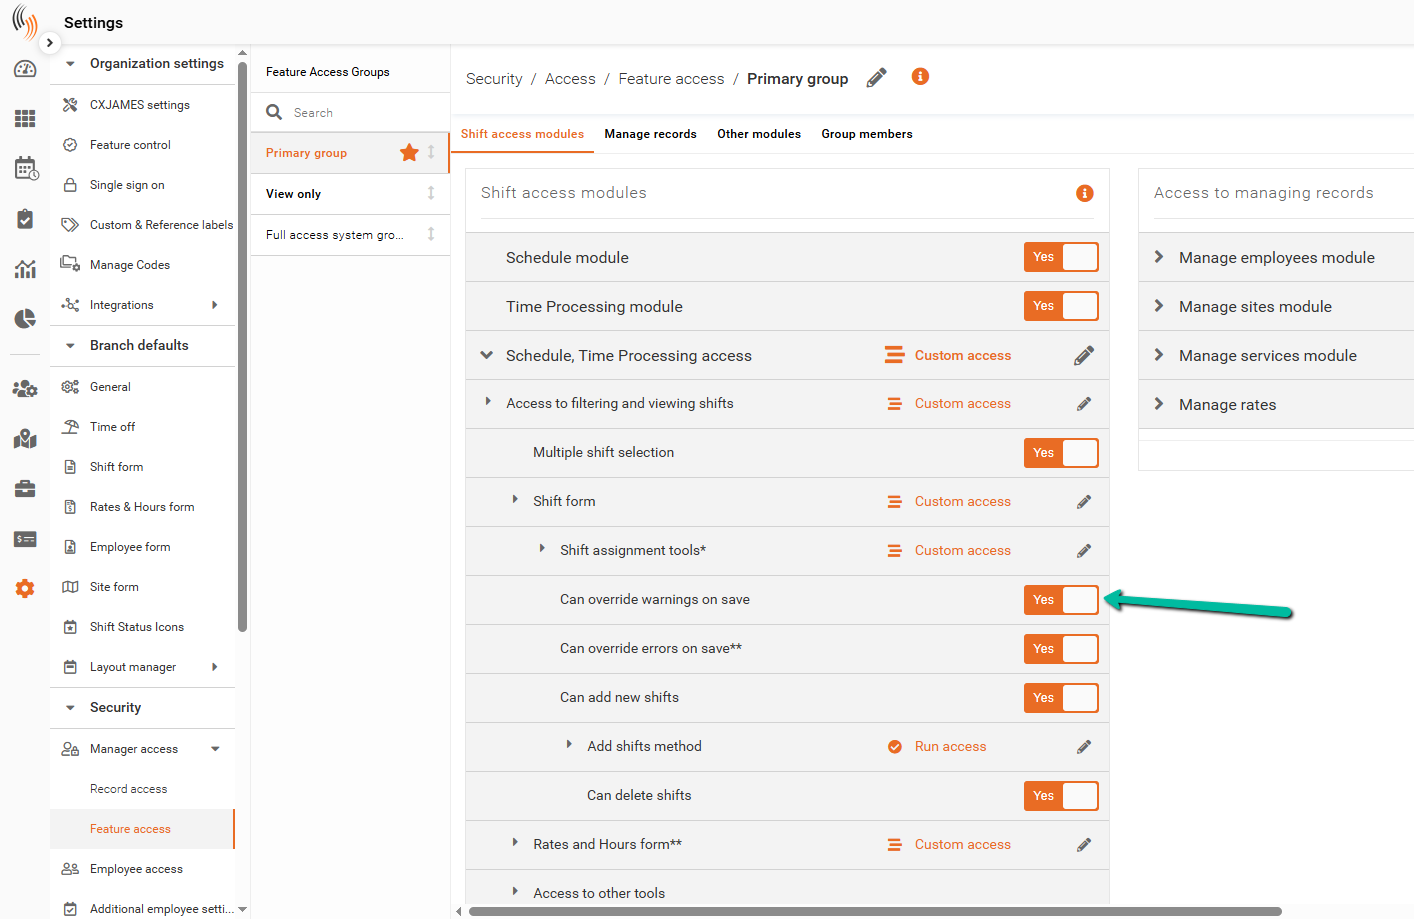
Shift Access Modules
The first section is Shift Access Modules.
This section is used to define access for:
- Scheduling
- Billing
- Payroll
These settings determine what scheduling and workforce management features a User can access.
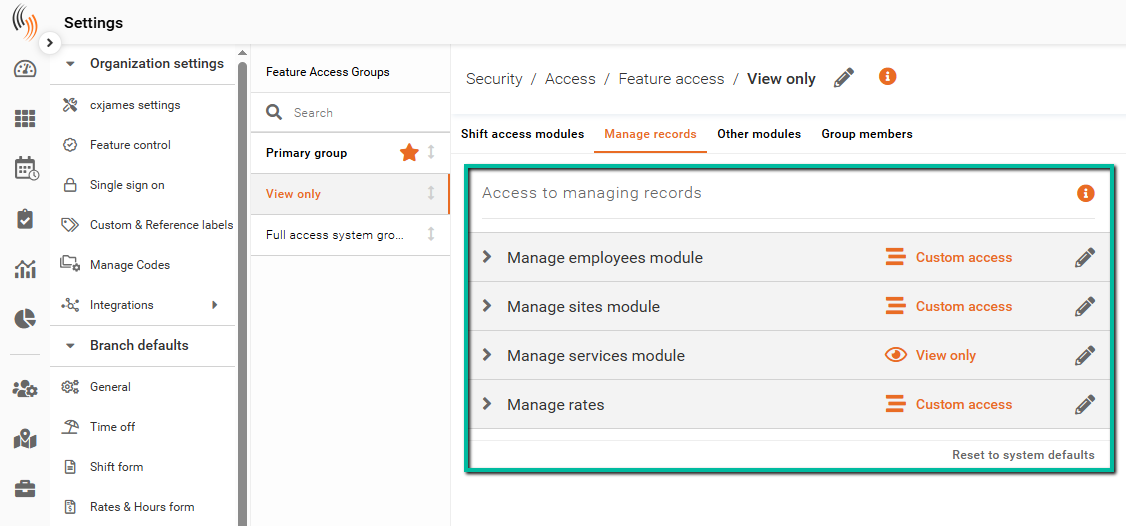
Access to Managing Records
The second section is Access to Managing Records.
This section is used to define access within:
These settings control which management modules a User can access and modify.
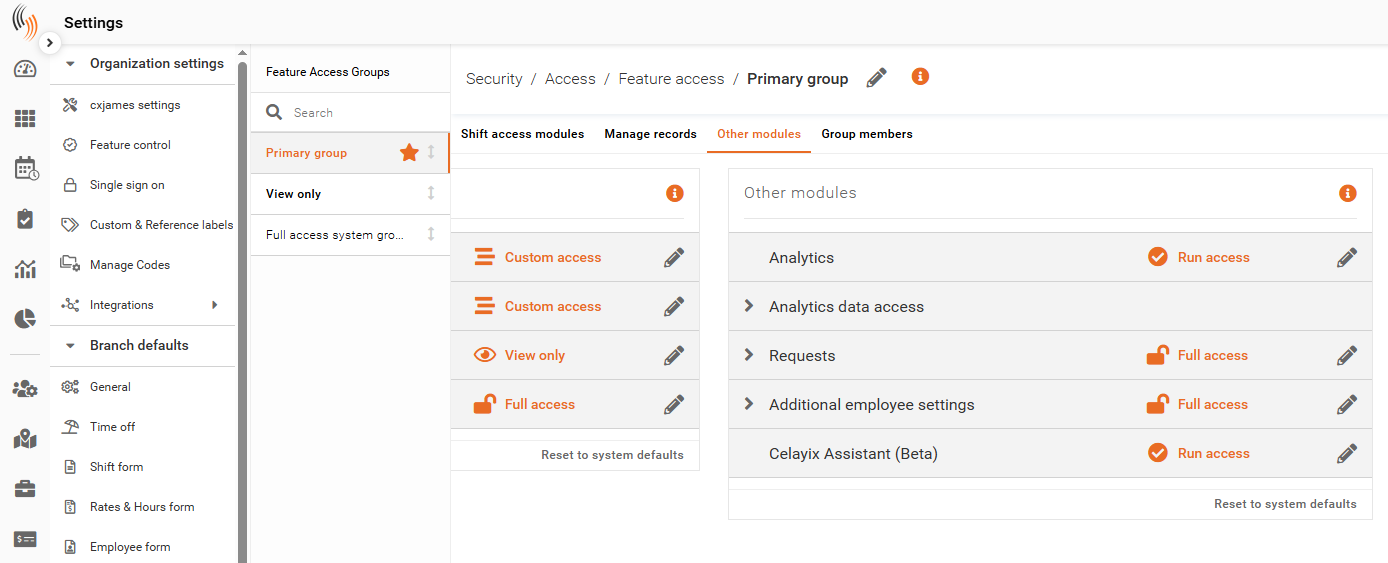
Other Modules
The third section is Other Modules.
This section is used to define access within the Requests module, including:
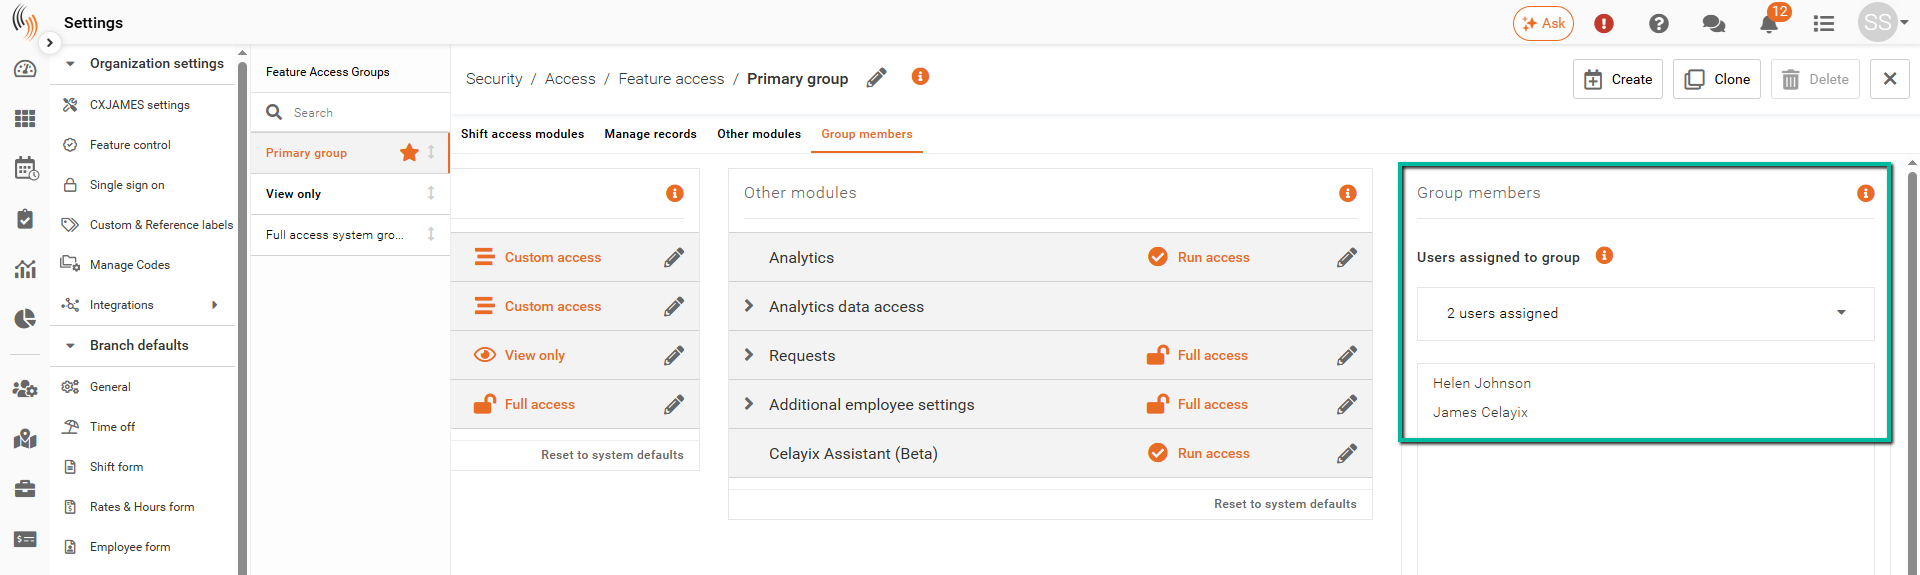
Group Members
The fourth and final section is Group Members.
This section contains all Users currently assigned to the selected Feature Access Group.
Note: A User can only belong to one Feature Access Group.
How to Define Your Feature Access Group
There are different ways to configure the level of access within each Feature Access Group.
Yes/No Toggle
The Yes/No toggle is a high-level setting that determines whether a User has access to a feature.
- Yes allows further configuration of sub-feature access
- No completely removes access to the feature
If a feature is set to No, Users within that group will not be able to access that area of Schedule Xpress.
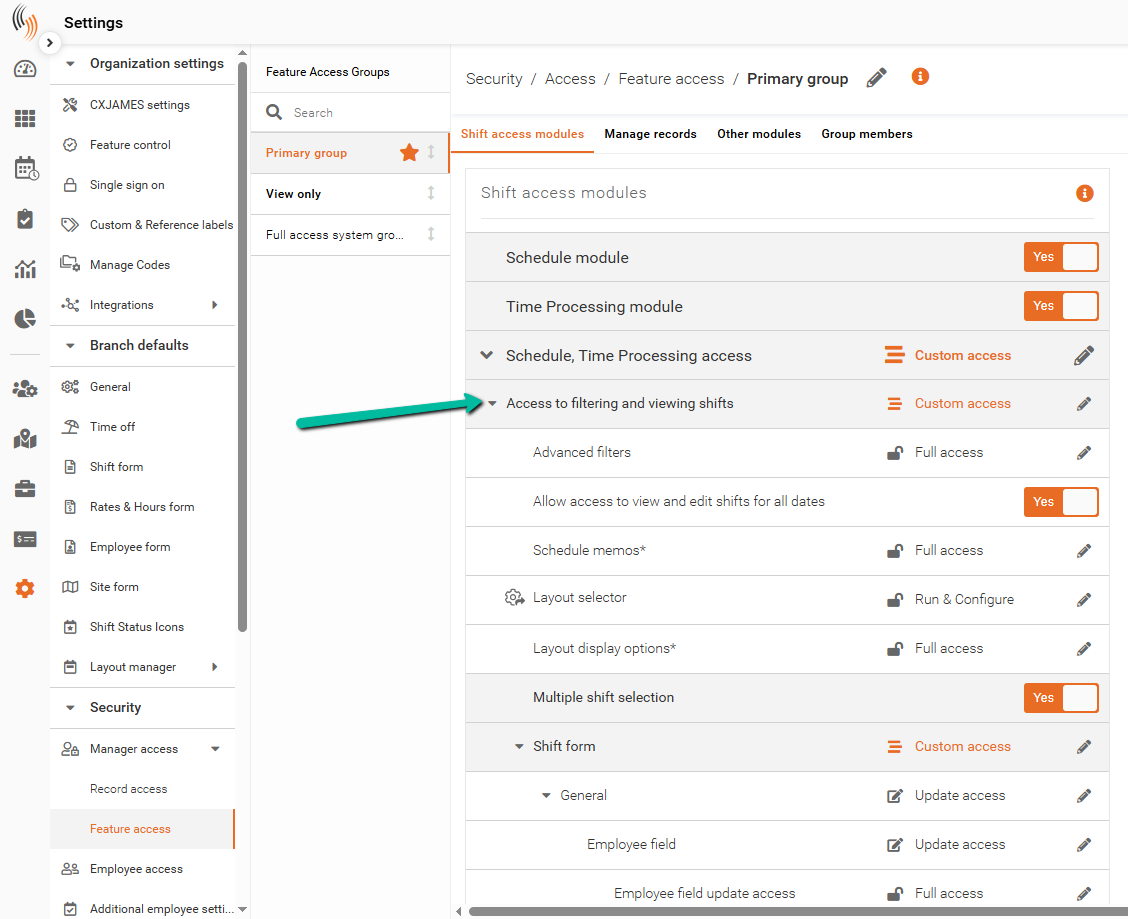
Header/Sub-header Dropdowns
You can expand and collapse headers and sub-header dropdowns to display additional feature settings and permissions.
These dropdowns help organize access settings into manageable sections.
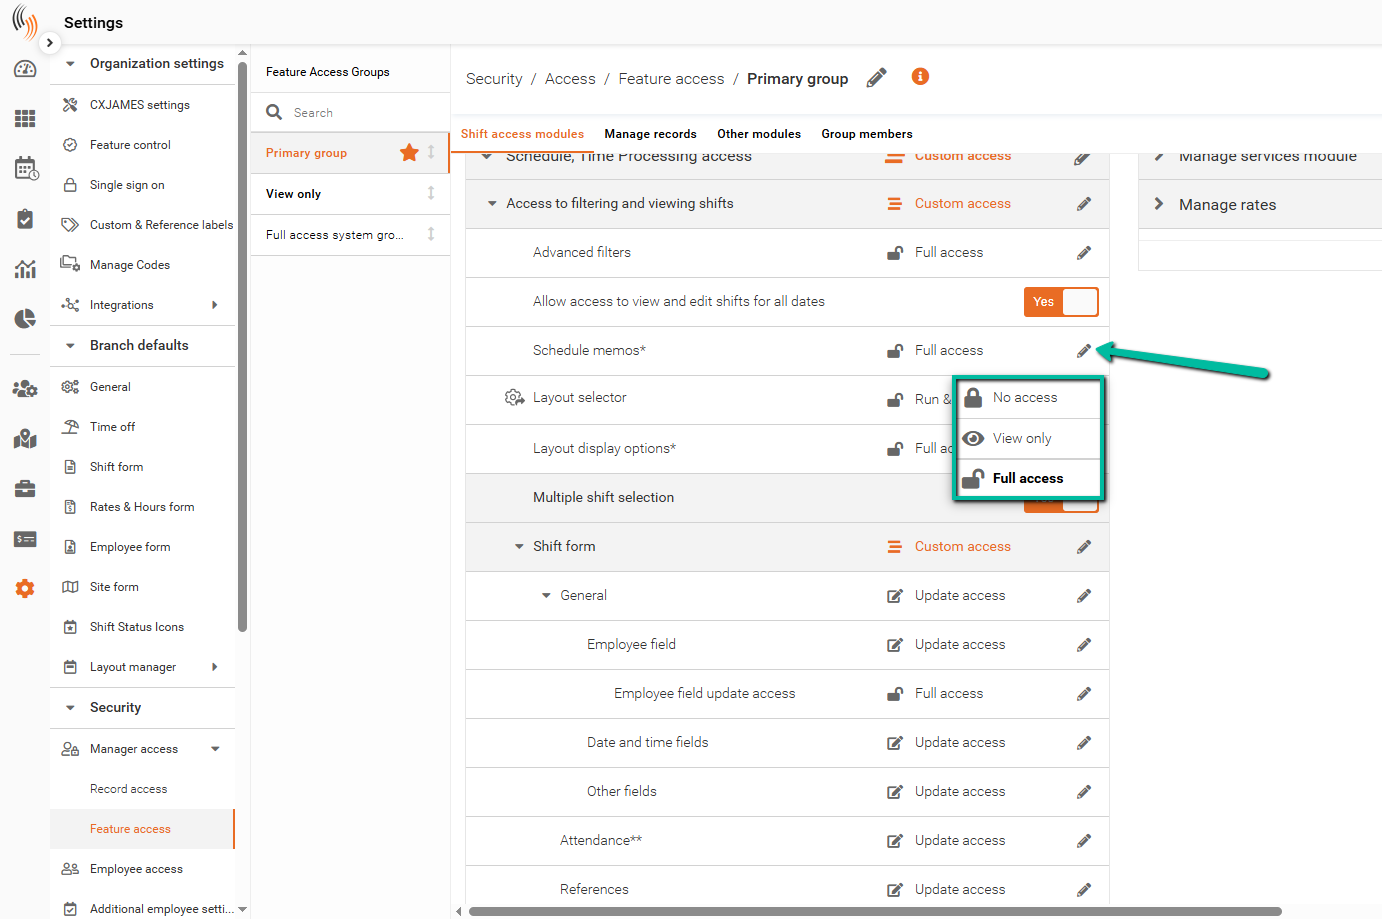
Select Level of Access
If a feature includes a pencil icon, it means you can define the level of access for that feature.
There are five different access levels:
- Full access / Update access – Allows full access to update and manage the feature
- View only – Allows Users to view the feature without making changes
- No access – Removes all access to the feature
- Run access – Allows Users to use the feature without modifying or saving changes
- Run & Configure – Allows Users to use the feature and configure layout filters
Access changes can be made at:
- Header level
- Sub-header level
- Individual feature level
If a change is made at the header or sub-header level, all settings beneath it will automatically inherit the same access level.
Add Users to a Feature Access Group
Users can be assigned to a Feature Access Group either directly within the group or from the User profile under:
Manage people > Administration > User Profile
For more information on assigning access groups to Administrators, refer to the Add Administrators article.