Manage Employee Access Groups
Employee Access Groups let administrators organize employees by role and responsibility, controlling what they can see and do within Team Xpress. Using these groups helps maintain security, streamline workflows, and ensure each team member has the right level of access for their role.
Find Employee Access Groups
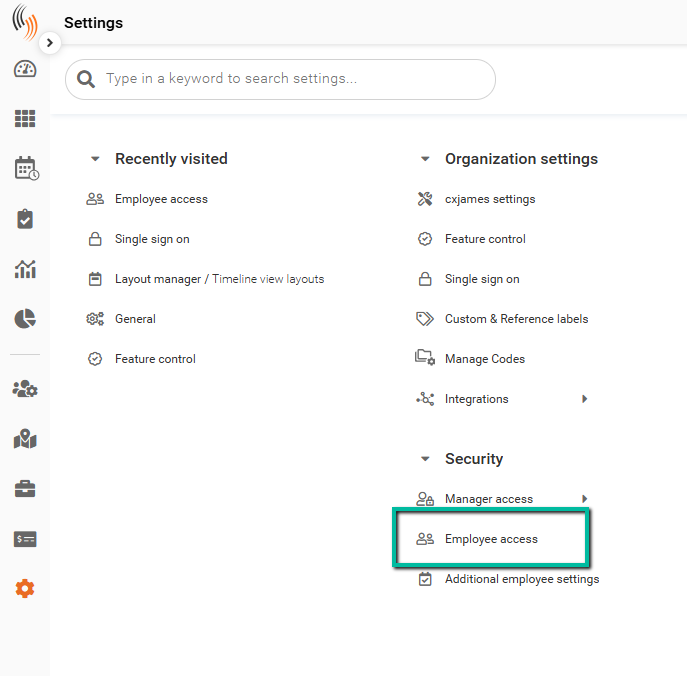
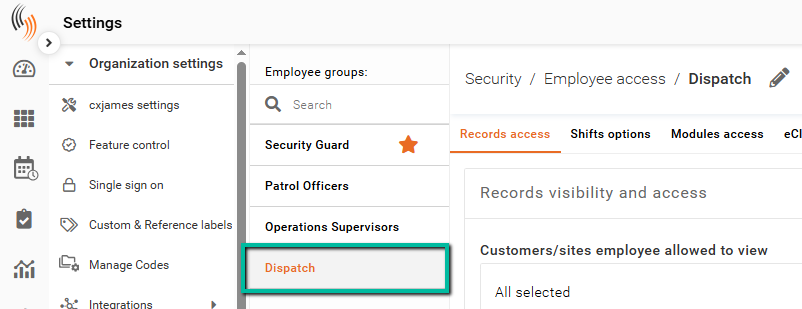
You can find Employee Access Groups in Schedule Xpress under Settings → Security → Employee Access.
Employee Access Group List
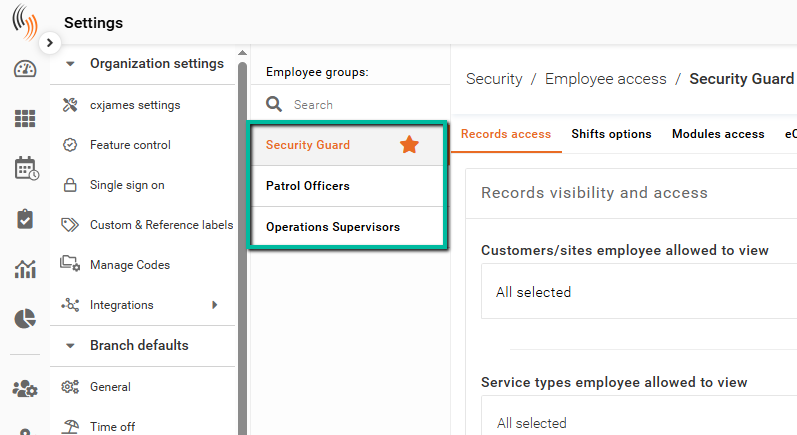
Once inside Employee Access, you can view and manage your Employee Access Groups. They will be listed on the left side.
Tip: To manage access levels in the Team Xpress app, consider creating multiple groups. Assign each group a clear and descriptive name to easily identify and organize your employees.
Default Employee Access Group
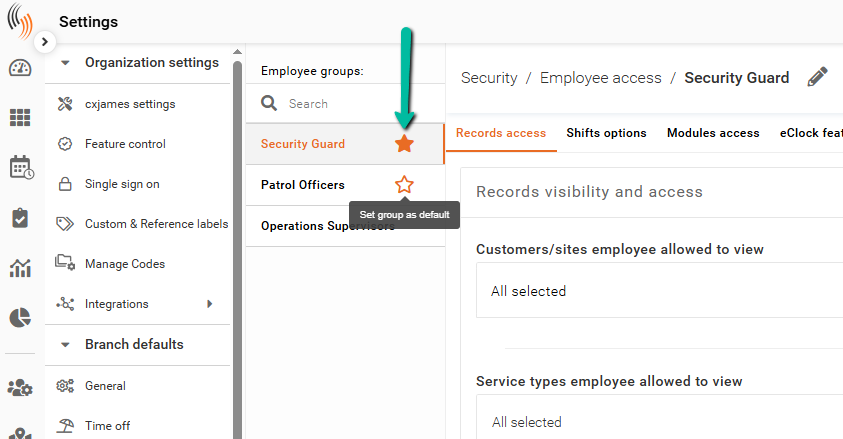
The orange star indicates that the employee access group is set as the default. This means any new employee added to your Celayix platform will automatically be assigned to this group unless you choose otherwise.
To change the default group, simply hover over another access group until the star appears, and then click on it, as shown in the image below.
Create Employee Access Groups
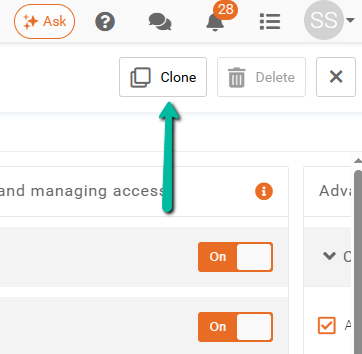
To create a new Employee Access Group, start by cloning an existing one. Choose the group that most closely matches your needs, so you only need to make minor adjustments.
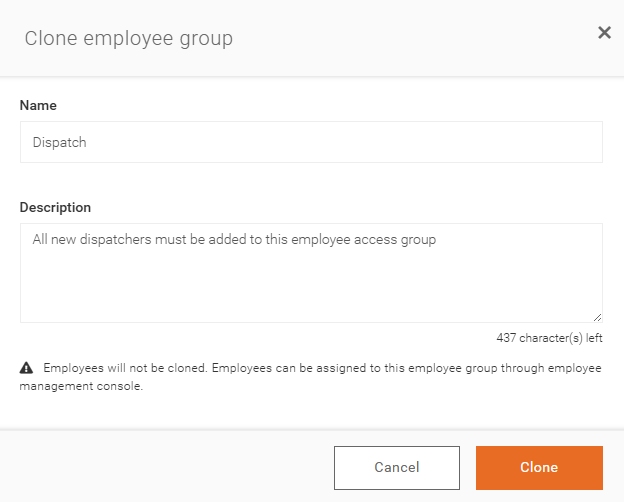
After you press Clone, you’ll be asked to name the new Employee Access Group. You can also add a description to provide more context if you wish.
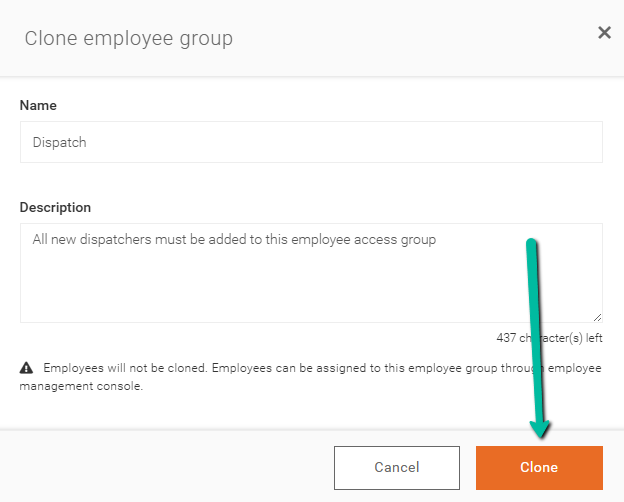
Once you’re satisfied with the new name and description, click Clone to create the Employee Access Group.
The new and cloned Employee Access Group will appear in your list, where you can make any necessary adjustments.
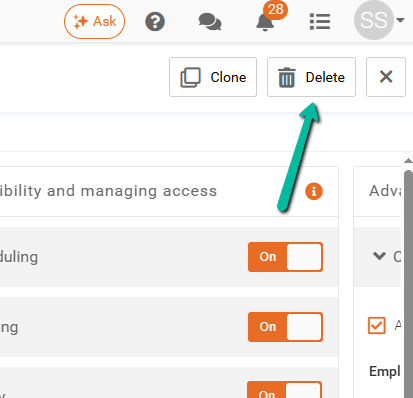
Delete Employee Access Groups
To delete an Employee Access Group, select it from the list and click Delete. Employees in the deleted group will be reassigned to the default access group.
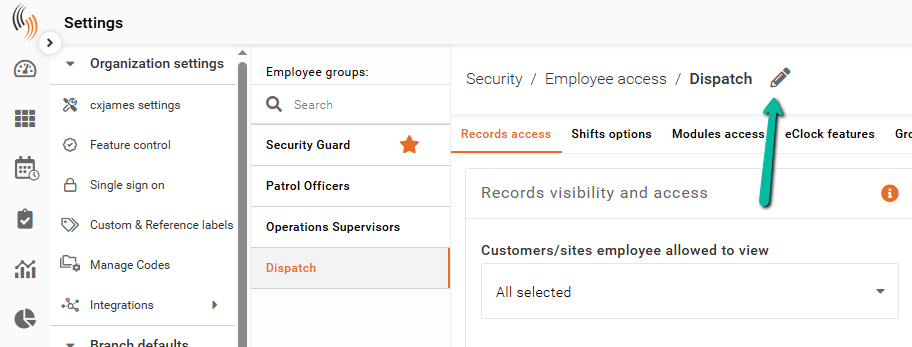
Rename Employee Access Groups
If you need to rename any of your Employee Access Groups, click the pencil icon next to the group name. This lets you edit the Name and Description.
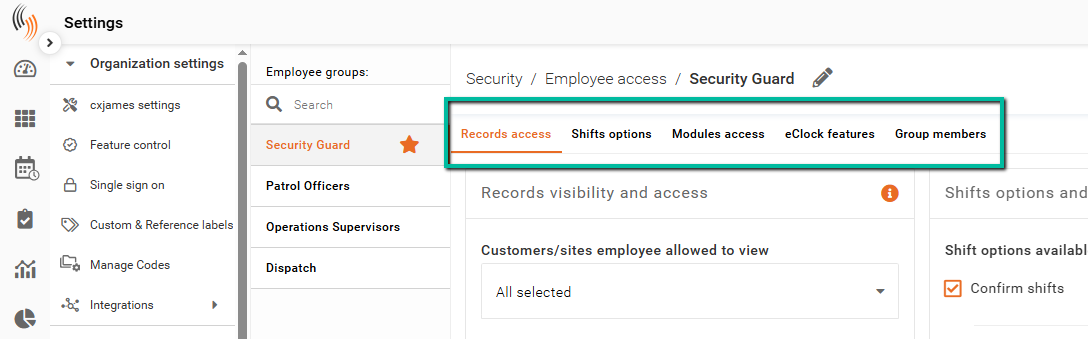
Configure an Employee Access Group
An Employee Access Group is broken down into 5 different sections:
- Records Visibility and Access
- Shifts Options and Field Visibility
- Modules Visibility and Managing Access
- Advanced Check In/Out Options
- Group Members
We'll outline what each section enables you to configure.
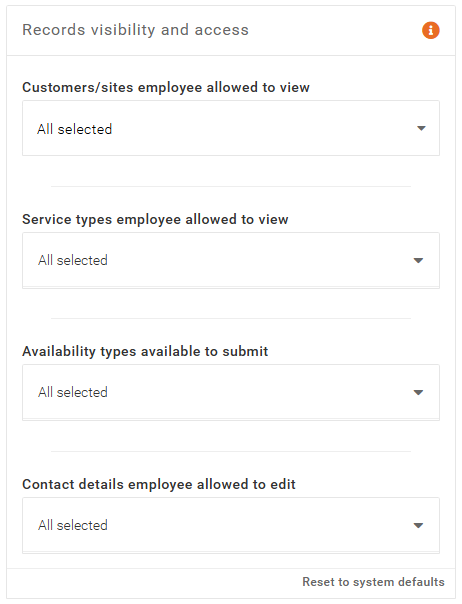
Records Visibility and Access
Records Visibility and Access allows you to control what employees can view and edit within the system.
You can define:
- Which Customers/Sites the employee can view
- Which Services they can access
- Which Availability Types they can see
- Which Personal Contact Details they are allowed to edit
Important: These settings control visibility only and do not prevent an administrator from scheduling an employee onto a shift, even if the employee does not have permission to view the associated Customer/Site or Service; the shift will still be assigned but will not be visible to the employee in their Team Xpress app.
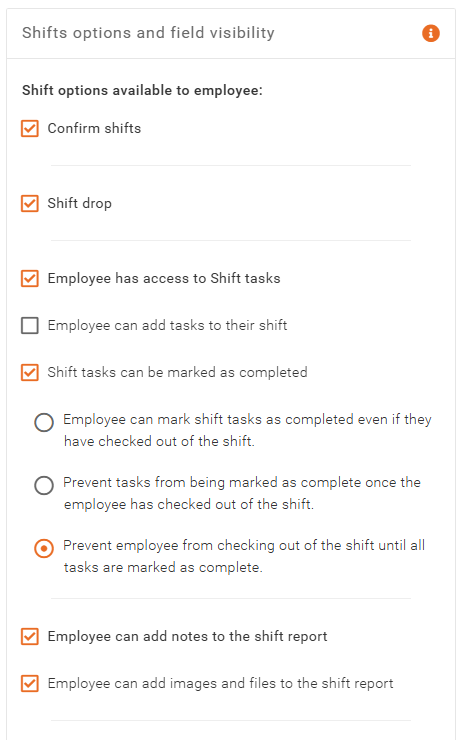
Shifts Options and Field Visibility
Shift Options and Field Visibility allows you to enable and customise shift-related settings and control what employees can see.
You can define whether employees can:
- Confirm Shifts
- Submit Shift Drop requests
- View and complete Shift Tasks
- Add Shift Notes
- Upload or access Images and File Attachments
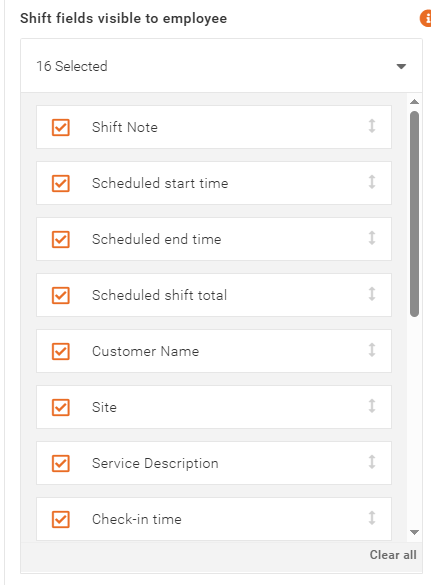
You can also define:
- Which shift fields are visible to the employee in the app
You can customize the shift details that employees view in their Team Xpress app by selecting or deselecting specific fields. You can also rearrange these fields by using the arrow on the right side of each field block.
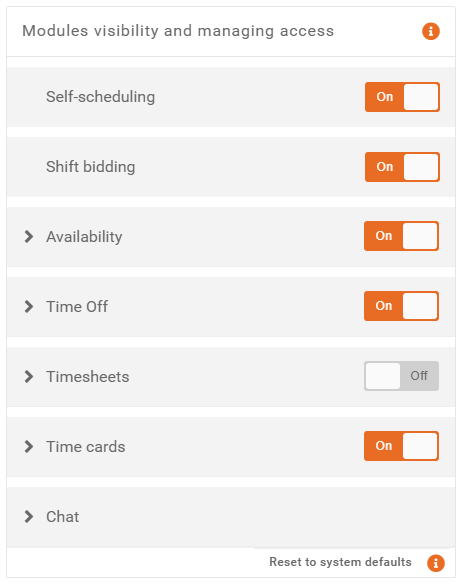
Modules Visibility and Managing Access
Modules Visibility and Managing Access allows you to control which features are available to employees in the Team Xpress app.
You can define whether employees can:
- Access Self-Scheduling – Allow employees to view and manage their own shifts.
- Participate in Shift Bidding – Enable employees to compete for open shifts.
- Submit and Manage Availability – Allow employees to submit general availability or specify preferred customers, sites, and services.
- Request Time Off – Allow employees to request different types of time off, including requests that require approval or can be canceled after approval.
- View and Manage Timesheets – Allow employees to add timesheets for existing shifts or create new ones using default or self-selected customers, sites, and services.
- Access Time Cards – Enable employees to view total worked hours, hour types, and optionally verify accuracy after each shift.
- Use Chat – Allow employees to initiate chats and communicate with colleagues when Chat is enabled.
You can choose whether the employee can submit only general Availability or specify the customers, sites, and services they prefer to work with.
For Time Off, you can specify which types employees can request, including those that need approval and those that can be canceled after approval.
Timesheets can be set up so that employees either add them for existing shifts or create new ones without a pre-established shift. Employees can also be assigned a default customer, site, and service, or have the option to choose their own.
Time Cards can be activated to allow employees to view their total worked hours and types of hours each week. If preferred, they can also have the option to verify the accuracy of this information after each shift.
If your database has the Chat feature enabled, you can choose whether employees are allowed to initiate new chats and communicate with their colleagues.

Advanced check in/out options
Advanced check-in and check-out options allow you to enable or disable features such as check-in/out, safety checks, and break slide bars. When these features are activated, you can configure parameters to control when the slide bars are available and how their times are recorded.
In the next section, we’ll explain the parameters you can adjust for these features.

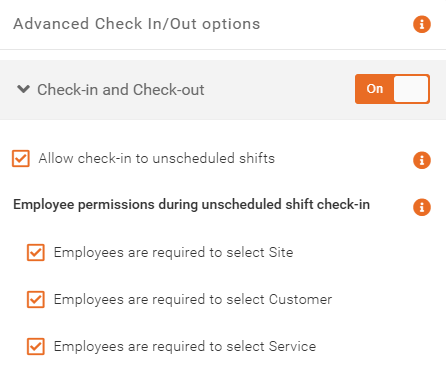
Allow Check-In to Unscheduled Shifts
When Allow Check-In to Unscheduled Shifts is enabled, employees can create and check in to shifts that were not pre-scheduled.
Under Employee Permissions During Unscheduled Shift Check-In, you can require employees to select specific details before starting their shift:
- Site – Employees must choose the site where they are working. If sites are geofenced, employees must be within the defined location to check in.
- Customer – Employees must select the associated customer.
- Service – Employees must select the service they are performing.
Important Note: If employees are not given the option to select a Customer, Site, or Service, Schedule Xpress will use the corresponding default values from the Settings tab of their employee profile. For example, if employees can select a Customer and Site, but not a Service, the system will use the Default Service configured in the employee profile.
Allow check-in to multiple shifts simultaneously
Enabling this option allows employees to check in to more than one shift at the same time. This feature should only be used if your organization permits employees to receive pay for overlapping shifts (e.g., double pay).
By default, employees are restricted to checking in to one shift at a time.
Ignore Yesterday
Ignore Yesterday restricts employees to checking in or out of a shift only on the same day the shift occurs.
This feature is typically used by organizations that do not schedule overnight shifts, as it helps prevent employees from accidentally checking in to or out of shifts from the previous day and keeps time records accurate.

Enable Check-Out Time Limits
To control when the Check-In and Check-Out sliders appear in Team Xpress, enable Check-Out Time Limits. Once enabled, you can configure the available check-in and check-out windows to meet your operational requirements.
Check-In Settings for Scheduled Shifts
Check-In Settings for Scheduled Shifts allow you to define:
- When the Check-In slider becomes available before the scheduled shift start.
- How long the Check-In slider remains available after the scheduled shift start if the employee is late.
- Whether early check-ins are recorded as Scheduled Time, Actual Time, or Rounded Time.
- Whether late check-ins are recorded as Scheduled Time, Actual Time, or Rounded Time.
For example, you may configure the Check-In slider to become available 1 hour before the scheduled shift start and remain available for 2 hours after the scheduled start time. Employees who check in early can be paid based on Scheduled Time, while employees who check in late can be paid based on Actual Time.
If an employee attempts to check in outside of the configured time limits, the Check-In slider will not be available.

Check-Out Settings for Scheduled Shifts
Check-Out Settings for Scheduled Shifts allow you to define:
- When the Check-Out slider becomes available before the scheduled shift end.
- How long the Check-Out slider remains available after the scheduled shift end if the employee is late checking out.
- Whether early check-outs are recorded as Scheduled Time, Actual Time, or Rounded Time.
- Whether late check-outs are recorded as Scheduled Time, Actual Time, or Rounded Time.
For example, you may configure the Check-Out slider to become available 2 hours before the scheduled shift end and remain available for 30 minutes after the scheduled end time. Employees who check out early can be paid based on Actual Time, while employees who check out late can be paid based on Scheduled Time.
If an employee attempts to check out outside of the configured time limits, the Check-Out slider will not be available.

Safety Checks
Safety Checks are typically used to support employee well-being and confirm that staff remain safe and active throughout their shift, particularly when working alone, in remote locations, or in higher-risk environments.
For Safety Checks, you can define how frequently employees are required to check in by configuring a check interval. For example, if a 1-hour interval is selected, employees in the group will be required to complete a Safety Check every hour using the slide bar.
You can also define how Safety Check times are recorded:
- Actual Time – Records the exact time the safety check is completed.
- Rounded Time – Records the safety check time using a rounding rule.
If Rounded Time is selected, you can choose to round to the nearest:
- 5 minutes
- 10 minutes
- 15 minutes
- 30 minutes
This helps organizations maintain regular employee check-ins while supporting operational and safety requirements.

Record Break
For Record Break, you can choose how break times are recorded when employees use the Team Xpress app to slide in and out of their breaks.
Break times can be recorded as:
- Actual Time – Records the exact time the break starts and ends.
- Rounded Time – Records break times using a rounding rule.
If Rounded Time is selected, you can choose to round to the nearest:
- 5 minutes
- 10 minutes
- 15 minutes
- 30 minutes
This provides flexibility in how break times are tracked and calculated for payroll purposes.
Important Note: Whether breaks are deducted from shifts depends on your system configuration. If you are unsure how your system is configured, please contact Celayix Support for assistance.

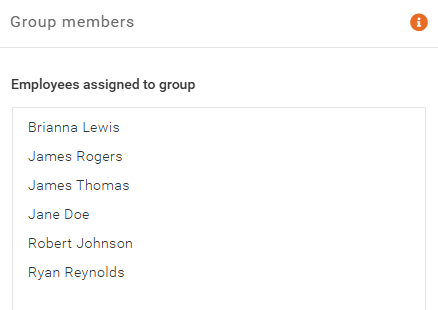
Group members
The Group Members section displays all employees currently assigned to the selected Employee Access Group.
By default, employees are assigned to the default Employee Access Group. Employee group assignments can be updated from the Accounts section of the employee profile under Manage People.