Self-Scheduling Setup
Self-Scheduling Options in eTime Xpress allow administrators to control how employees search for, view, and request available shifts. These settings define shift eligibility rules, apply scheduling validations, and determine how shifts are presented within the self-scheduling interface.
By configuring options such as General Settings, Validations, Search Filters, Shift Grouping, Display, and Sort, organizations can ensure employees only see and request appropriate shifts while maintaining scheduling accuracy, consistency, and operational control.
Access Self-Scheduling Options
To configure self-scheduling, go to:
eTime Xpress → Visual Scheduler → File → Self-Scheduling Options
Understand Self-Scheduling Setup Sections
Self-Scheduling Options are organized into the following sections:
- General – Controls how shift requests are submitted.
- Save Options (Validations) – Defines which scheduling rules are enforced.
- Search Filters – Controls how employees search for available shifts.
- Shift Grouping – Groups identical shifts into a single listing.
- Display – Controls which shift details are visible.
- Sort – Determines the order in which shifts are displayed.
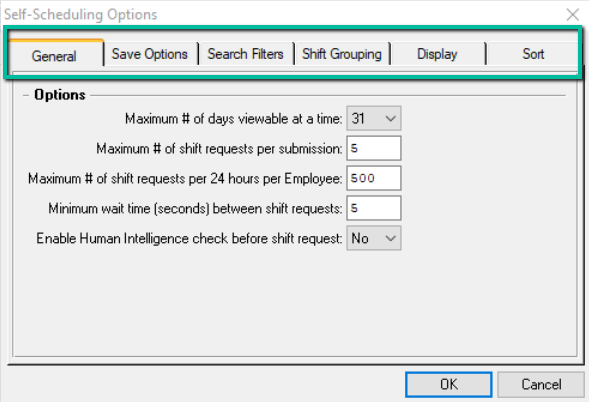
General
Use the General tab to control how employees submit shift requests.
You can configure:
- Maximum Number of Days Viewable at a Time – Defines how many days into the future employees can view available shifts. This can be increased if broader visibility is needed.
- Maximum Number of Shift Requests per Submission – Limits how many shifts an employee can request at once in a single submission.
- Maximum Number of Shift Requests per 24 Hours per Employee – Restricts how many shift requests an employee can make within a 24-hour period.
- Minimum Wait Time Between Requests – Sets the required time (in seconds) an employee must wait before submitting another request.
- Human Verification Before Submitting a Request – Requires employees to complete a verification step, such as a CAPTCHA, before submitting a shift request.
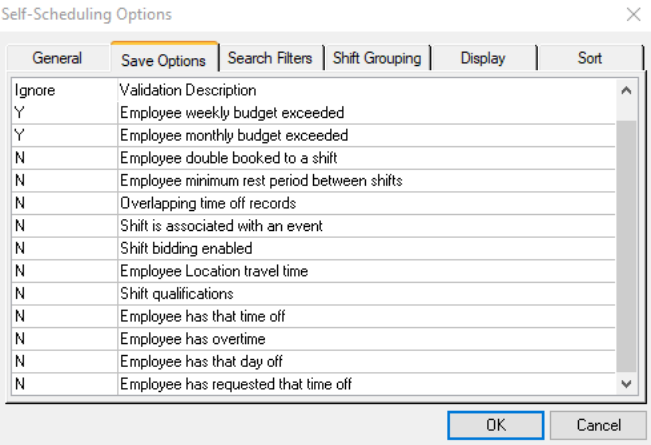
Validations (Save Options)
Use the Save Options tab to control which validations are enforced during self-scheduling.
- Double-click Yes (Y) to ignore a validation.
- Double-click No (N) to enforce a validation.
Available validations include:
- Employee Daily Budget Exceeded
- Employee Weekly Budget Exceeded
- Employee Monthly Budget Exceeded
- Employee Double Booked to a Shift
- Employee Minimum Rest Period Between Shifts
- Overlapping Time-Off Records
- Shift Is Associated with an Event
- Shift Bidding Enabled
- Employee Location Travel Time
- Shift Qualifications
- Employee Has That Time Off
- Employee Has Overtime
- Employee Has That Day Off
- Employee Has Requested That Time Off
For example, setting Shift Qualifications to No (N) ensures employees can only view and request shifts they are qualified to perform. Setting it to Yes (Y) allows employees to request shifts regardless of qualifications.
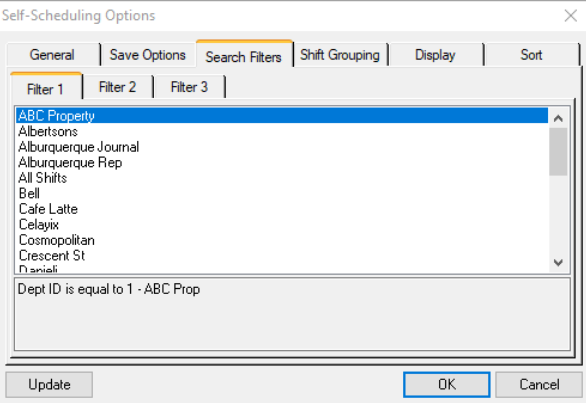
Search Filters
Use the Search Filters tab to define which shifts employees can view.
- Customer – Allows employees to filter shifts by customer.
- All Available Shifts – Displays all shifts available to the employee.
Configured filters appear as selectable options within Team Xpress.
Note: If you are unsure how to configure Search Filters, please contact Celayix Support.
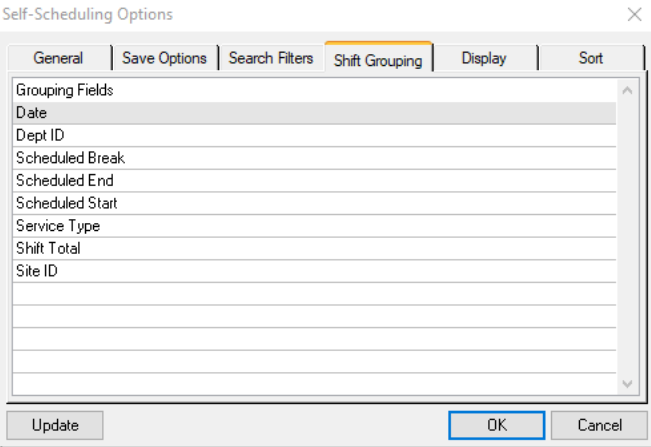
Shift Grouping
Use the Shift Grouping tab to group identical shifts together.
- Groups shifts with matching details into a single listing.
- Reduces duplicate shift entries.
- Simplifies the employee self-scheduling experience.
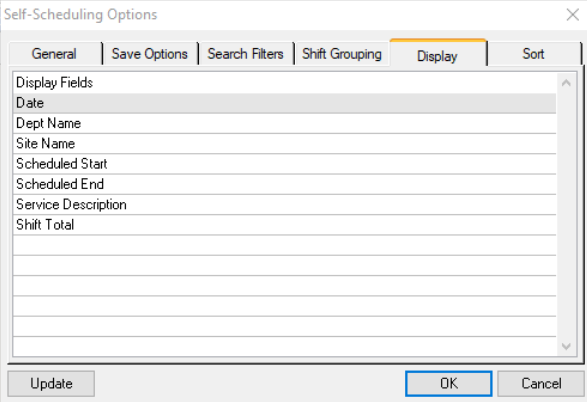
Display
Use the Display tab to control which shift details are visible to employees when viewing available shifts.
- Configure which shift fields are displayed.
- Control the amount of information employees can view before requesting a shift.
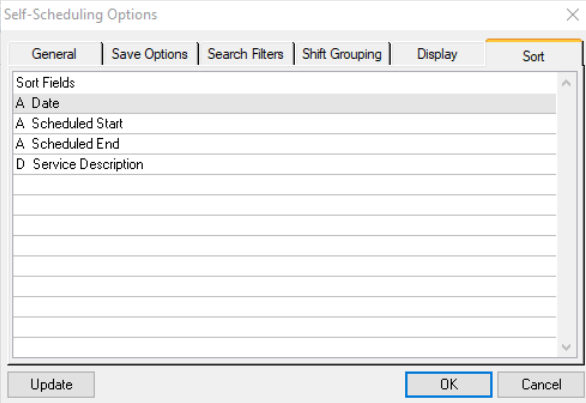
Sort
Use the Sort tab to determine the order in which available shifts are displayed.
- Ascending (A) – Displays values from lowest to highest or earliest to latest.
- Descending (D) – Displays values from highest to lowest or latest to earliest.
For example, if Date is selected as the primary sort field in Ascending order, shifts will display with the earliest date first. If multiple shifts occur on the same date, the next configured sort field, such as Scheduled Start Time, will be used.