Shift Colors
Shift Colors help you quickly identify and organize scheduled shifts at a glance. By applying color-coding based on site, service, or state, you can make your schedule easier to read and manage.
Using Shift Colors ensures consistency across your schedule without requiring manual updates. This makes it easier to distinguish between different types of shifts and improves visibility for all users.
Set Shift Colors By
Shift colors can be set in the following ways:
- By Site: Assign colors to shifts based on the site where they occur, making it easy to distinguish shifts across multiple locations.
- By Service: Apply colors based on the service assigned to a shift to quickly identify different types of work on the schedule.
- By State: Set colors according to a shift’s state (such as scheduled, published, or unfilled) to easily track shift status and priority.
Select Site Colors
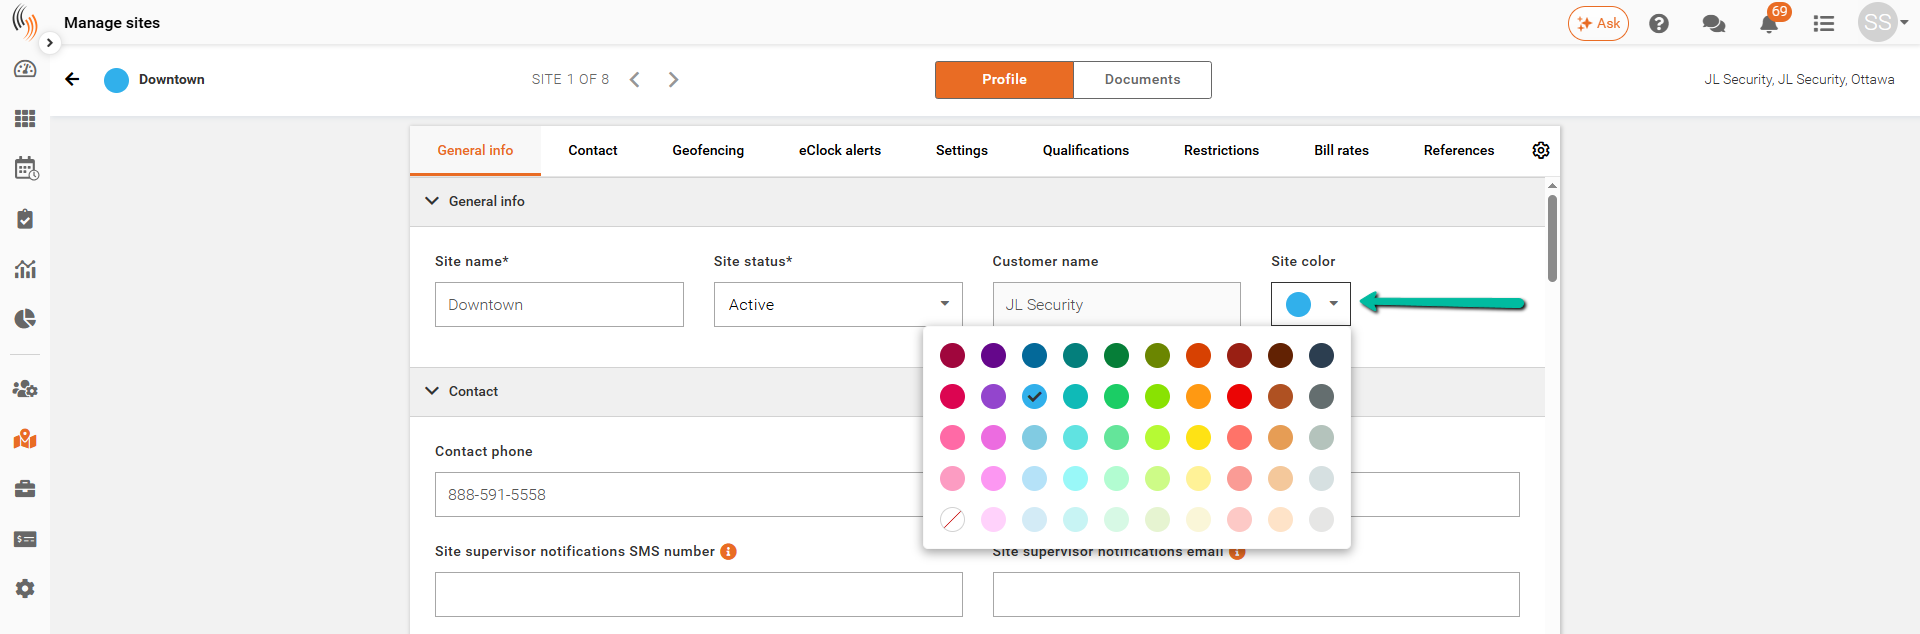
You can assign Site Colors for any of your sites using the Manage Sites interface. To choose a color, go to the General Info section and select a color from the Site Color dropdown menu.
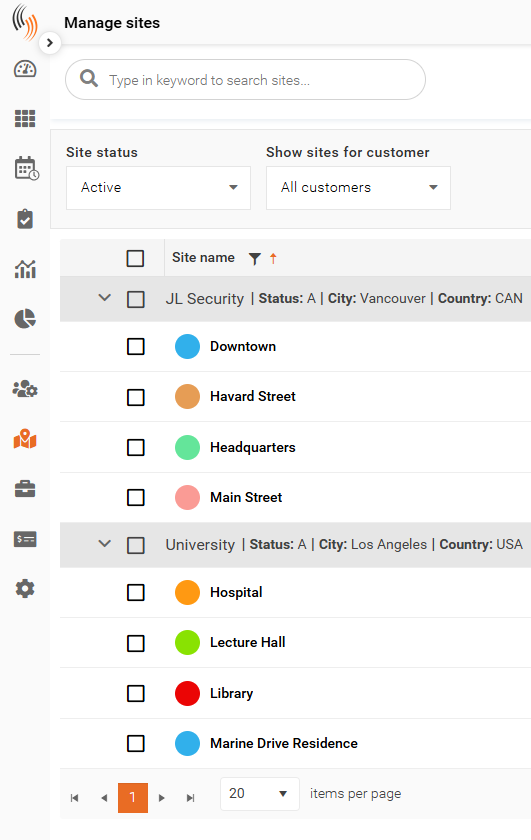
Site Colors are shown to the left of their site names in Manage Sites, making it easy to identify each site at a glance.
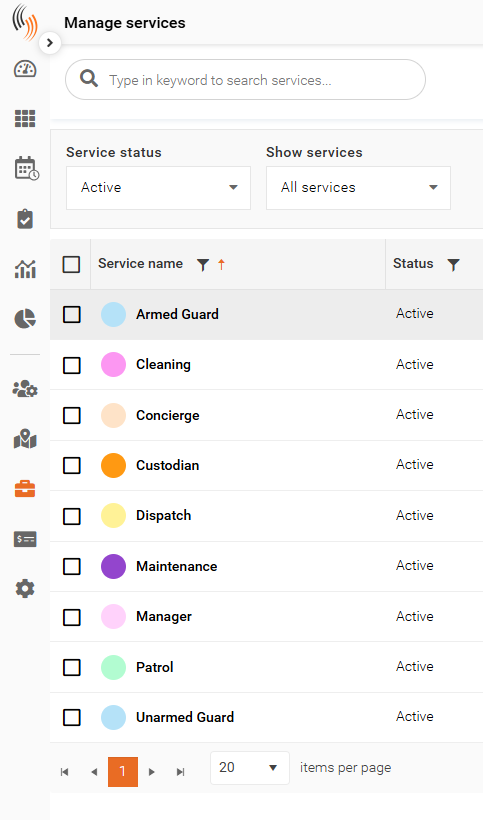
Select Service Colors
To choose service colors, go to Manage Services and pick the service you want to update. In the General Info section, you'll see a Service Color dropdown menu where you can select a color from the palette.
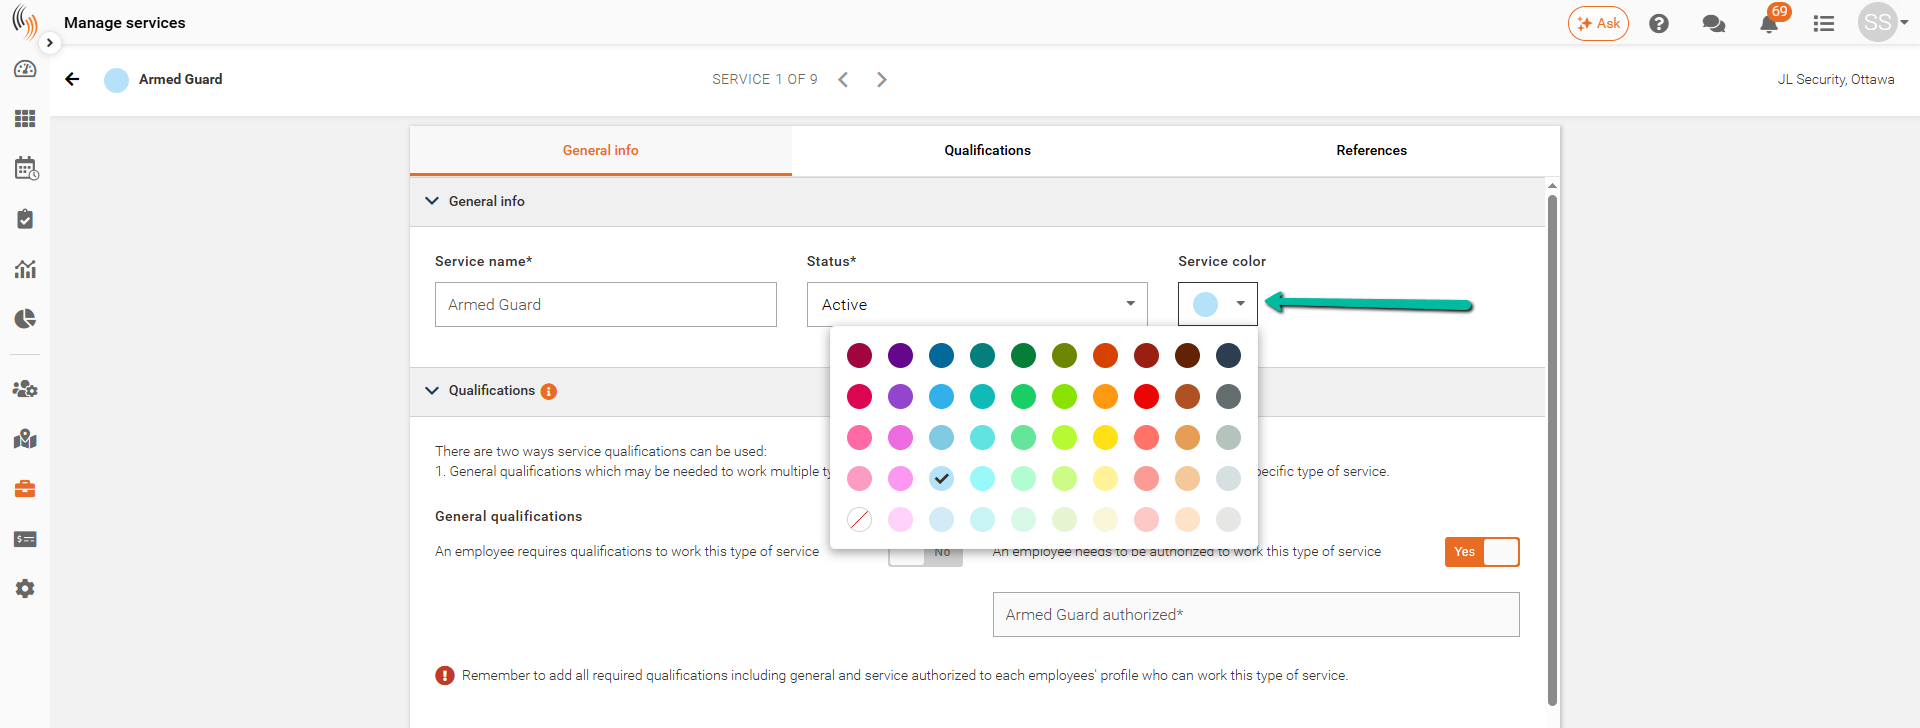
Service Colors are shown to the left of the service names in the Manage Services section.
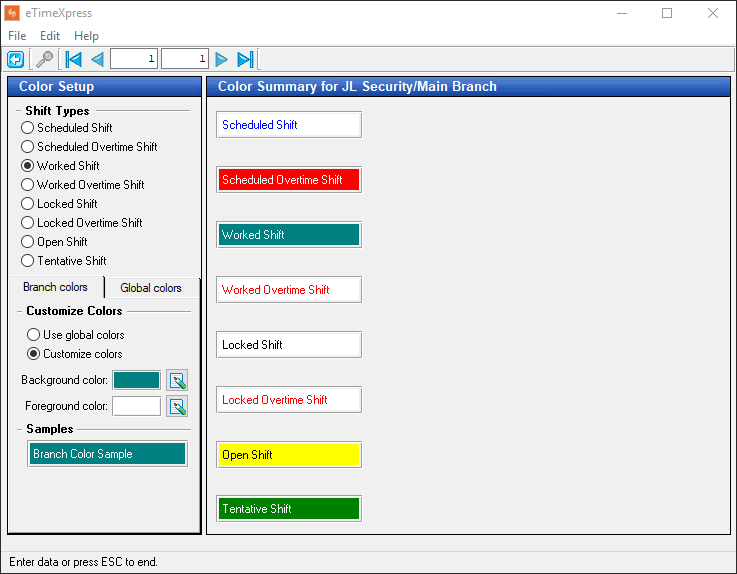
Select State colors
State Colors are managed exclusively within eTime Xpress. To access and configure these settings, navigate to Configuration → Company/Branch → Branch → Branch Colors.
Within this section, you can assign custom background and foreground colors to shifts based on their current state. This color-coding helps visually distinguish between different shift statuses, improving schedule visibility and workforce management.
The following shift states can be configured:
- Scheduled Shift
- Scheduled Overtime Shift
- Worked Shift
- Worked Overtime Shift
- Locked Shift
- Locked Overtime Shift
- Open Shift
- Tentative Shift
Schedule Color Display Settings
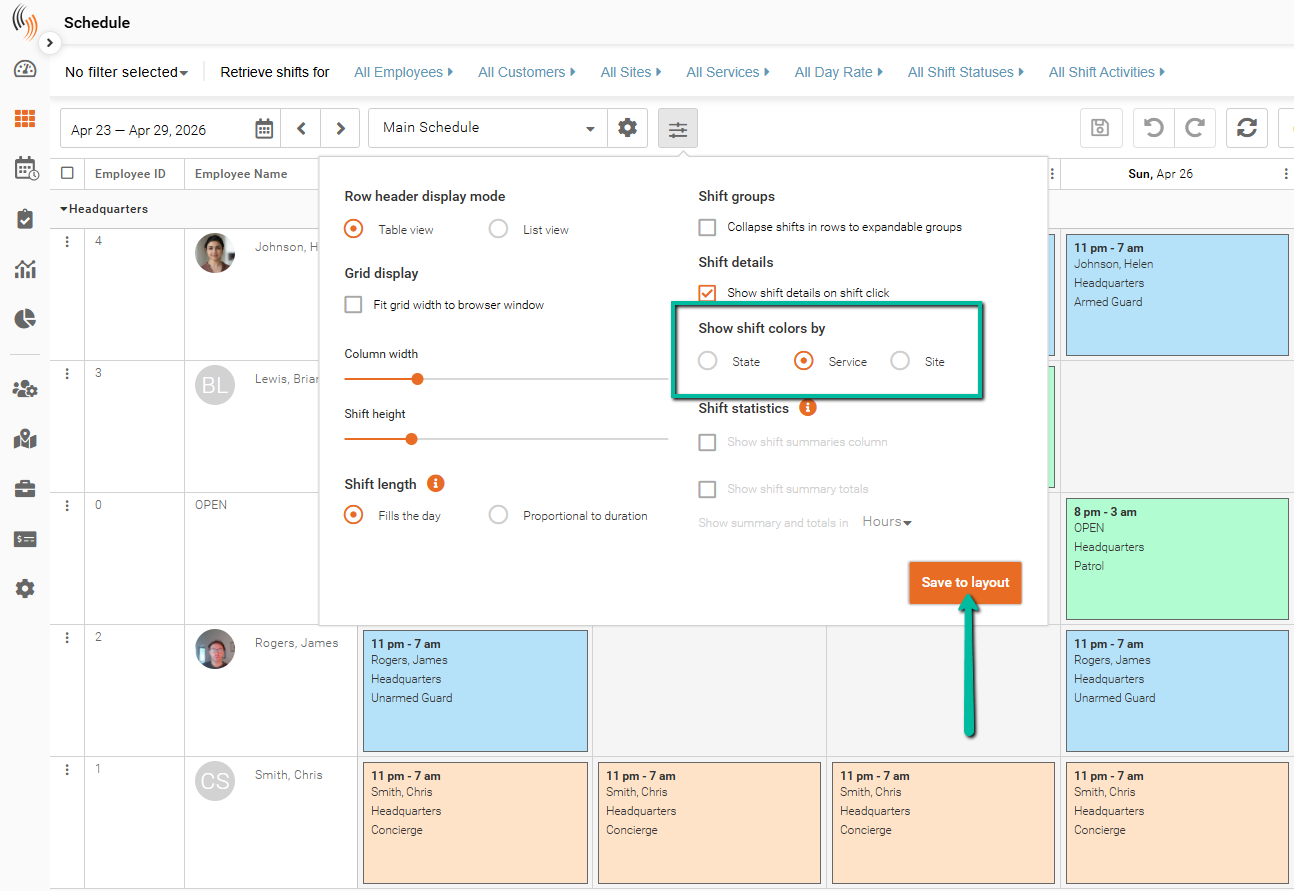
To customize your Schedule Colors, go to the Selected Layout Display Options in your Schedule.
You can customize your Shift Color display by selecting your preferred option in the Show Shift Colors By section. Choose from:
- State Colors
- Site Colors
- Service Colors
To save your selection, click Save to Layout.
Important: The Save to Layout option is available only when using custom-created filters. Celayix default filters (marked with *) allow temporary color changes that will automatically revert to the original State Colors.