Manage Employee Check-In and Check-Out (Desktop)
The Check-In and Check-Out feature in Time Processing allows administrators to record and manage employee worked times for scheduled shifts. Admins can quickly apply scheduled start and end times using the Add In and Out Times option or manually adjust times when employees work outside their scheduled hours. This ensures accurate time tracking before reviewing and approving payroll.
Access Time Processing
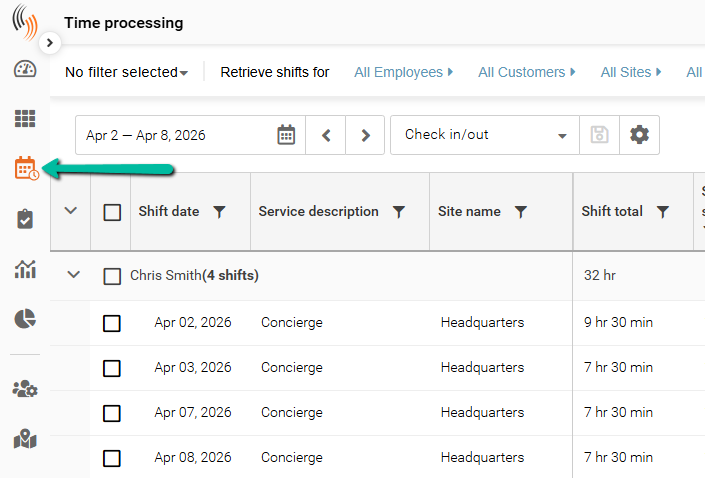
To manage employee check-in and check-out times, begin by navigating to Time Processing.
- Open Schedule Xpress
- Select Time Processing
- Choose or build a filter that includes Check-In Time and Check-Out Time fields
- Set your desired date range and apply the filter
Find Specific Records
Before managing check-in and check-out times, you can use filters in Time Processing to quickly locate the records you need.
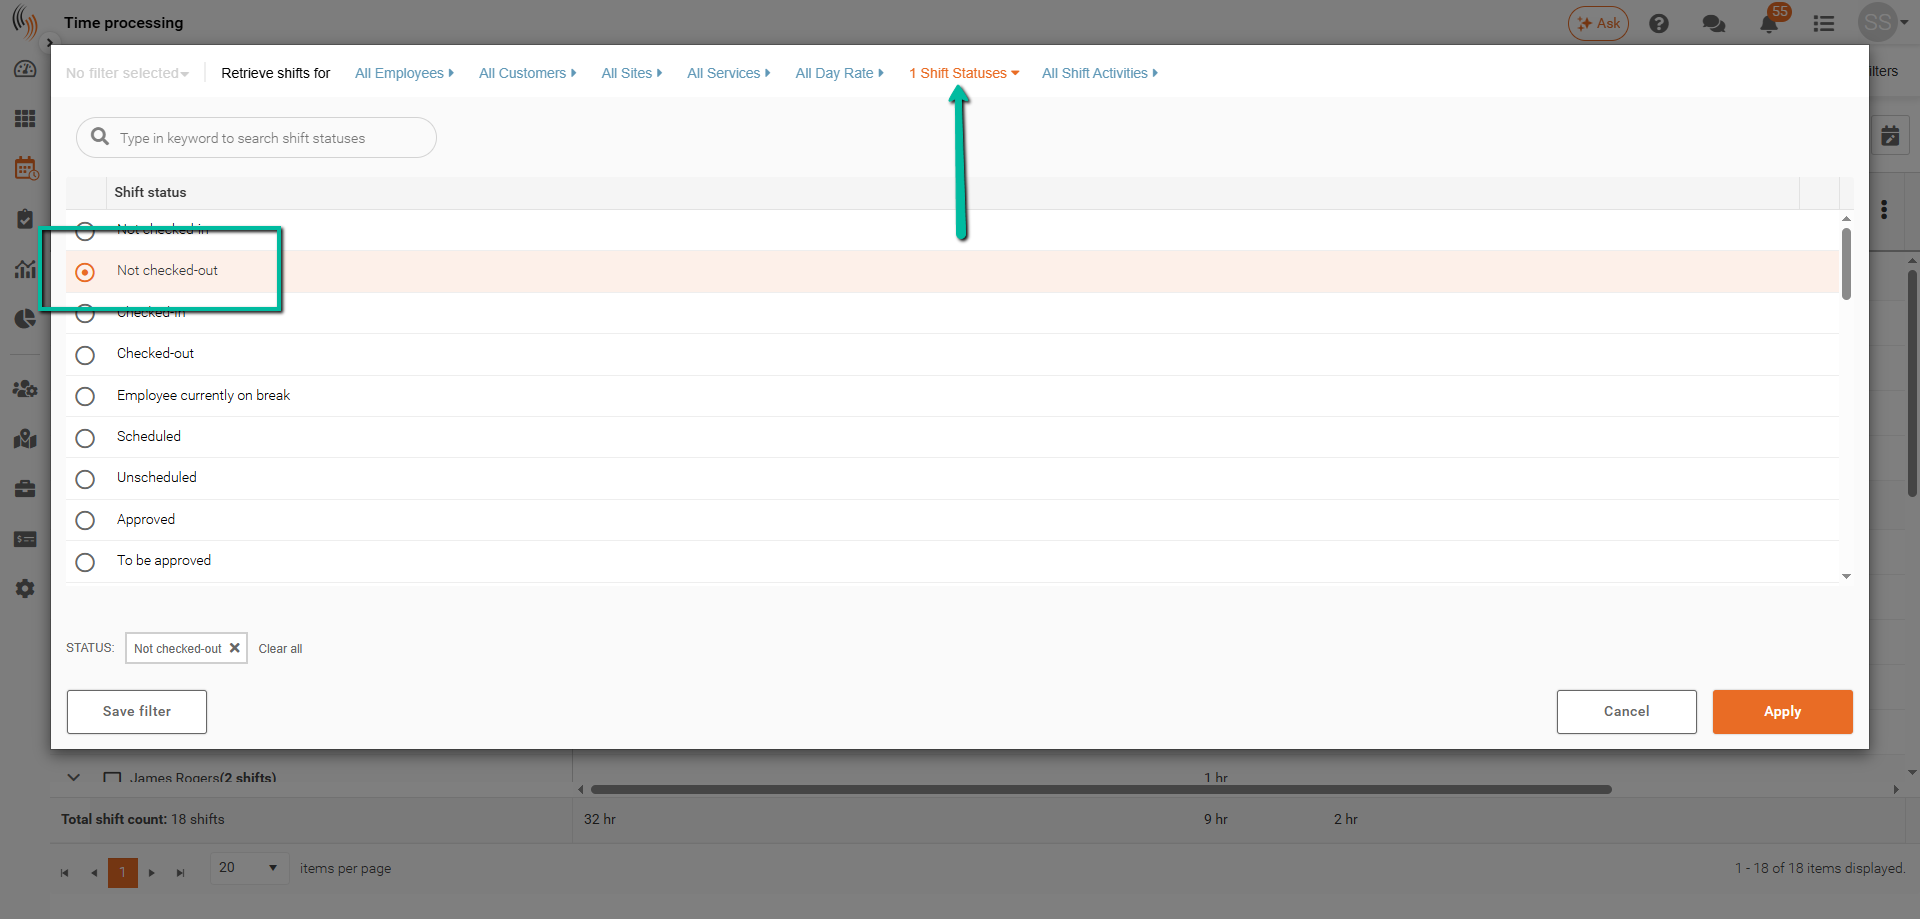
Filter by Shift Status
Select All Shift Statuses, then choose Not Checked Out to display shifts where employees have not been checked out.
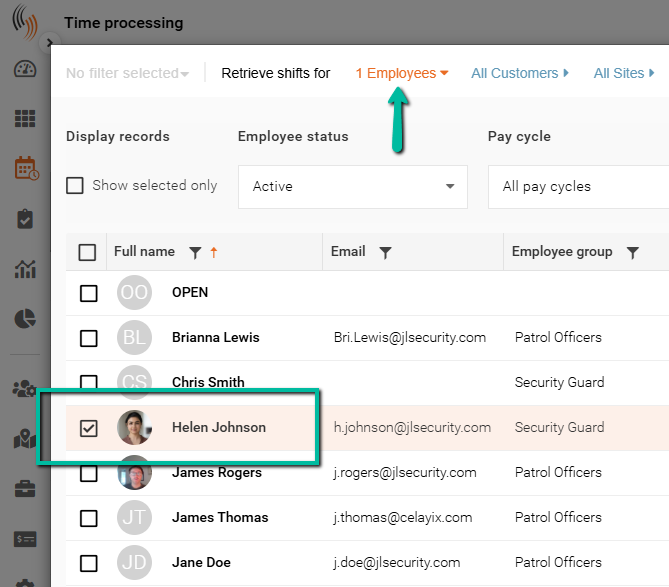
Search by Employee
Use All Employees to search for a specific employee and display only their shifts.
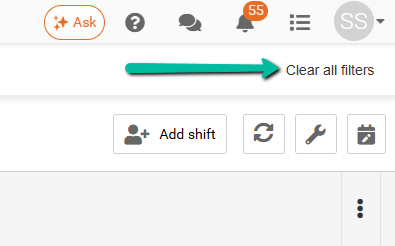
Clear All Filters
To reset your view, click Clear All Filters in the top-right corner of Time Processing. This will remove all active filters and display the full list of records.
Ways to Manage Check-In and Check-Out Times
The Check-In and Check-Out feature in Time Processing allows you to record, review, and adjust employee worked times for scheduled shifts.
You can either:
- Automatically populate times using Add In and Out Times, or
- Manually enter or adjust times from the shift details panel
Let's look at these options in more detail.
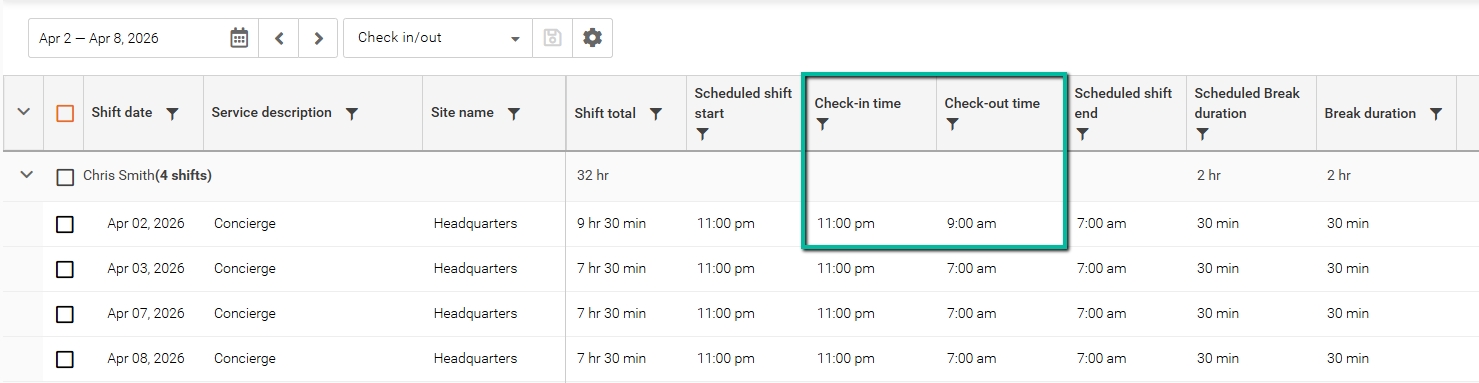
Add Check-In and Check-Out Times
Use this option when you want to quickly apply scheduled shift times as actual worked times.
- Navigate to Time Processing
- Select the desired date range and filters
- Check the box(es) for the shift(s) you want to update
- Click Add In and Out Times
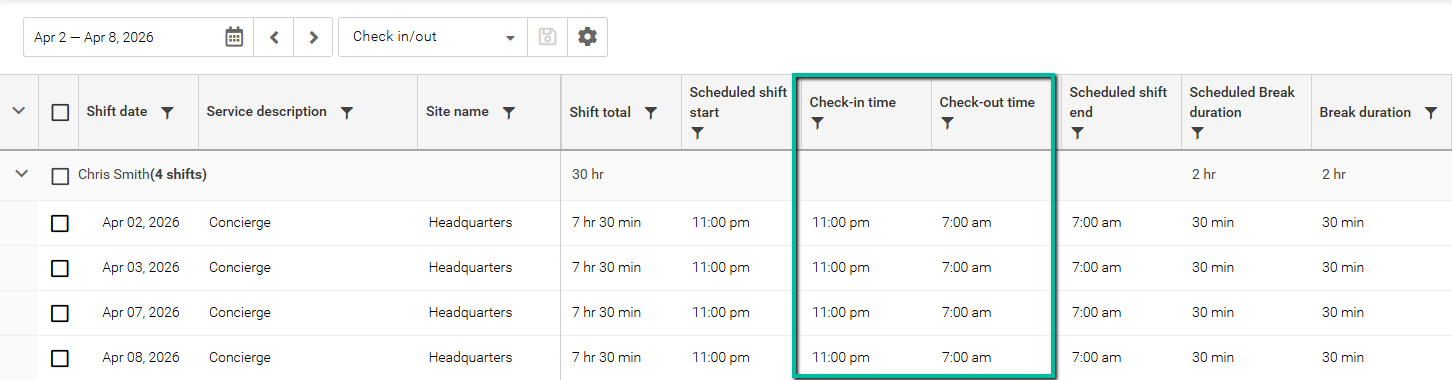
Result
- The system will populate:
- Check-in time = Scheduled shift start
- Check-out time = Scheduled shift end
This is useful when employees worked exactly as scheduled.
Note: On smaller screens or laptops, the Add In and Out Times button may not be visible. If this occurs, click the wrench icon in the top-right corner and select Add In and Out Times.
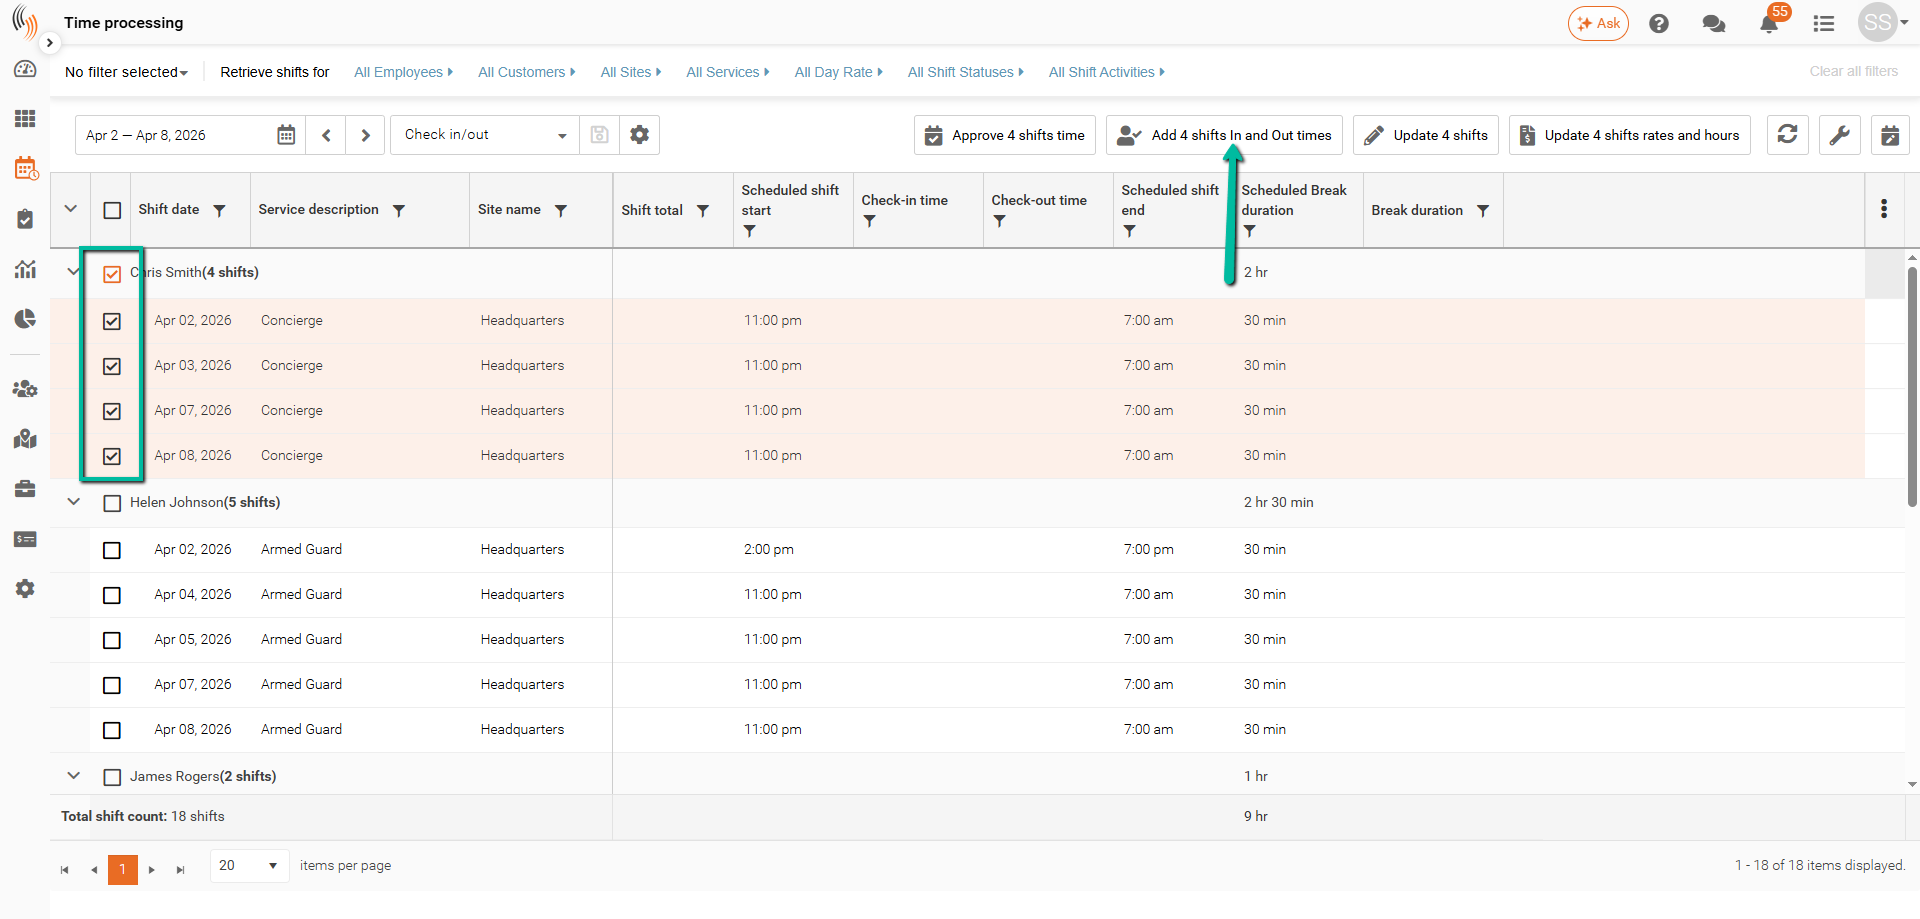
After selecting Add In and Out Times, the values will populate in the grid under the Check-In Time and Check-Out Time columns.
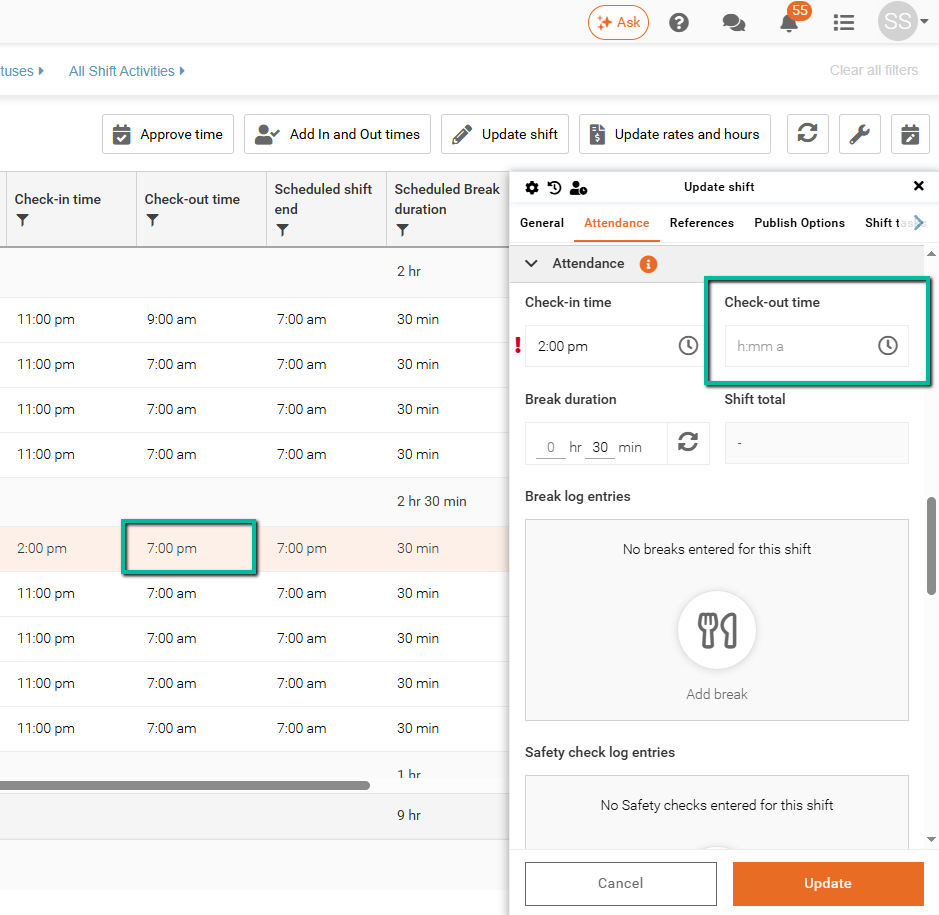
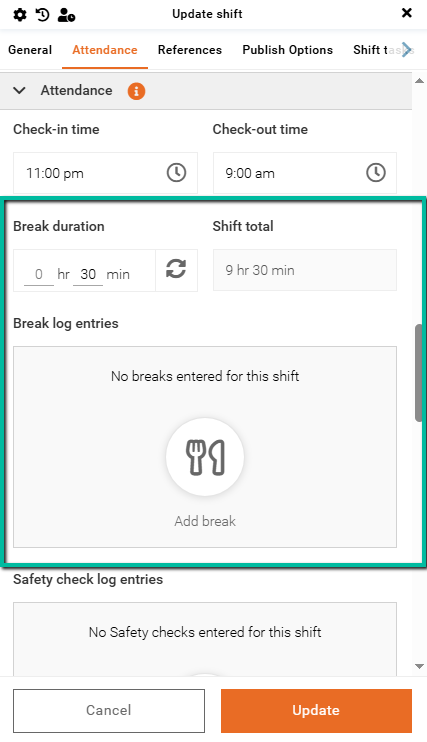
Manually Edit Check-In and Check-Out Times
Use this method when actual worked times differ from the scheduled shift.
- In Time Processing, locate the shift you want to edit
- Double-click the shift to open the Update Shift panel
- Go to the Attendance tab
- Enter:
- Check-in time
- Check-out time
- Click Update
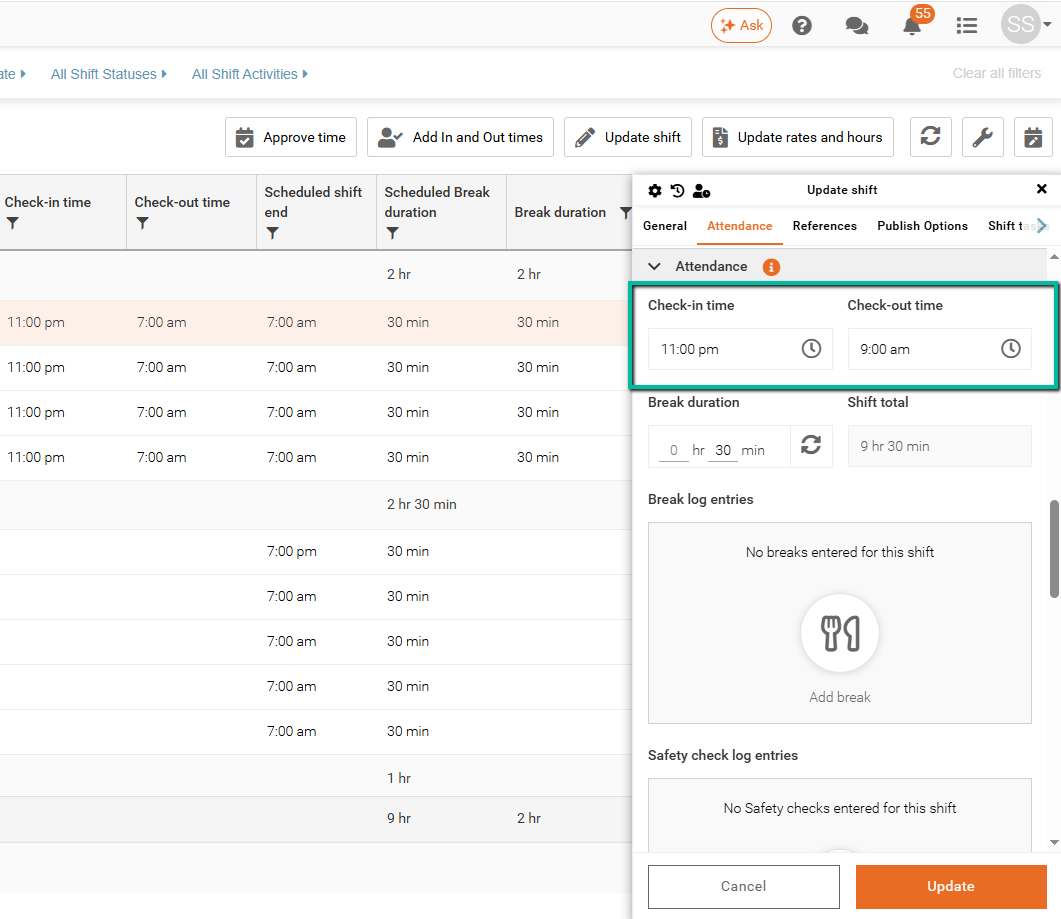
Result
- The shift will reflect the manually entered times
- The Shift Total will update automatically based on the new values
Break Adjustments (Optional)
Within the Attendance tab, you can also:
- Modify Break Duration
Adjust the total break time for the shift. This duration is automatically deducted from the shift total. - Add Break Log Entries
Manually enter break start and end times on behalf of the employee, if needed, for more accurate tracking.
When to Use Each Option
Scenario | Recommended Action |
|---|---|
Employee worked exactly as scheduled | Use Add In and Out Times |
Employee arrived late or left early | Manually edit times |
Missing or incorrect time data | Manually enter times |
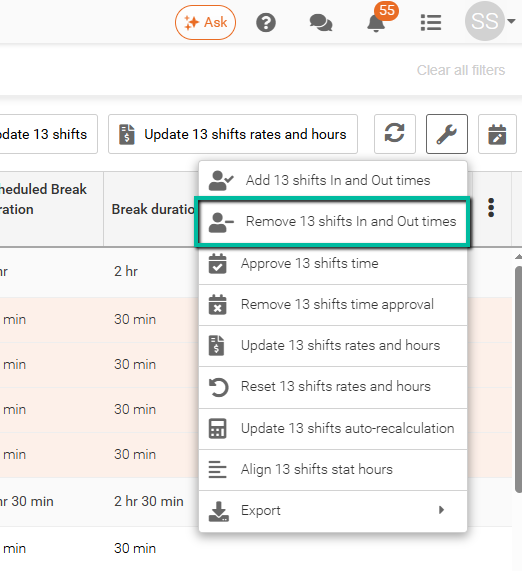
Remove Check-In and Check-Out Times
You can remove check-in and check-out times either in bulk or individually.
Remove Both Check-In and Check-Out Times
- Select the shift(s) you want to update
- Click the wrench icon in the top-right corner
- Select Remove In and Out Times
Remove Check-In or Check-Out Individually
- Open the shift to access the details panel
- Navigate to the Attendance section
- Delete the Check-In Time or Check-Out Time as needed
- Click Update