Manage Schedule Layouts
Build and manage schedule layouts to control how information is displayed, organized, and accessed within Schedule Xpress.
The Layout Manager allows you to customize views based on your operational needs by selecting which data is shown, how it is grouped, and how shifts are presented. By creating and managing layouts, you can streamline scheduling workflows, improve visibility, and ensure the most relevant information is always front and center.
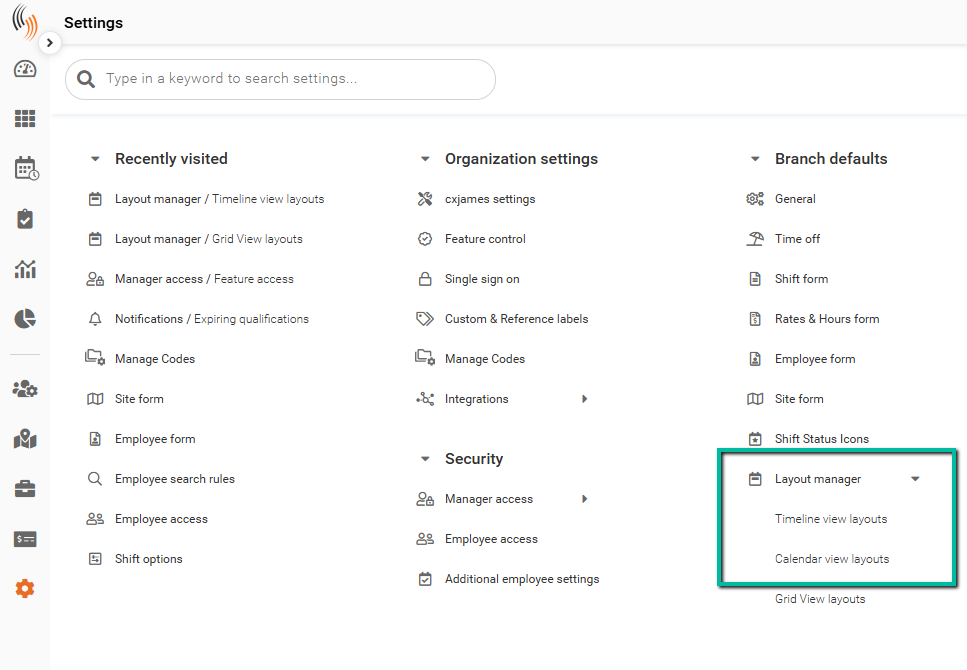
Access Layout Manager
To access the Layout Manager from the Schedule:
Click the settings (gear) icon next to the layout name in the Schedule view.
Alternatively, navigate to:
Settings → Branch defaults → Layout manager
For Grid View Layouts, please visit the Manage Time Processing Layouts.
Layout Types
Choose from three layout types:
- Timeline View – Displays shifts by day
- Calendar View – Displays shifts by time within each day
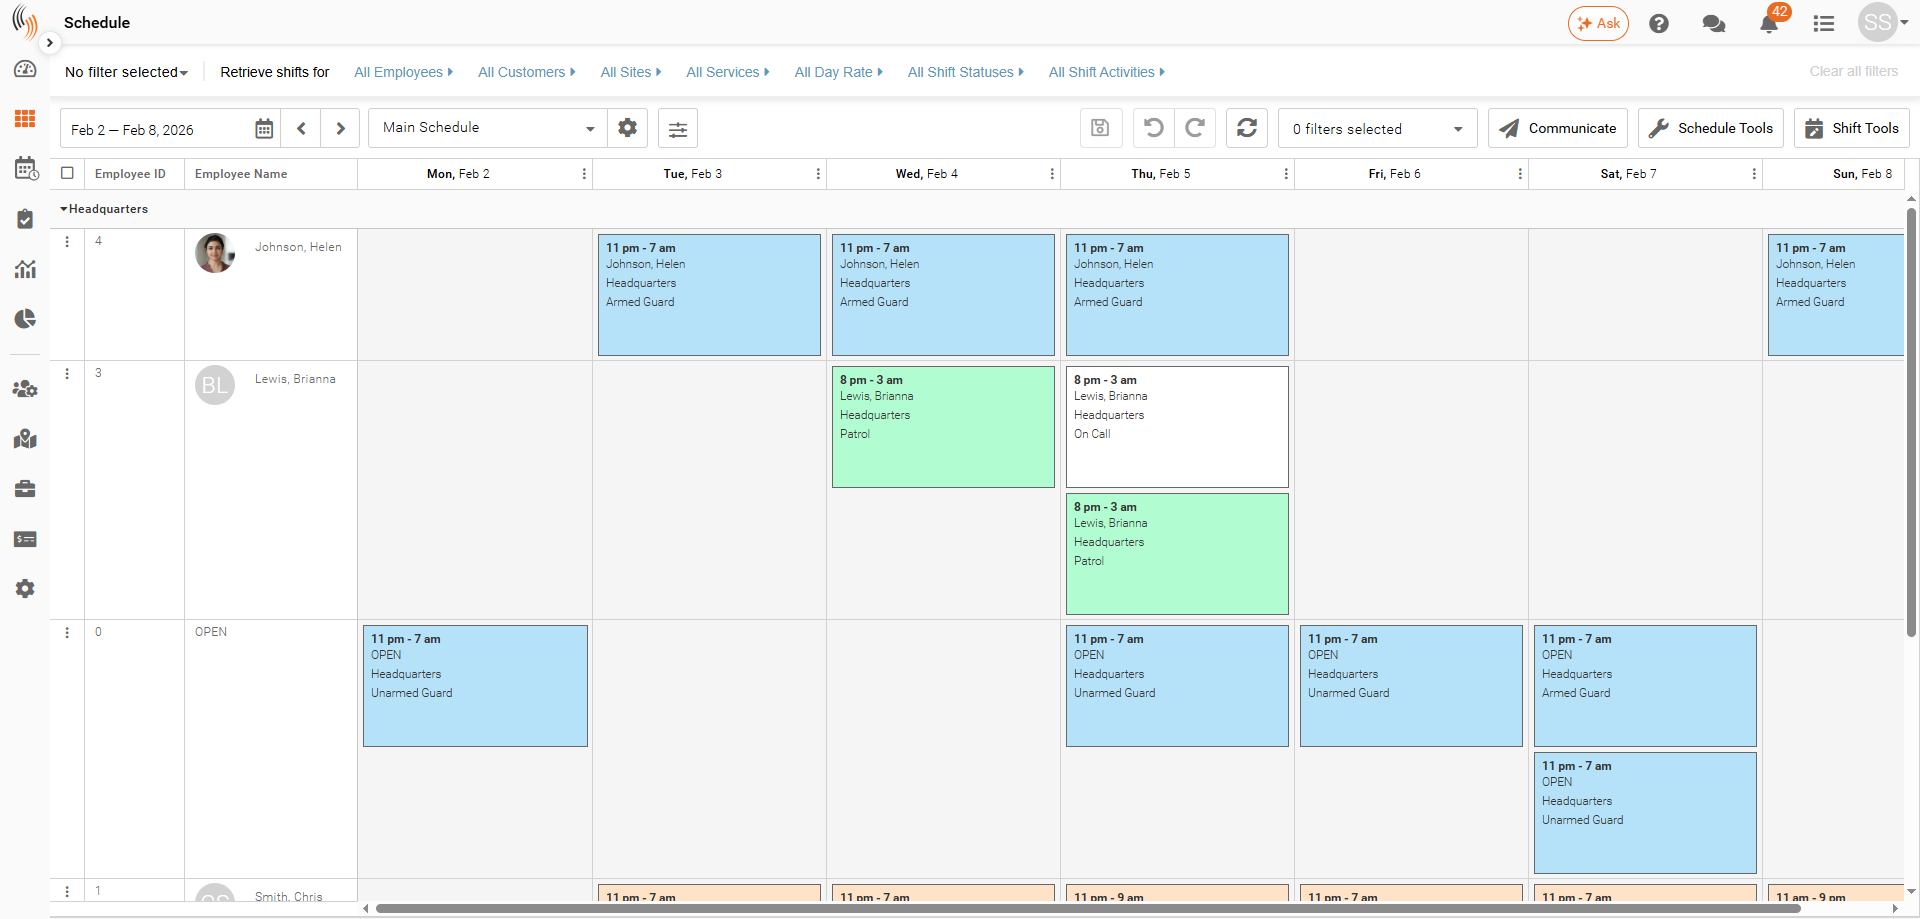
Timeline View
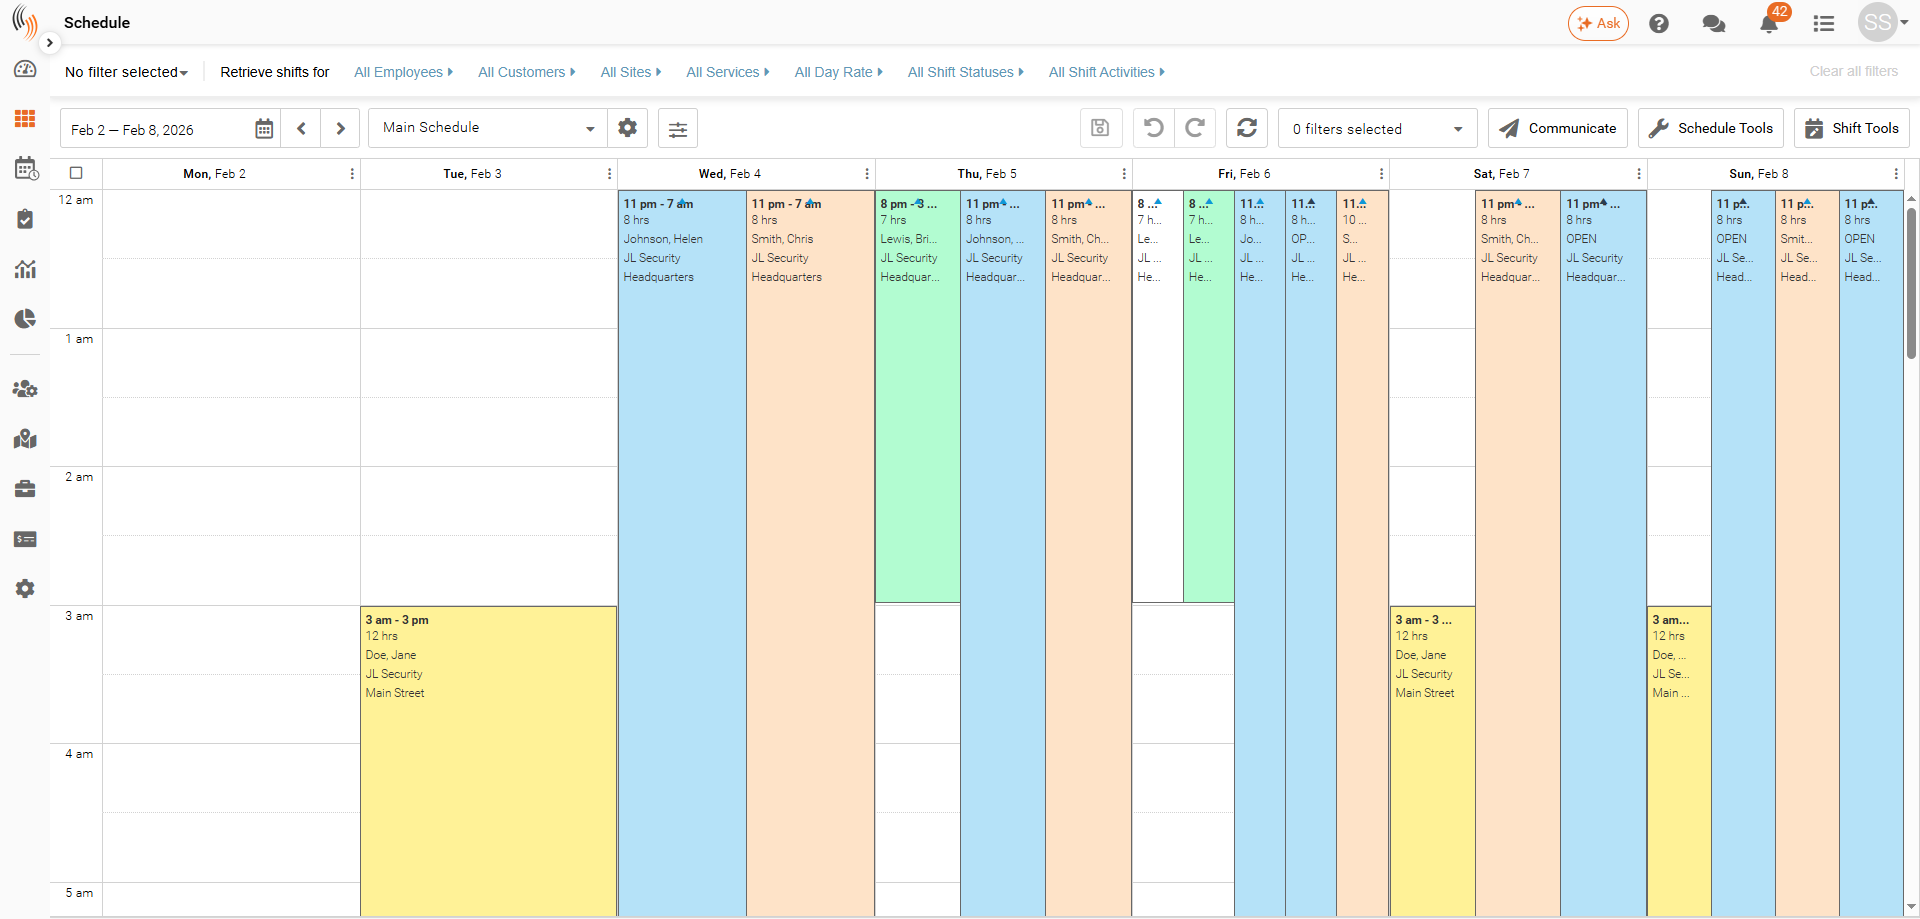
The Timeline View displays shifts across a continuous time scale, making it easy to visualize coverage, overlaps, and gaps throughout the day.
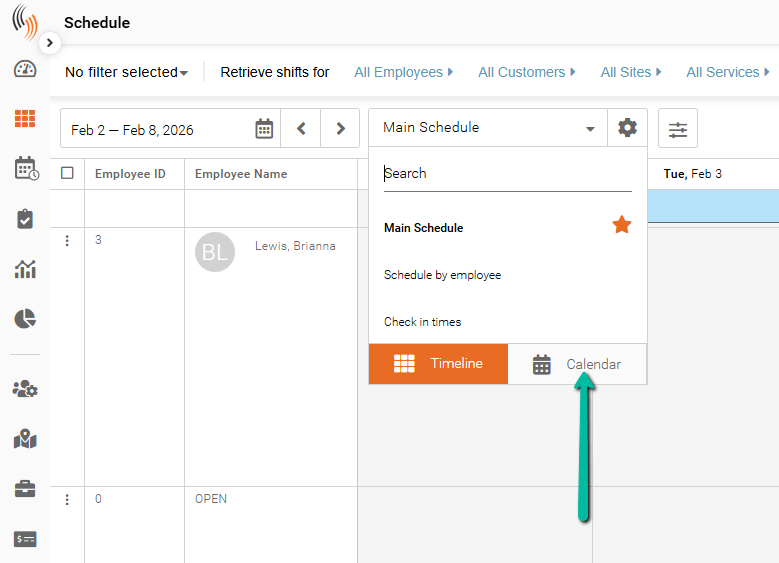
Calendar View
The Calendar view displays shifts by their duration across the schedule, making it easier to see when shifts start, end, and overlap throughout the day.
To switch to Calendar view, open the layout selector in the Schedule and choose the Calendar option.
If you've selected Work Hours in your layout setup, you can switch to a Calendar View Layout that displays either those specific work hours or a full 24-hour day.
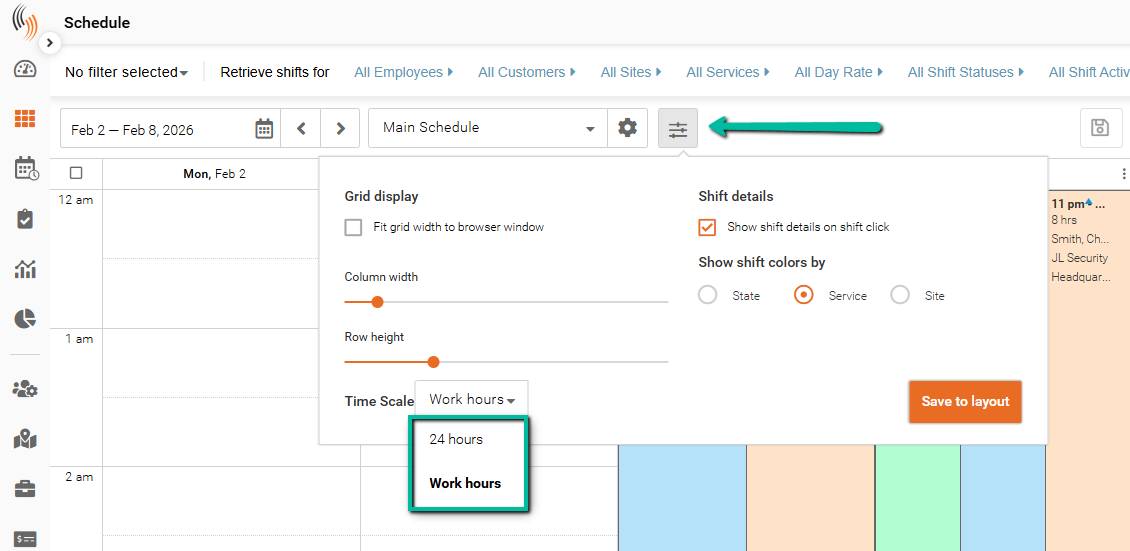
Here is an example of a Calendar View Layout that shows shifts by the hour instead of covering the entire day.
Create Layouts
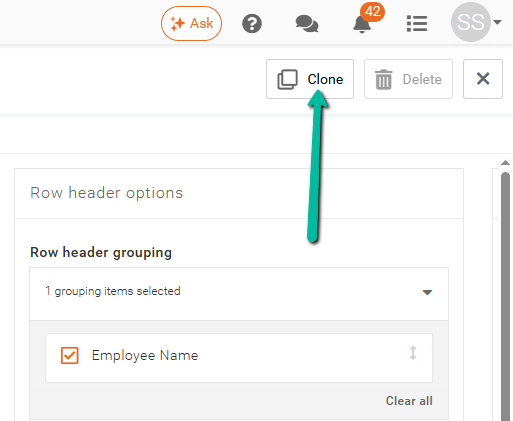
System layouts (marked with *) are read-only and cannot be modified.
To create a new layout, you must clone an existing system layout. Cloning creates a copy that you can then modify to suit your needs.
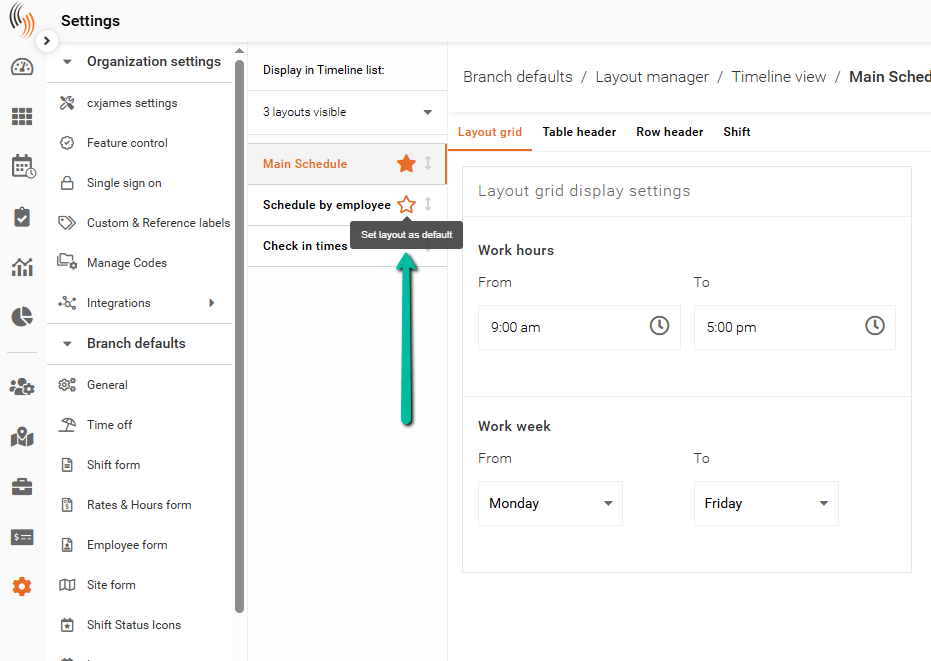
Set a Default Layout
You can set a layout as the default to ensure it loads automatically when opening the Schedule.
To set a default layout:
- Click the star icon next to the layout name
The selected layout will now load by default when accessing the Schedule.
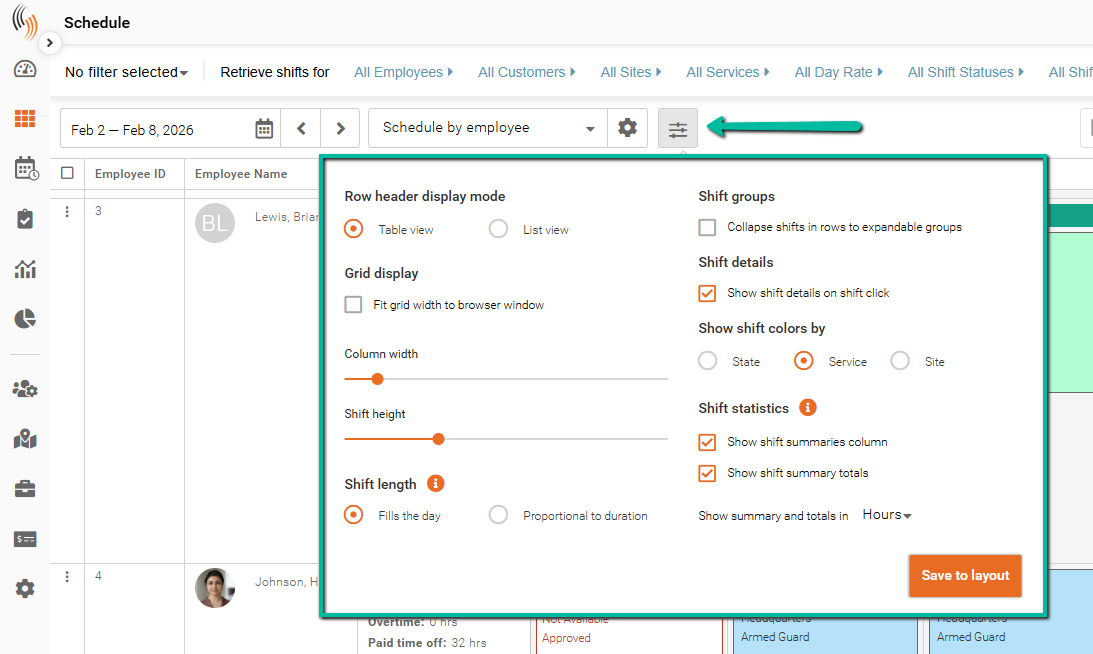
Configure Layout Display
The following sections outline each part of the layout and how they can be configured.
Layout Grid Display Settings
This controls how the schedule grid is displayed, including visible hours and working days.
- Work Hours – Defines the time range shown on the schedule (From = earliest time, To = latest time)
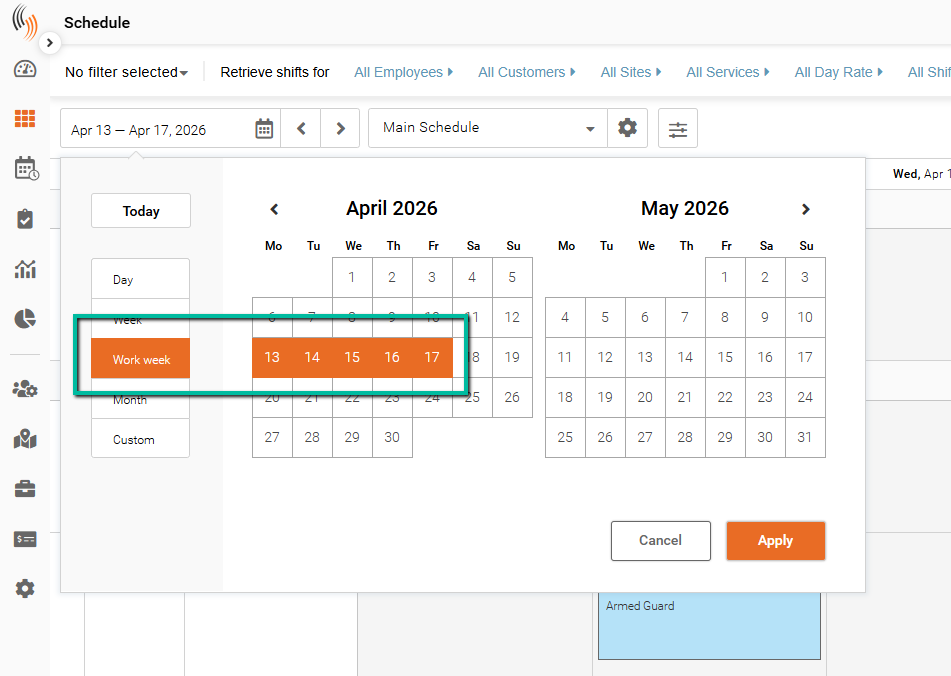
- Work Week – Defines which days appear when using the Work Week view (From = start day, To = end day)
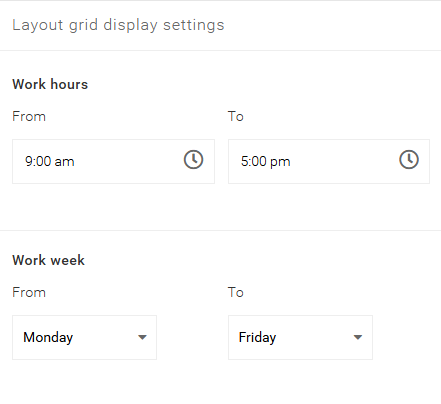
Selecting Work Week in the calendar will apply these settings when using this layout filter.
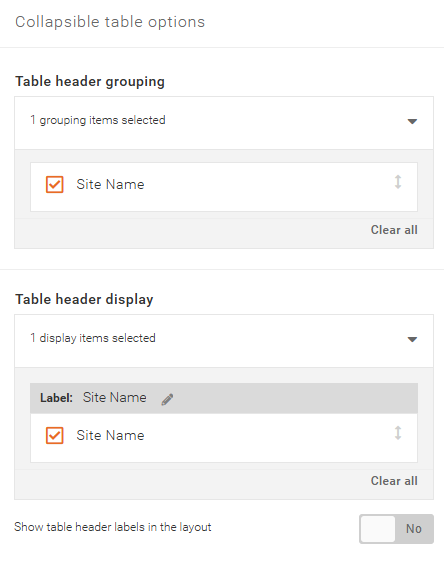
Collapsible Table Options
Controls how information is grouped and displayed in the schedule grid.
- Table Header Grouping – Groups rows under a selected field (e.g., Site Name) so they can be expanded or collapsed
- Table Header Display – Controls which fields appear as headers in the layout and how they are labeled
- Show Table Header Labels – Toggles whether header labels are visible in the schedule
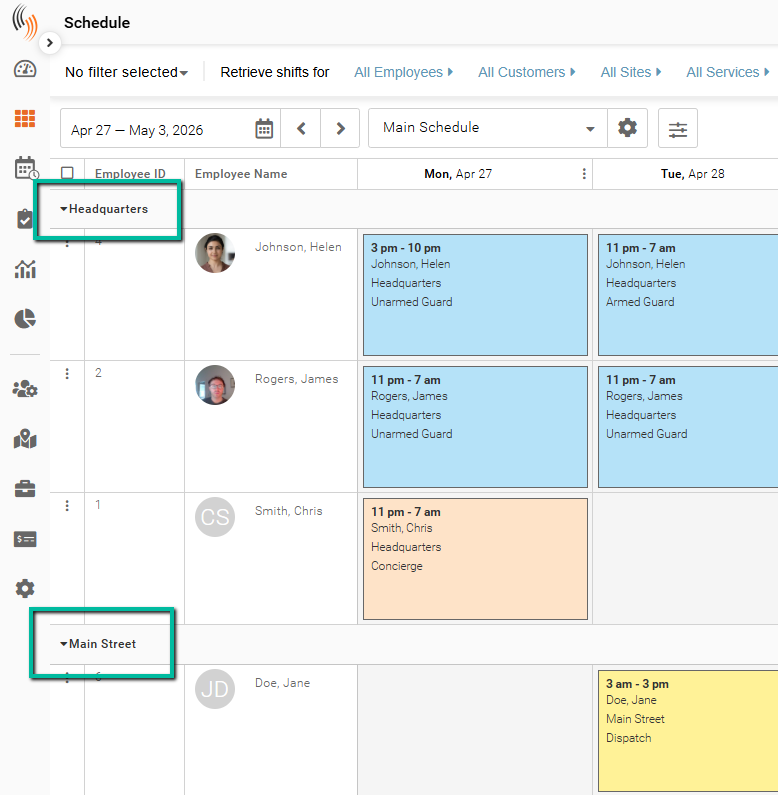
Here’s what this looks like in the schedule when table headers are grouped by a field such as Site Name.
The table headers can be collapsed or expanded as needed.
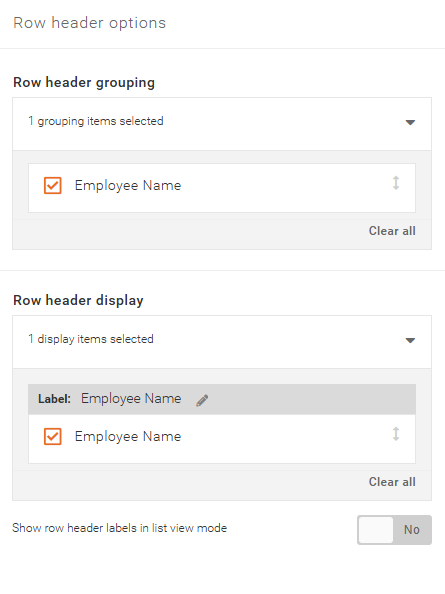
Row Header Options
These settings define how rows are arranged and labeled across the schedule layout.
- Row Header Grouping – Determines how rows are organized across the grid based on a selected field (e.g., Employee Name)
- Row Header Display – Controls which fields appear as row headers and how they are labeled
- Show Row Header Labels – Toggles whether row header labels are visible in list view mode
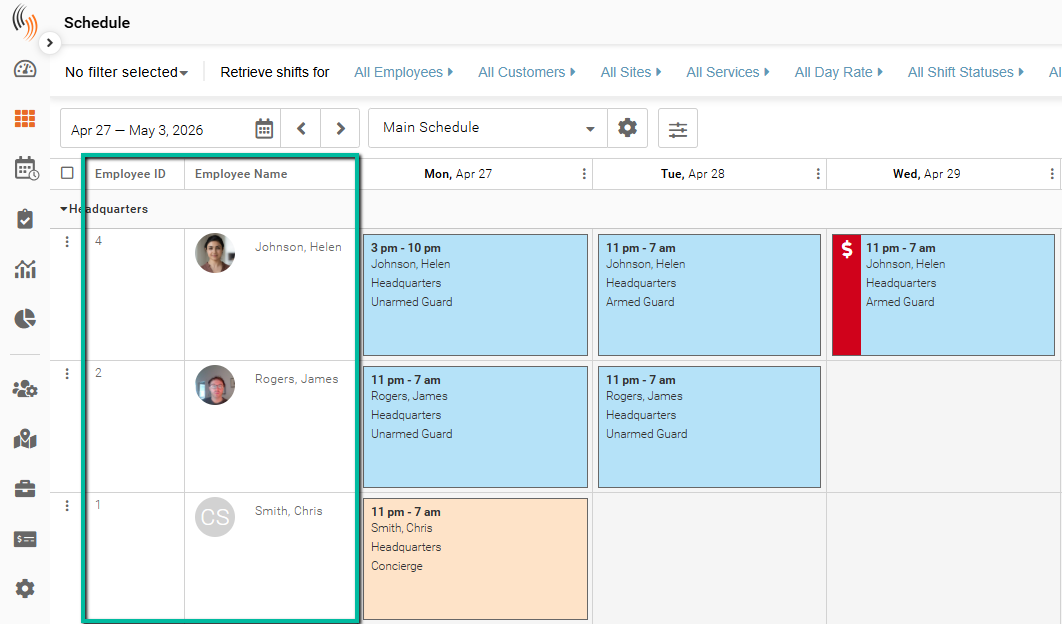
Here’s what this looks like in the schedule when rows are organized across by a field such as Employee ID and Employee Name.
Additional Layout Options
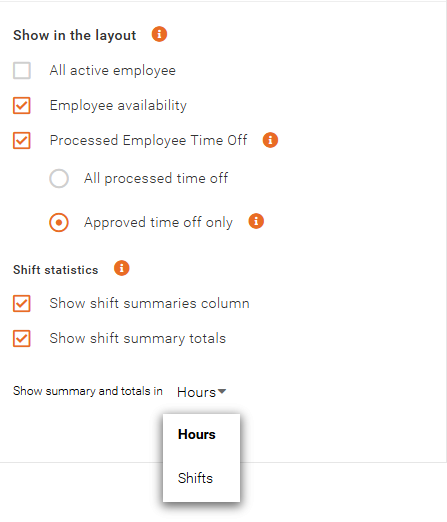
Additionally in the Row Header Options, you can display employee-related information and shift statistics within the schedule.
- All Active Employees – Displays all active employees in the layout
- Employee Availability – Shows employee availability alongside shifts
- Processed Employee Time Off – Displays time-off entries (with options for all or approved only)
Shift Statistics:
- Show Shift Summaries Column – Adds a column summarizing shift data
- Show Shift Summary Totals – Displays totals for shift hours or counts
- Show Summary and Totals In – Defines whether totals are shown in hours or shifts
These options are accessible only with an employee-centric layout. This layout includes Employee ID and Employee Name fields in the Row Header Options and leaves the Collapsible Table Options empty.
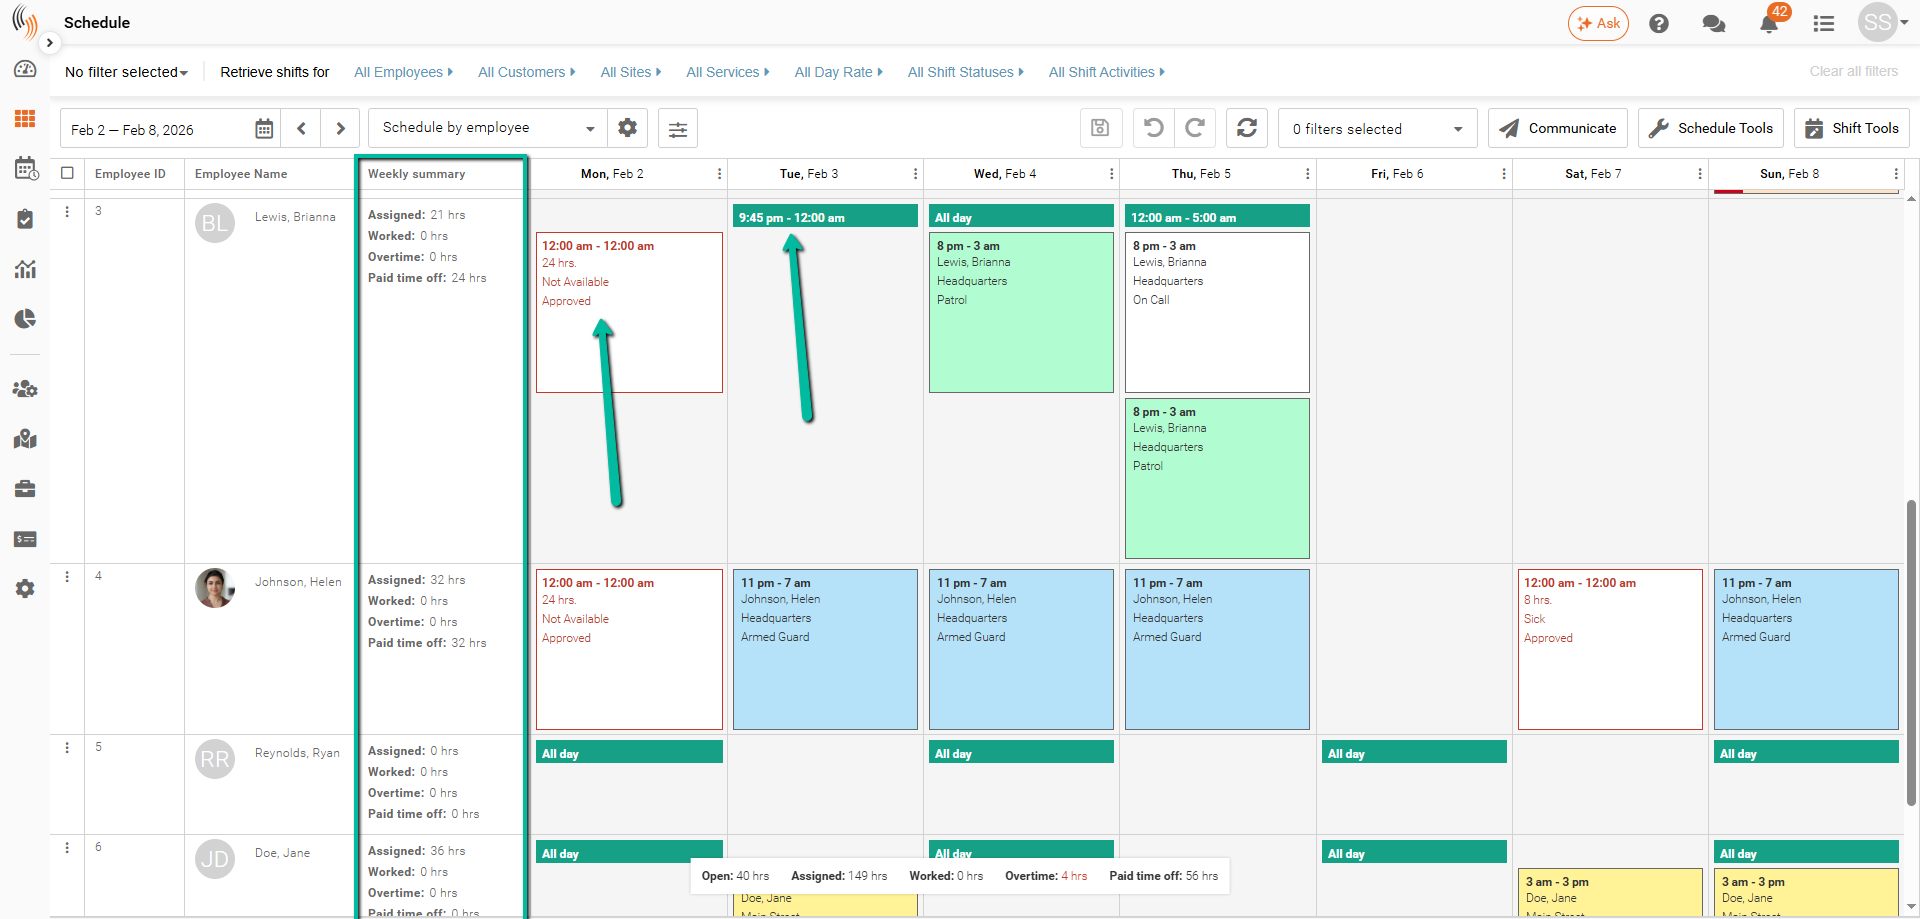
Here’s what this looks like in the schedule when Availability, Time Off and Shift Statistics are selected.
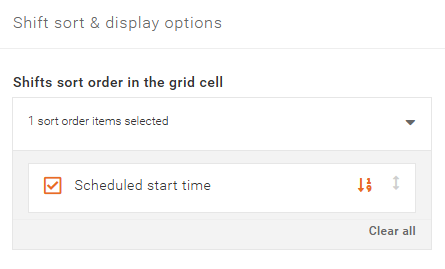
Shift Sort & Display Options
These settings define how shifts are ordered within each grid cell in the schedule.
- Shifts Sort Order in the Grid Cell – Determines how multiple shifts are displayed within the same cell (e.g., by Scheduled Start Time)
- You can adjust the order to control how shifts are prioritized and viewed
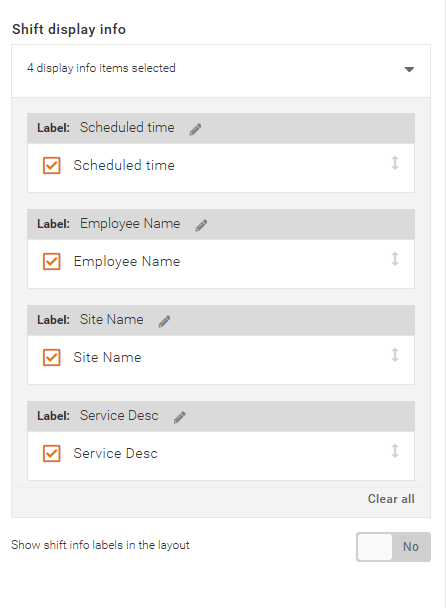
Shift Display Info
These settings define what information is shown on each shift within the schedule.
- Select which details appear on the shift (e.g., Scheduled Time, Employee Name, Site Name, Service)
- You can rename labels to customize how information is labeled if you select Show shift info labels
- Adjust the order to control how details appear within each shift using the arrows on the right edge of each shift block
Show Shift Info Labels – Toggles whether labels are displayed alongside the shift information
Adjust Display Options
- Row display mode – Table or List view
- Grid settings – Adjust column width and shift height
- Shift length
- Fills the day
- Proportional to duration
- Shift details on click – Toggle preview
- Shift colors – Based on state, service, or site