Configure Schedule Errors and Warnings
Errors and warnings can be customized to automatically flag shifts when specific conditions are not met. This helps identify potential scheduling conflicts and compliance issues during schedule creation, such as double bookings, time-off conflicts, and qualification mismatches, ensuring schedules are accurate and ready before publication.
Configure Error and Warning Validations
To prevent scheduling errors and warnings, verify that each Message Type is configured correctly.
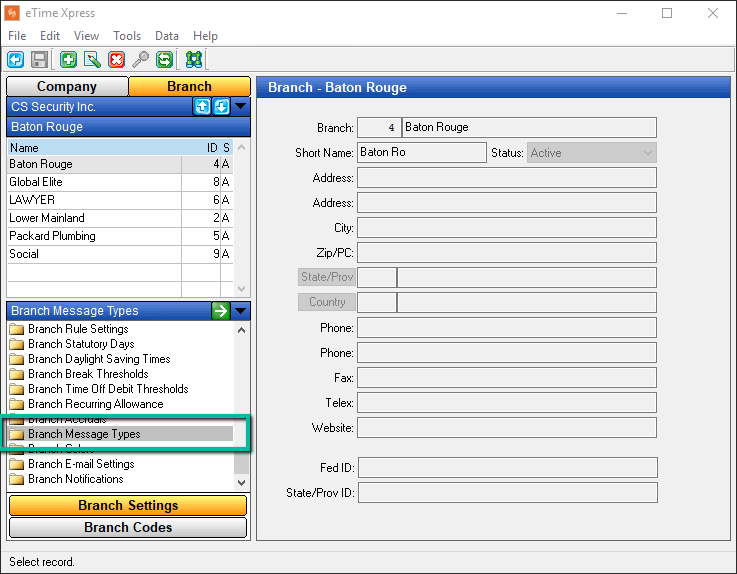
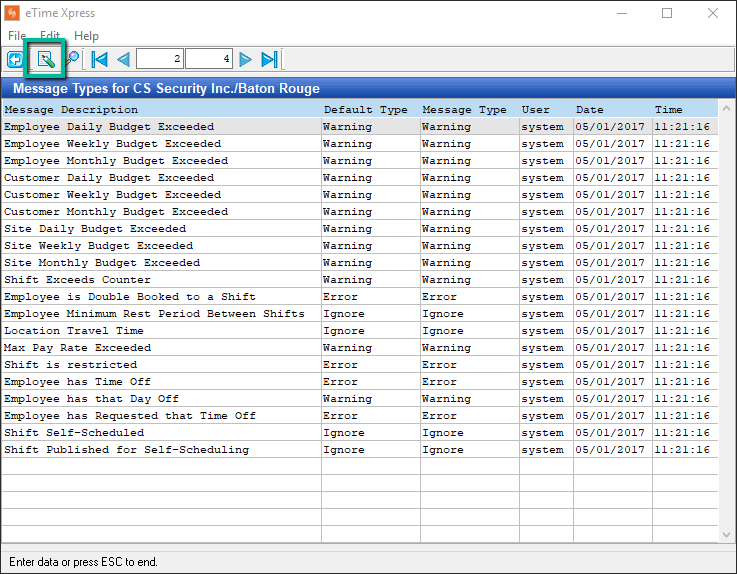
Navigate to Configuration → Company/Branch → Branch → Branch Message Types in eTime Xpress.
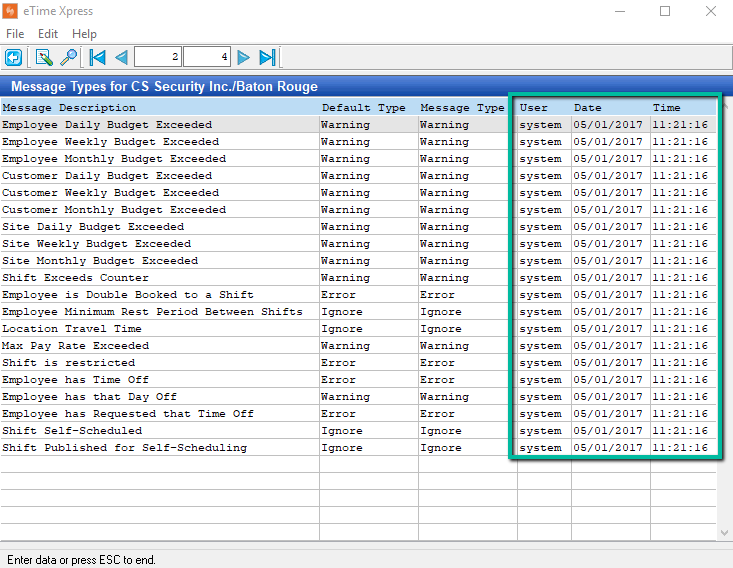
The interface displays a list of Message Types, each categorized as either an Error or Warning.
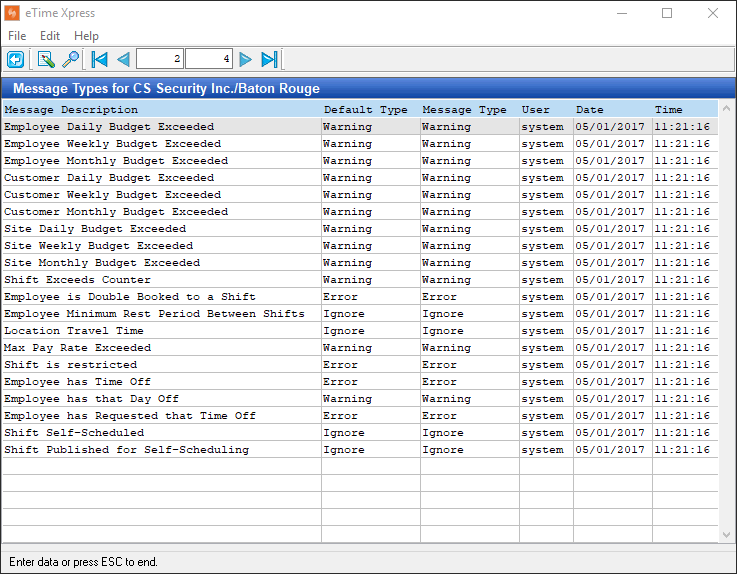
Message Description
Each Message Description represents a specific validation rule used in scheduling, such as double bookings, time-off conflicts, or budget limits. These validations automatically check conditions and flag issues when requirements are not met.
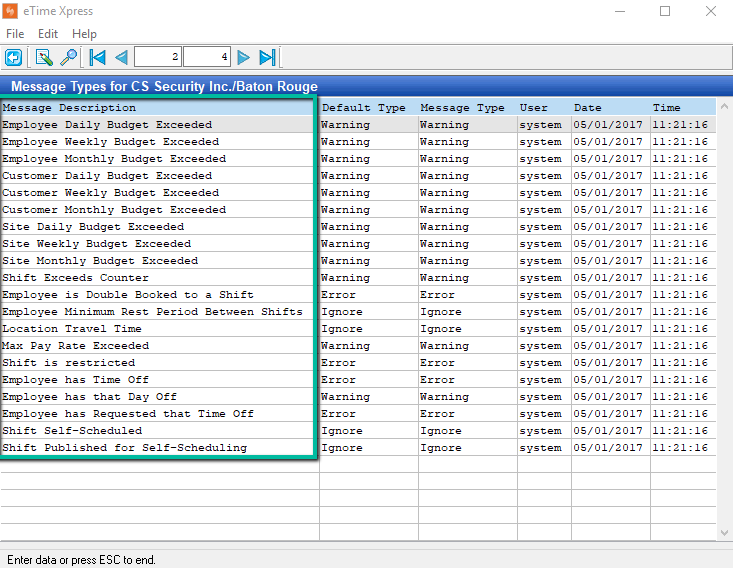
Message Types
Message Types determine how validations are handled when scheduling shifts.
There are three types of Message Types:
- Error – Prevents the shift from being saved. Errors must be resolved or the changes discarded before proceeding.
- Warning – Allows the shift to be saved, but flags a potential issue. Warnings can be ignored or addressed later.
- Ignore – Disables the validation entirely, so no error or warning will be triggered.
Choose the appropriate Message Type based on how strictly you want the system to enforce each validation.

Modify an Error or Warning
Use Message Types in eTime Xpress to control whether a validation appears as an error or a warning.
- Default Type – Sets the default classification (Error or Warning)
- Message Type – Allows you to change how the validation is flagged
First, click the Update button, represented by a pencil on a paper icon.
After clicking Update, modify a Message Type by:
- Double-clicking the Message Type field next to the validation you're looking to change and enter Error, Warning, or Ignore
The User, Date, and Time fields will automatically update to reflect the change.
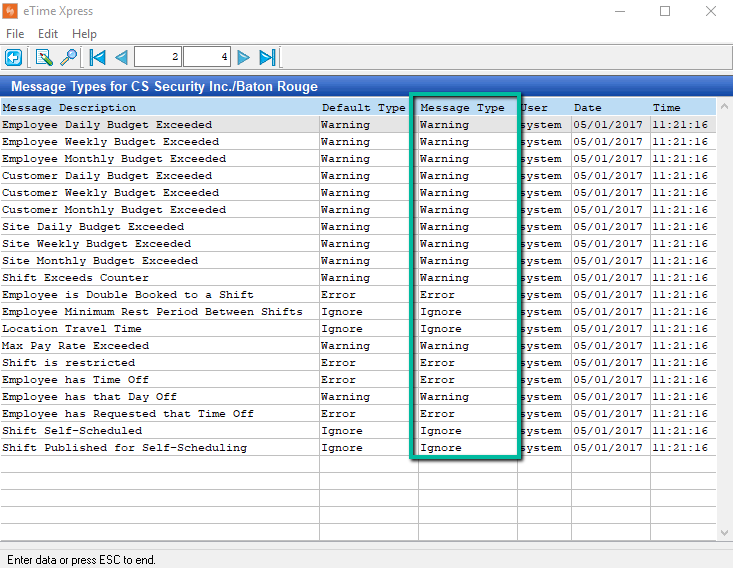
Upon completion, the User, Date, and Time fields will automatically update to reflect who made the change and when it occurred.