Shift Change Audit Report
Use the Shift Change Audit Report in Schedule Xpress to review all shift activity, including created, updated, and deleted shifts. This helps you monitor changes, investigate discrepancies, and understand how schedules are being managed across your team.
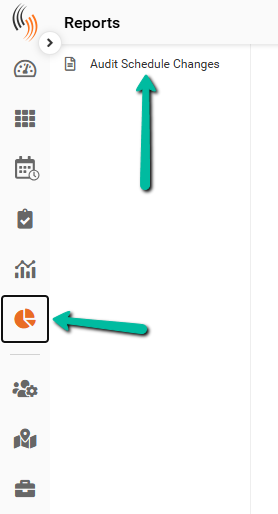
Access the Report
To access the Shift Change Audit Report:
- Go to Reports
- Select Audit Schedule Changes
Set Report Parameters
Use the Options panel to define your search criteria and narrow your results.
Set Date Range
Set the Changes From and Changes To fields to define when the shift changes occurred.
Use the format:
YYYY-MM-DDTHH:MM:SS.sss
Example:
- Changes From: 2026-04-18T00:00:00.000
- Changes To: 2026-04-18T23:59:59.999
This returns all changes within the selected time period.

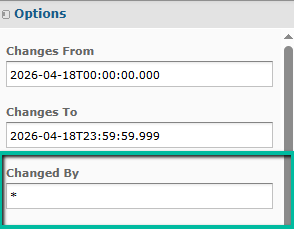
Filter by User
Use Changed By to filter results by a specific user.
- Enter the user’s username (not display name)
- Default value
*returns all users
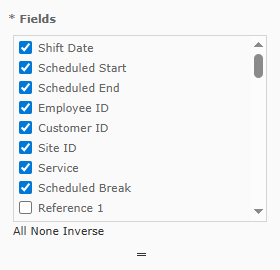
Select Fields
Choose which shift fields to include in the report.
- Only selected fields will appear in results
- Changes to unselected fields will not be shown
You can drag the divider downward to view and select additional fields.
Use:
- All – Select all fields
- None – Clear all selections
- Inverse – Reverse current selections
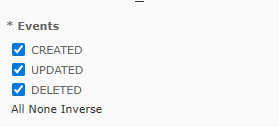
Select Event Types
Choose which types of shift changes to include in the report.
- Created – Newly created shifts
- Updated – Changes made to existing shifts
- Deleted – Removed shifts
Use:
- All – Select all event types
- None – Clear all selections
- Inverse – Reverse current selections
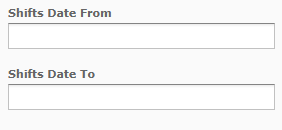
Filter by Shift Date
Use Shift Date From and Shift Date To to find shifts scheduled within a specific date range.
Use the format:
YYYY-MM-DDTHH:MM:SS.sss
To make this easier, you can copy and paste values from the Changes From and Changes To fields, then adjust the dates as needed.
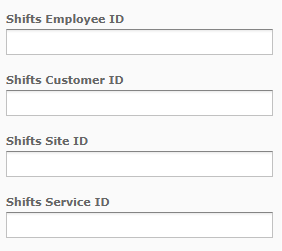
Search by IDs
Use the following fields to locate specific records:
- Employee ID
- Customer ID
- Site ID
- Service ID
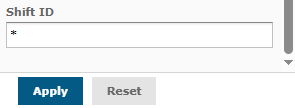
Search by Reference or Shift ID
- Shift Reference 1 – Search using keywords from reference fields
- Shift ID – Search for a specific shift
Default * returns all matching results.
Run or Reset Search
- Apply – Run the report using selected filters
- Reset – Clear all filters and return to default

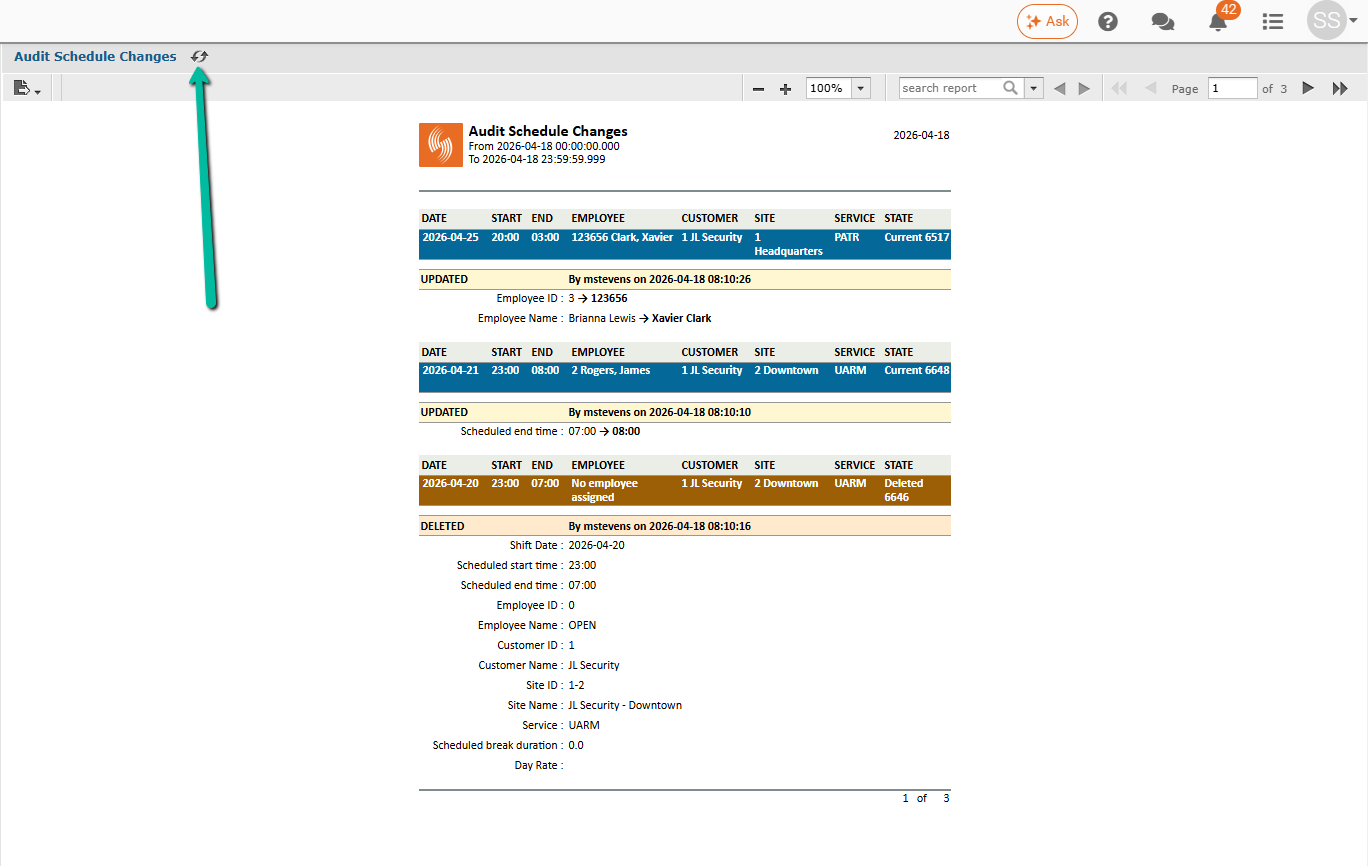
View Results
Matching records appear on the right-hand side after applying filters.
Each record includes:
- Date, time, and shift details
- Employee, customer, site, and service
- Status (current or deleted)
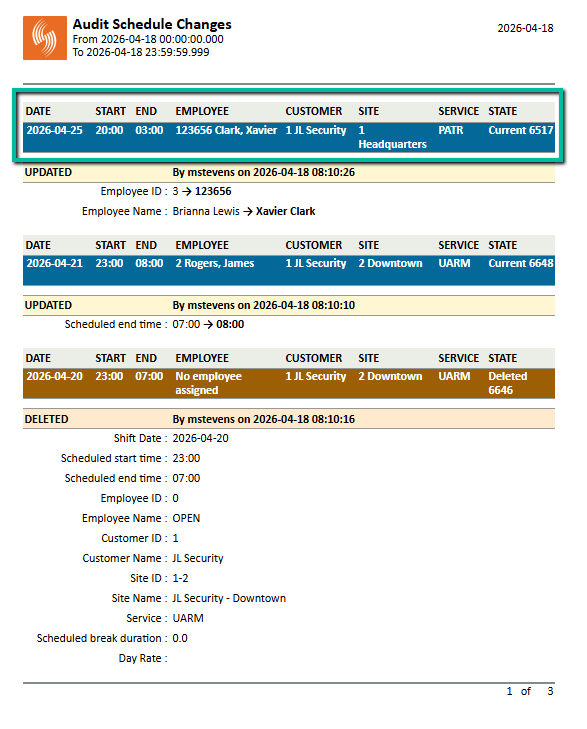
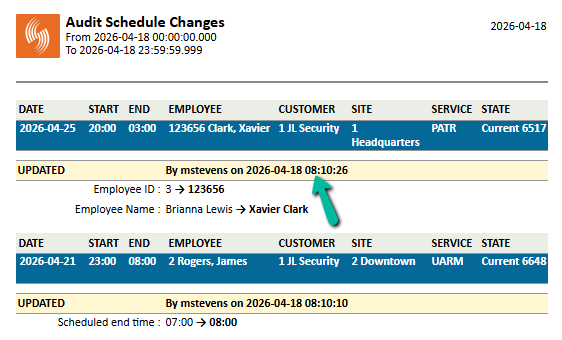
Identify Shift Changes
Each record shows the type of change:
- Created
- Updated
- Deleted
Records are color-coded to help distinguish between current and deleted shifts.
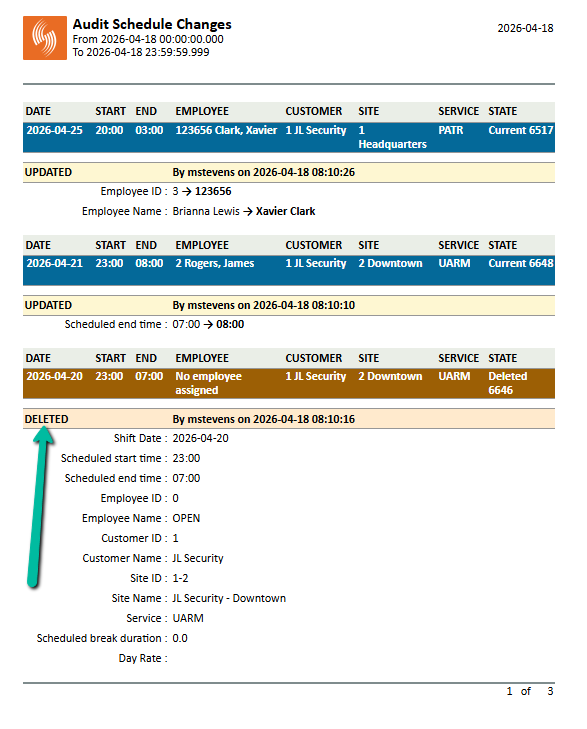
Understand Record Order
Shift changes are grouped by shift and displayed in reverse chronological order:
- Most recent change at the top
- Oldest change at the bottom
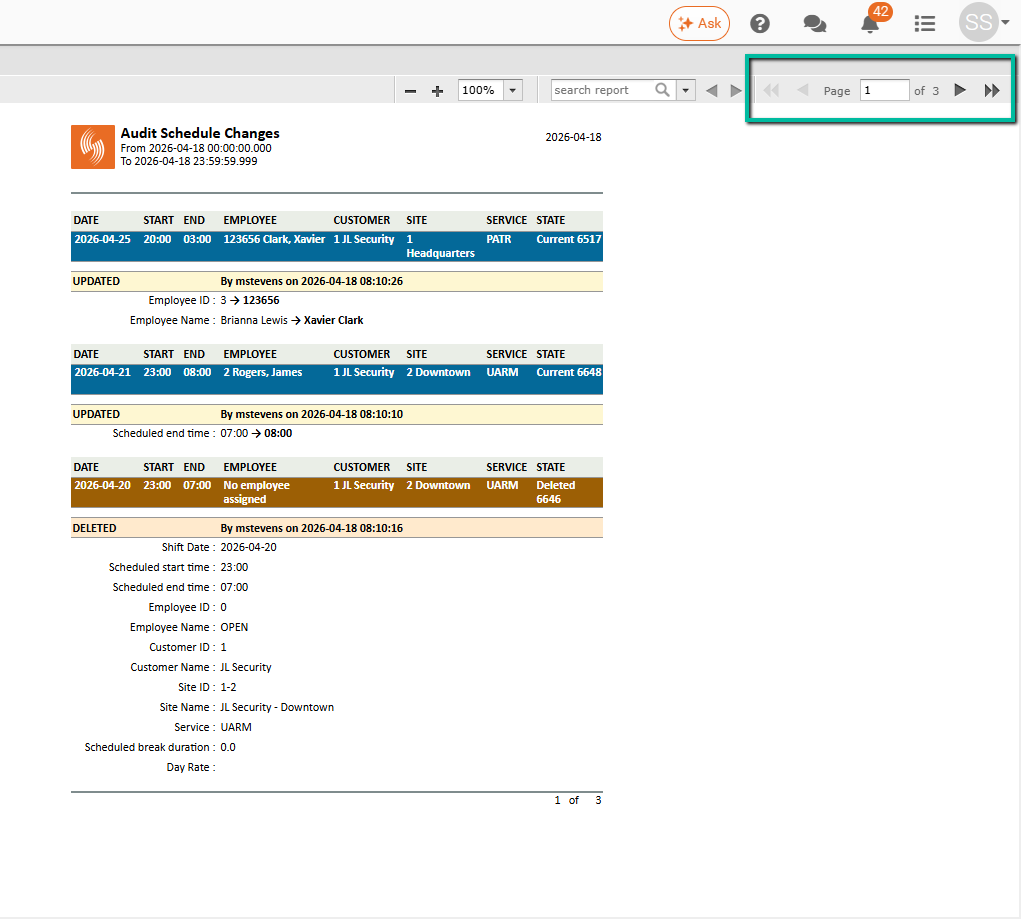
Navigate Records
Use the arrows to move between pages:
- Single arrows – Move one page
- Double arrows – Jump to first or last page
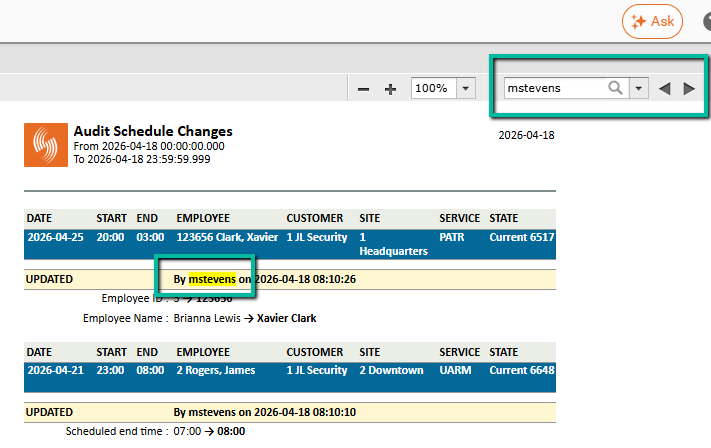
Search by Keywords
Use the search field to find specific terms within the report results.
Matching results will be highlighted, making it easier to quickly locate relevant records.
Use the arrows next to the search field to move forward and backward through each matching result.
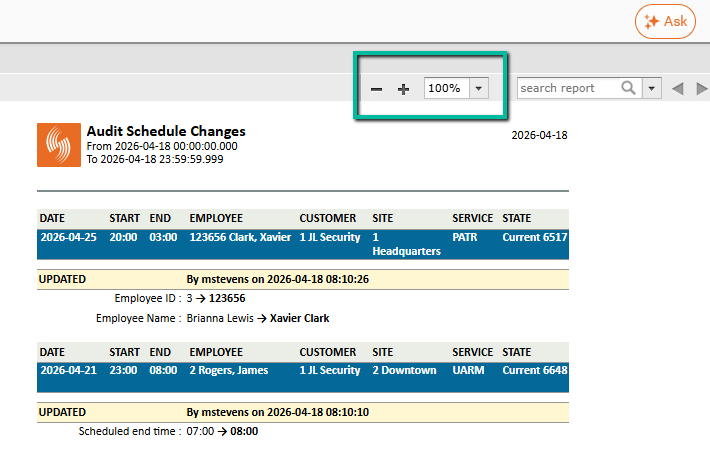
Adjust View
Use browser zoom controls to adjust your view as needed.
Refresh Results
Click Refresh to rerun the report using the same parameters.
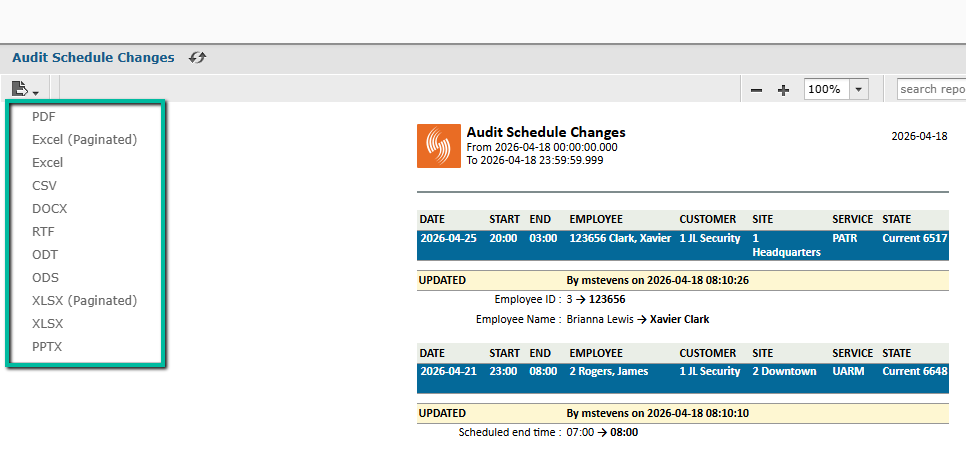
Export Report
Click the Export icon to download the report.
Available formats include:
- PDF – Best for viewing and sharing
- Excel (Paginated) – Allows editing after enabling editing mode
- Excel / XLSX / CSV – Useful for data analysis and reporting
- DOCX / RTF / ODT – For document-based formats
- ODS / PPTX – Additional format options depending on your needs